PS 123 12 VDC, 3 Amp Power Supply • User's Guide
PS 123, cont’d
10
PS 123 12 VDC, 3 Amp Power Supply • User's Guide
11
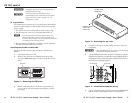
2. Mount the PS 123 on the rack shelf, using two 4-40 x 3/16"
screws in opposite (diagonal) corners.
3. If necessary, mount the half rack width false front panel
(included with the Universal Rack Shelf only) and/or the
quarter rack width false front panel (included with the
PS 123) to the shelf, using two 4-40 x 3/16" screws in the
front holes for each panel.
Under-desk mounting
In addition to using the PS 123 power supply on a rack or
projector, it can also be mounted under furniture (such as a
desk) using the MBU 125 Under-Desk Mounting Kit (part
#70-077-01). To mount the PS 123 under a desk or other
furniture, follow these steps:
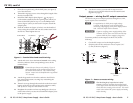
1. Attach the mounting brackets to the power supply with
the provided machine screws (figure 9).
2. Hold the power supply with the attached brackets against
the underside of the furniture. Mark the location of the
screw holes of the bracket on the mounting surface.
3. Drill 3/32" (2 mm) diameter pilot holes, 1/4" (6.3 mm)
deep in the mounting surface at the marked screw
locations.
4. Insert #8 wood screws into the four pilot holes. Tighten
each screw into the mounting surface until just less than
1/4" of the screw head protrudes.
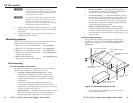
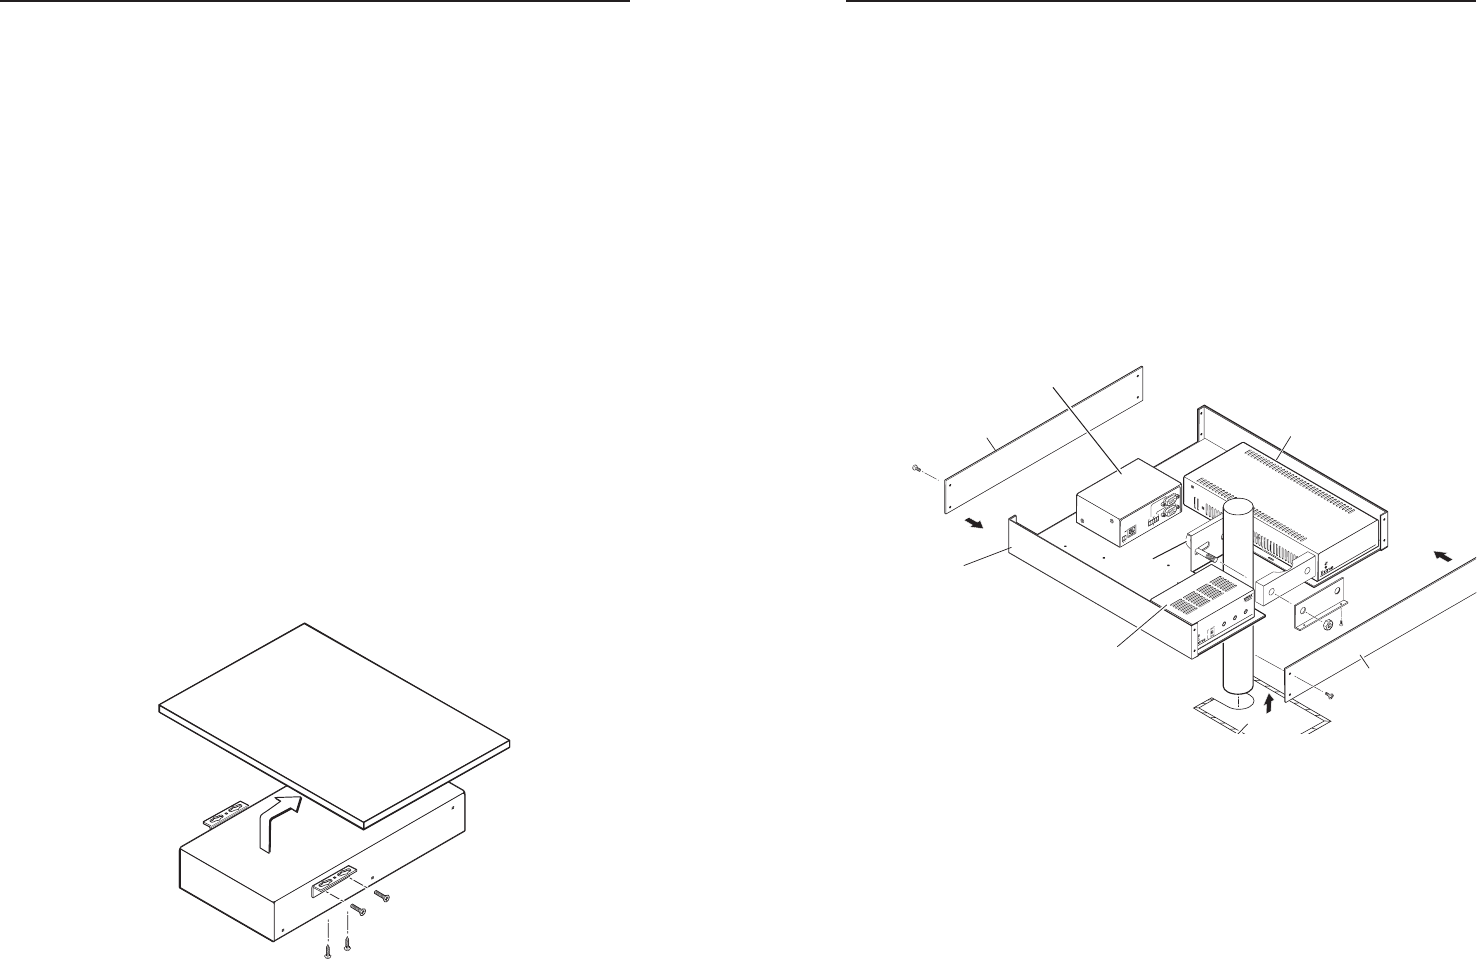
Figure 9 — Under-desk mounting the PS 123
5. Align the mounting screws with the slots in the brackets
and place the power supply against the surface, with the
screws through the bracket slots.
6. Slide the unit slightly forward or back, then tighten all four
screws to secure it in place.
Projector mounting
PMK 350
The PMK 350 is an above-projector mounting kit that attaches
to a 1" to 2" diameter projector mounting pole (figure 10). It can
hold more than one device, in a variety of sizes. The PMK 350 is
available in black (part #70-563-02) or white (part #70-563-03).
R
E
D
-
O
V
E
R
L
O
A
D
P
/
S
1
2
3
12
V
DC 3A PO
WER SUPPL
Y
B
A
S
S
L
E
V
E
L
T
R
E
B
L
E
M
I
N
I
P
O
W
E
R
A
M
P
L
I
F
I
E
R
M
P
A
1
22
ON
OF
F
L
I
M
I
T
E
R
ST
ER
EO
DU
AL
MO
N
O
Extron
PMK 350
Multi-product Projector
Mounting Kit
Extron
PS 123
12 VDC 3 A
Power Supply
Cover Sheet
Front Plate
Rear Plate
U-bolt
Extron
IPL T S2
Ethernet Control
Interface
Extron
MPA 122
Mini Power Amplifier
COM
1
LA
N
UID#
093012052
P
O
W
E
R
1
2
V
.5
A
M
A
X
C
O
M
1
T
X
R
X
T
X
R
X
C
O
M
2
COM
2
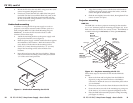
Figure 10 — Projector mounting the PS 123
Follow these steps to mount the PS 123 onto the PMK 350
bracket:
1. Remove the front and back plates from the PMK 350
(figure 10), using an Extron Tweeker or a #2 Phillips
screwdriver. Retain the screws to reattach the plates when
you are finished.
2. If necessary, remove the feet from the bottom of the PS 123.
3. Secure the unit to one side of the mounting tray, using two
of the 4-40 x 3/16" screws in opposite (diagonal) corners.
4. Place the PMK 350 around the projector ceiling mounting
pole (figure 10, above).


