Mainboard D2151
2 - English A26361-D2151-Z110-1-8N19, edition 2
Installing/removing or replacing processor (with heat sink)
!
Disconnect the system from the mains voltage before performing any of the tasks
described below. Details are contained in the operating manual of your system.
Technical data
● Intel Pentium 4 with 533, 800 or 1066 MHz front side bus in the LGA775 design
● Intel Celeron D with 533 MHz Front Side Bus in the LGA775 design
● A current list of the processors supported by this mainboard is available on the Internet at:
www.fujitsu-siemens.com/mainboards.
!
Never touch the underside of the processor. Even minor soiling such as grease from
the skin can impair the processor's operation or destroy the processor.
Place the processor in the socket with extreme care, as the spring contacts of the
socket are very delicate and must not be bent.
If one or more spring contacts are bent do not insert the processor in any case as it
may be damaged by doing so. Please contact the responsible vendor.
► Remove the heat sink.
!
The processor socket ist covered with a protective cap to protect the spring contacts In a
warranty case the mainboard can only be taken back by Fujitsu Siemens Computers with
the protective cap secured!
► Press down the lever and unhook it.
► Fold up the frame.
a
b
b
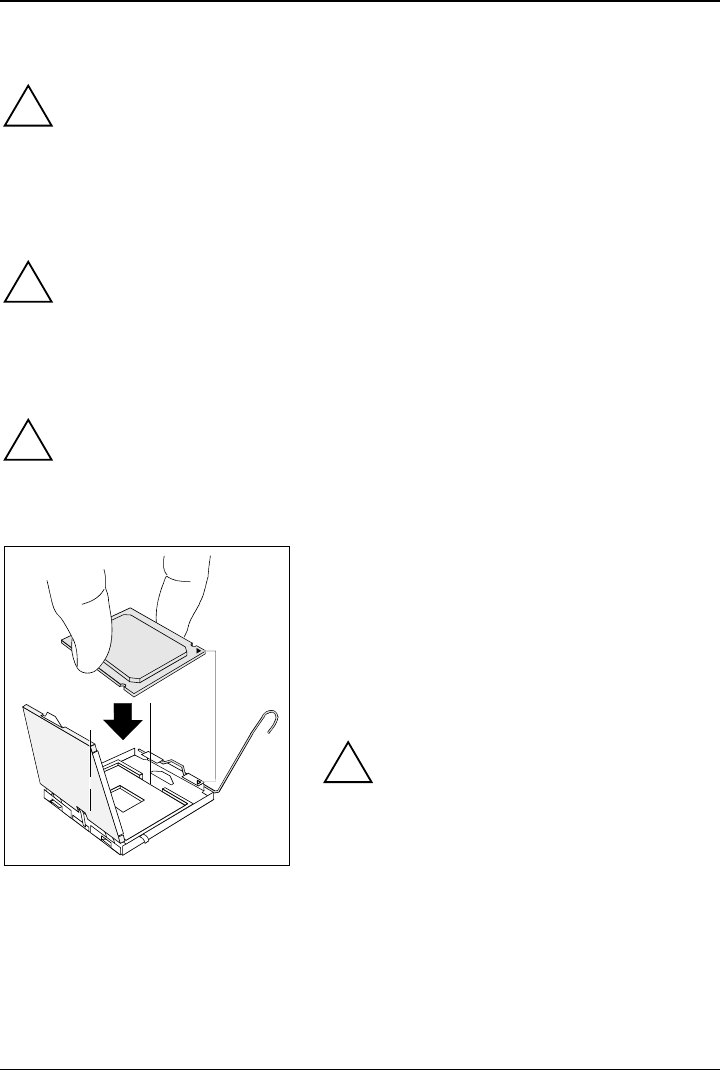
► Hold the processor between your thumb and
index finger and insert it into the socket (b) so that
the marking of the processor is aligned with the
marking on the socket (a).
► Fold down the frame.
► Press the lever downward until it is hooked in
again.
► Remove the protective cap and keep it.
!
Please note that, depending on the heat
sink used, different heat sink mounts are
required on the mainboard.
► Depending on the configuration variant, you must pull a protective foil off the heat sink or coat
the heat sink with heat conducting paste before fitting it.
► Secure the heat sink - depending on the model - with four screws or push it into the mounts.


