2
4
Checking location before installing the server
For details on installing the rack, refer to the "Installation
Guide for the RACK" and the manual provided with the
rack.
n
Conditions
When installing this server avoid the following areas.
- Humid, dusty, or oily areas
- Poorly ventilated areas
- Areas close to re or other sources of heat
- Areas close to water
- Areas close to direct sunlight or near heating appli
ances
- Areas with a temperature of below 10°C or above 35°C
- Areas with humidity of less than 20% or more than 80%
- Salty areas
- Areas where corrosive gas is generated
- Areas where cables become trip hazards
- Areas where strong magnetic elds are generated,
such as near TVs and speakers
- Areas where the device is not stable and could tip
over and hurt somebody
n
Installing the server to the rack
Make sure to contact an ofce listed in the "Contact In-
formation" before attempting to install or remove a server
from the rack.
1
Open both the front and rear doors of
the rack.
2
Check where to attach the slide rail
and rack nuts
Attach the slide rail to the front and rear brackets.
Attach the rack nuts to the front brackets.
3
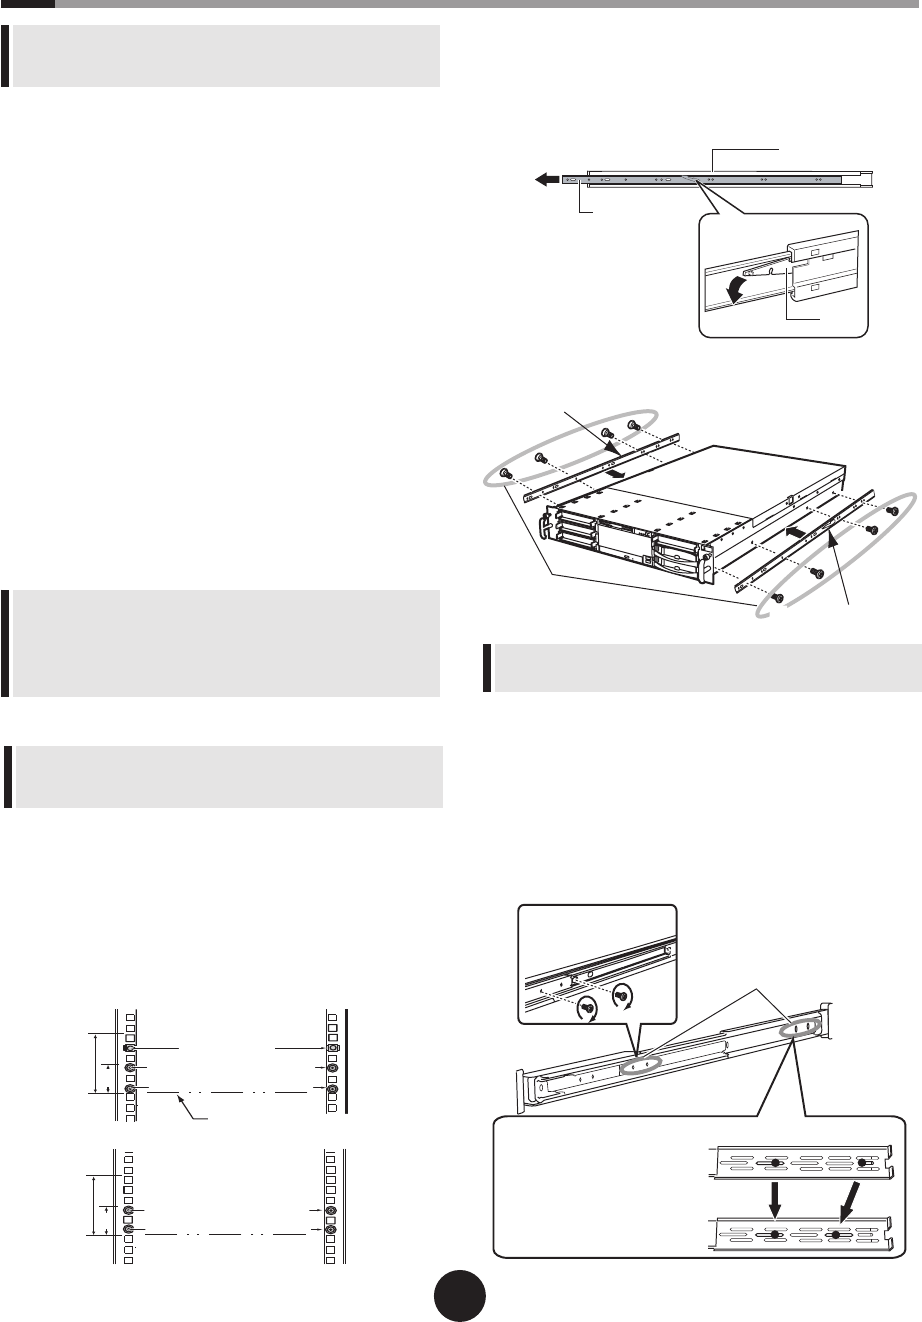
Remove the inner rail from the slide
rail
Press down the lock in the center of the inner rail
to remove.
�
4
Attach the inner rail to the server.
Left and right inner rails are different.
Check the letter at the lock part for correct installation.
5
Remove the athead screws xing the
slide rail bracket, and attach binding
head screws.
Two on the front: Tightly fasten where the athead
screws were used.
Two on the rear: Loosely fasten at the location in
the following gure.
- In dusty area, dust will quickly stick to the front and
backside of the server. Since this can cause failure,
changing the installation place is recommended.
- Be sure to secure racks and cannect stabilizers to prevent
the device tipping over.


