10
English
2.2 Connecting to the Wi-Fi Network
A Wi-Fi connection makes it easy to connect to the Internet. Once you have successfully connected
to a Wi-Fi network, the device will automatically connect to the network when you are within range.
To configure the Wi-Fi connection, do the following:
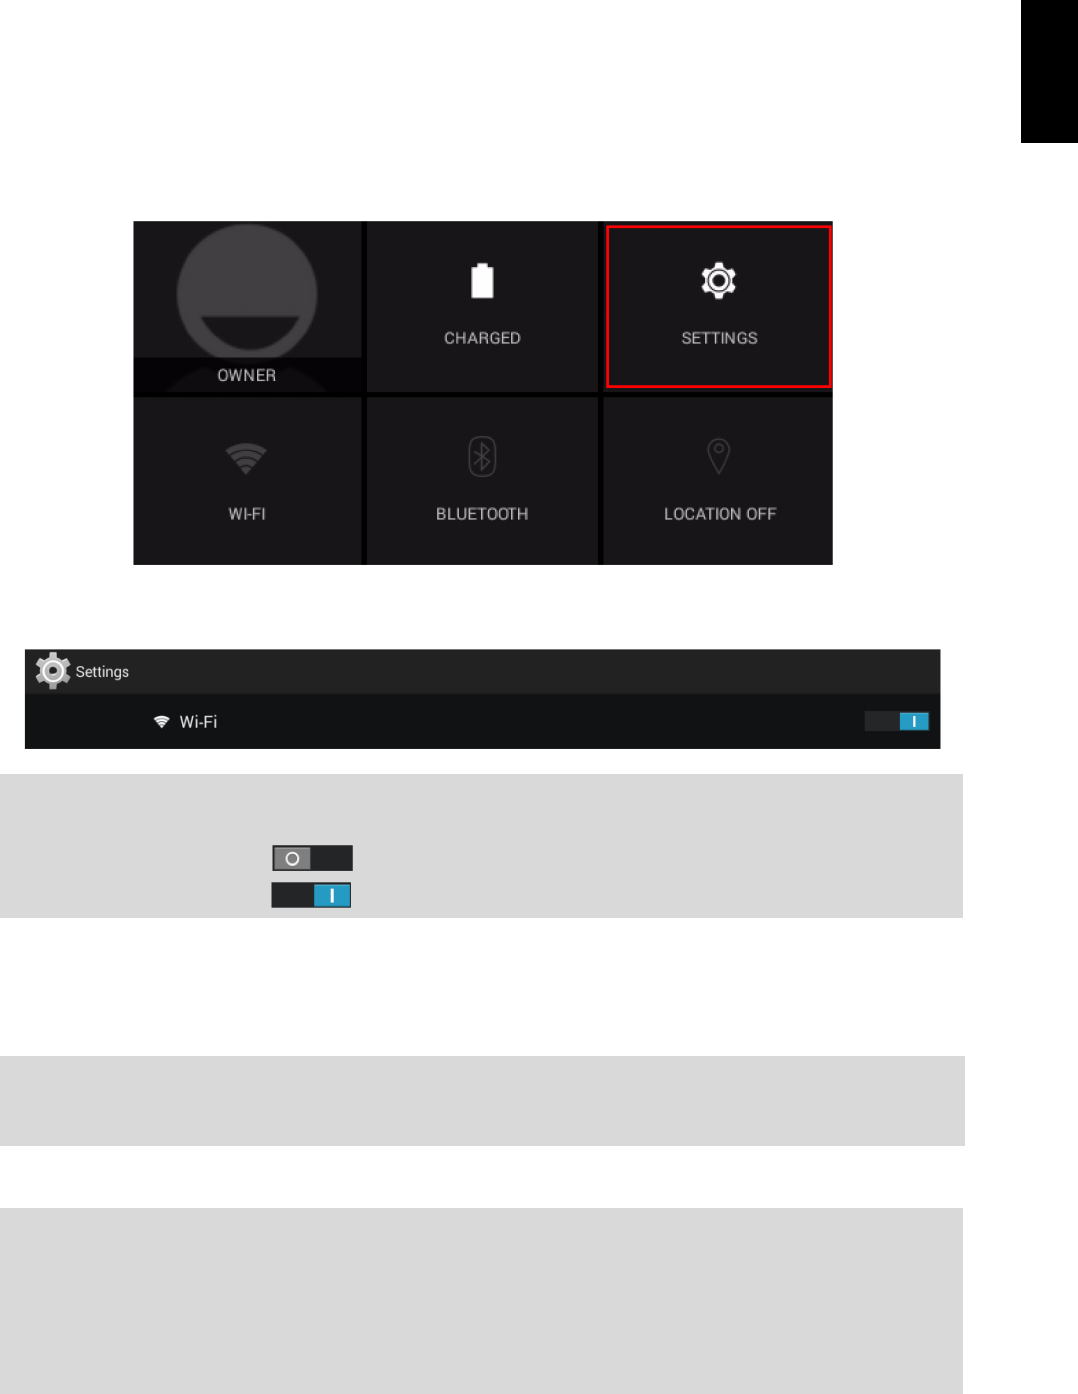
1. Tap and drag the status bar downward to open the notification panel.
2. On the Quick Settings screen, tap SETTINGS.
3. Turn on Wi-Fi. The device searches for available networks within range and displays the
searched Access Point (AP) names on the right panel.
4. Tap an access point name that you want to connect to. If the selected access point is
protected by a password, the device will prompt for the password.
5. If prompted, enter the password to connect to the AP.
6. Tap Connect.
NOTE:
Tap the Wi-Fi switch button to turn Wi-Fi on or off.
• The Wi-Fi icon showing indicates Wi-Fi is turned off.
• The Wi-Fi icon showing indicates Wi-Fi is turned on.
NOTE:
• The password entry is required only when connecting to the AP for the first time.
• To make the Wi-Fi password visible while typing it, select the “Show password” checkbox.
NOTE:
• Some public places offer free wireless internet access. This means no password is required to establish
the connection.
• For secured networks, you may need to enter several parameters to complete the settings. If you are not
sure about the parameters, please contact your local Internet Service Provider (ISP).
• This tablet PC keeps track and recognizes Wi-Fi networks that have been connected before. Once Wi-Fi is
turned on and a known connection is detected, the device automatically connects to that network.


