


Owner’s Manual
for installing, setting up and using your new product
What’s Included
Step Two
• Hardware — IBM PC or compatible with one
available USB port and a CD drive.
• Software — Microsoft Windows 98, Windows
98SE, Windows 2000, Windows ME, or
Windows XP.
Windows NT does not support the USB interface.
System Requirements
Step One
Step Four
USB 27 MHz
Wireless Optical Mouse
26-753
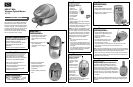
Thank you for buying an HP USB 27 MHz Wireless
Optical Mouse. The mouse’s advanced RF (radio
frequency) technology enables 360-degree operation
around your computer - no line-of-sight placement
required. Its ergonomic design lets you hold and use
it comfortably. The mouse’s optical technology
senses mouse movements precisely and smoothly,
with no moving parts to clean or replace.
As Windows 98/98 SE does not support the
mouse’s scroll function, you must install the
supplied software to use the mouse. Follow these
steps ONLY if you have Windows 98/98 SE.
1. Make sure the supplied USB receiver is
connected to the computer.
2. Insert the supplied mouse driver CD into your
computer’s CD ROM drive.
3. Follow the on-screen instructions to finish
installing the mouse driver.
Installing Software
Mouse USB Receiver Charger
AC Adapter Owner’s Manual Driver CD
AA Ni-MH Rechargeable Batteries (2)
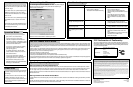
Installing the Batteries
1. Open the battery compartment cover
by squeezing the mouse’s sides
where it attaches to the mouse as
shown.
2. While squeezing the sides of the
mouse, pull the battery
compartment cover out with your
other hand.
3. Insert the two supplied Ni-MH
batteries into the battery
compartment as indicated by the
polarity markings (+ and -)
marked inside.
4. Replace the battery compartment
cover.
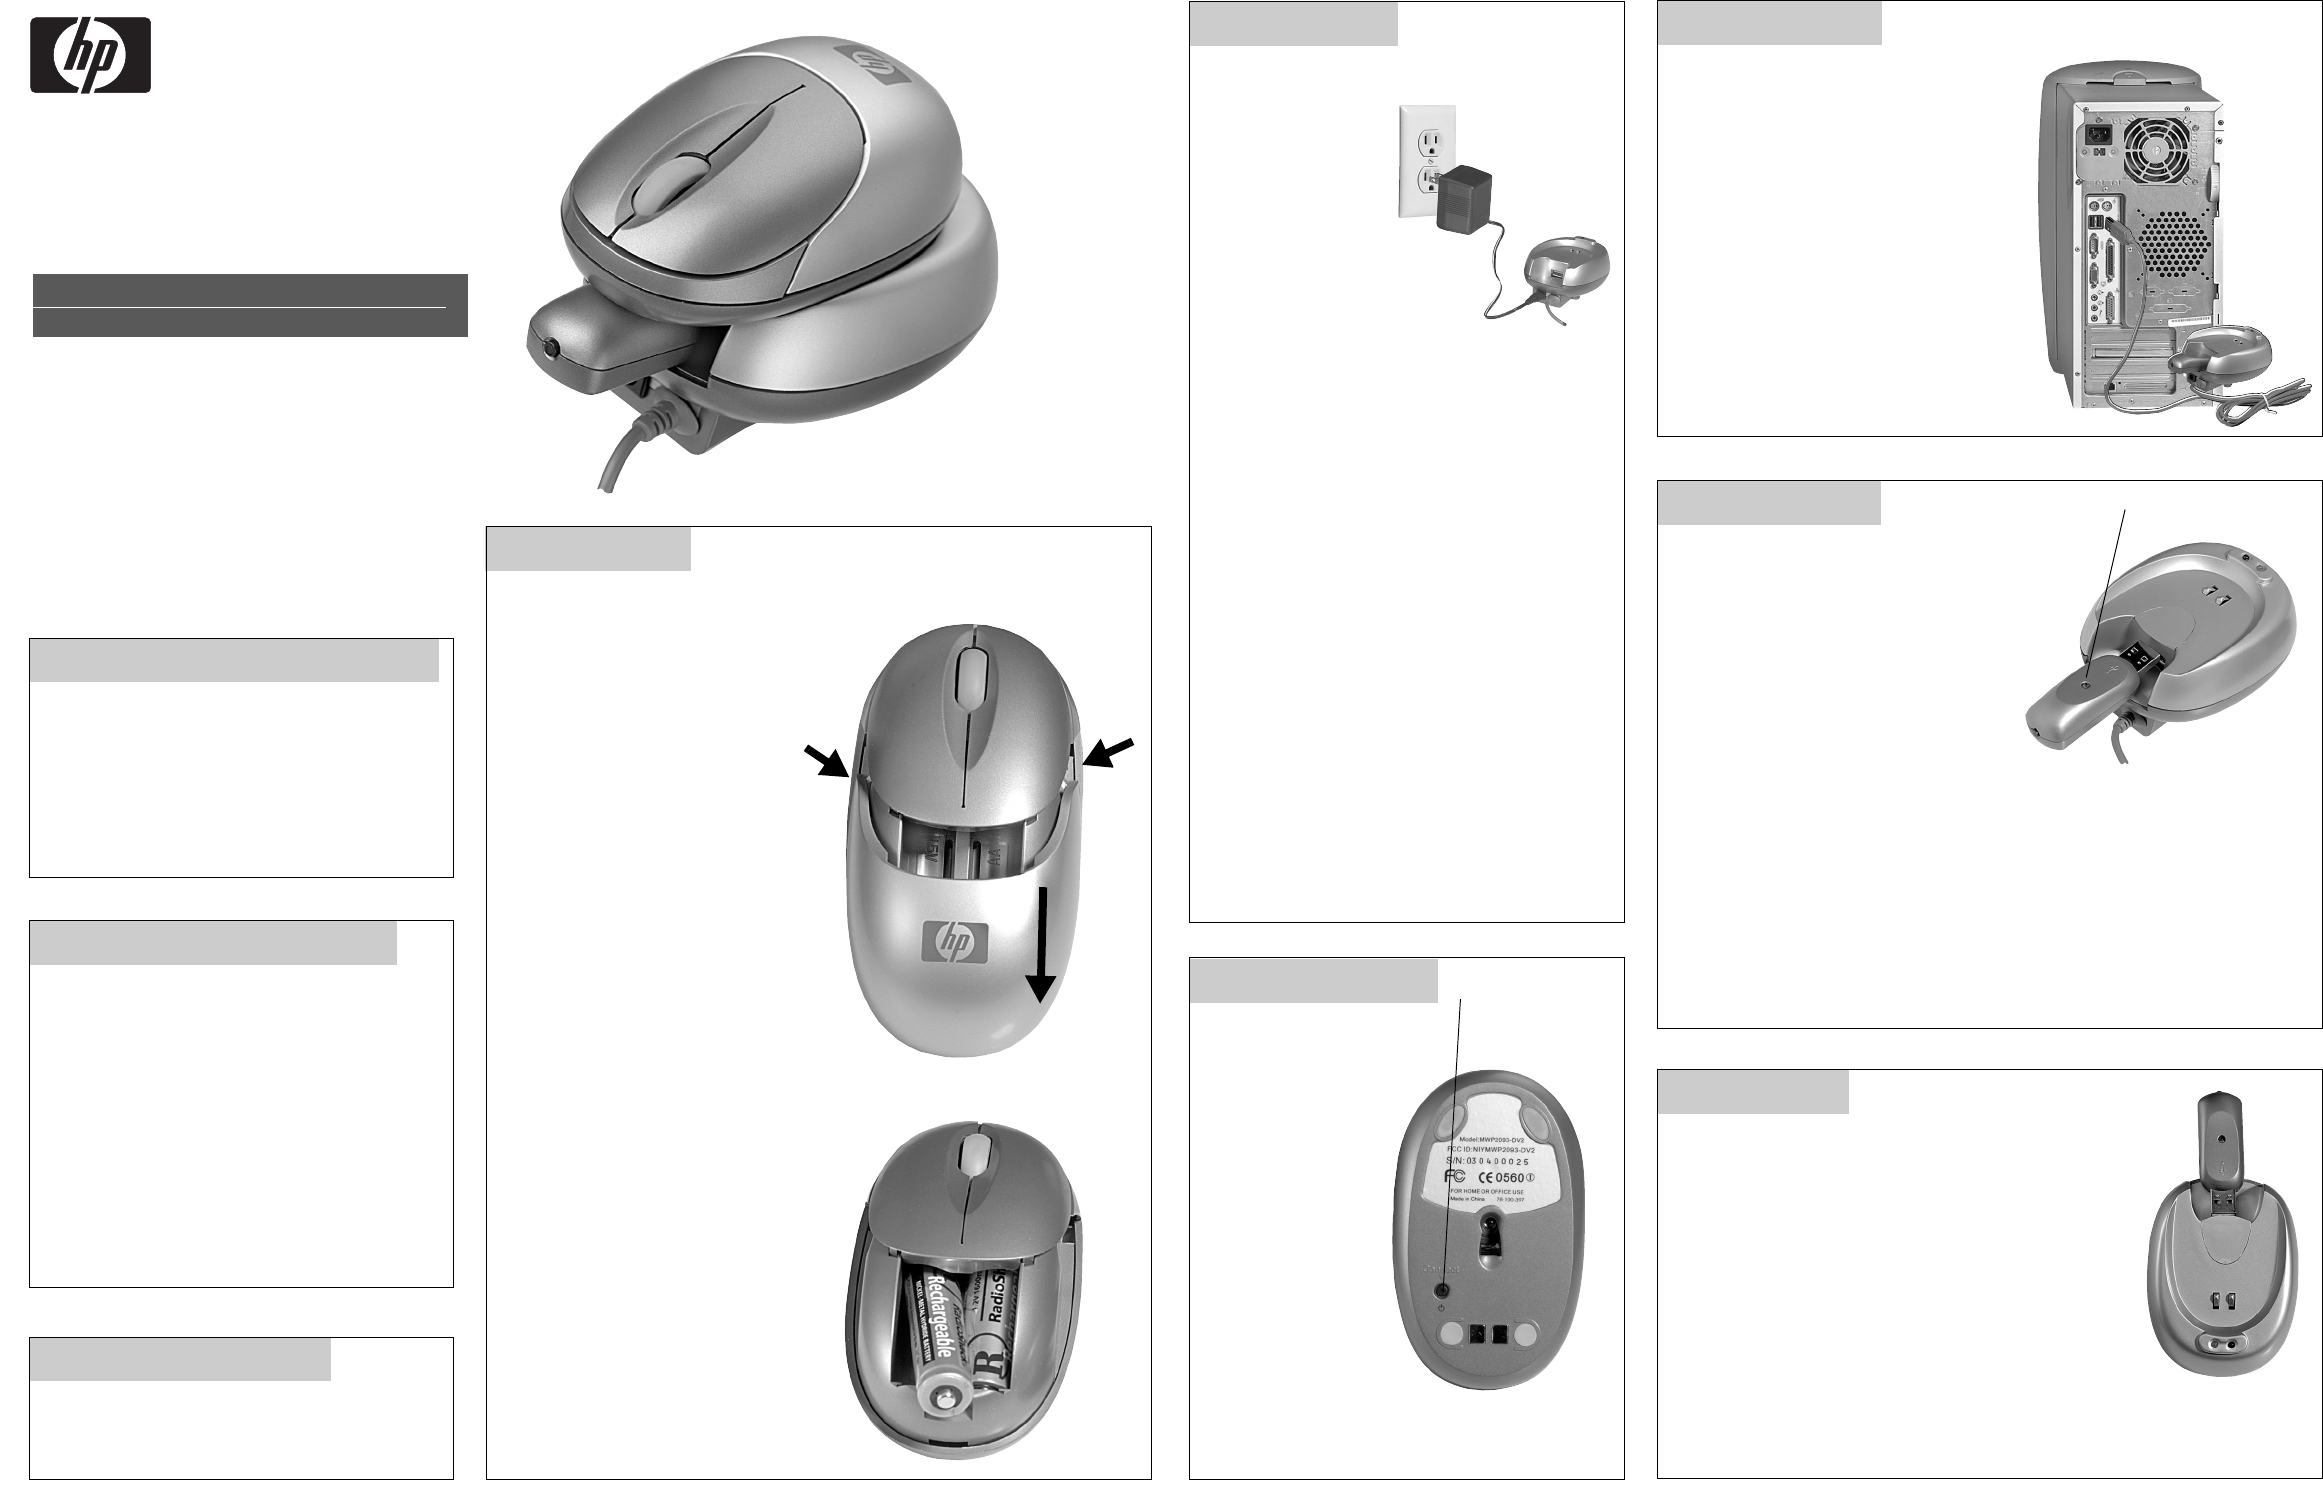
Charging the Batteries
1. Connect the
supplied AC
adapter to the DC
jack on the back of
the supplied charger.
Then, plug the other
end of the adapter
into a standard
AC outlet.
2. Place the mouse’s
charging contacts on the charger’s contacts to
charge the batteries.
The green charging indicator lights. Charge the
rechargeable batteries at least 8 hours before
you use the mouse for the first time.
Caution: You must use a regulated Class II power
source that supplies 5V DC and delivers at least
450 mA. Its center tip must be set to positive and its
plug must fit the charger’s DC jack. The supplied
AC adapter meets these specifications. Using an
adapter that does not meet these specifications
could damage the charger or the adapter.
Notes:
• The mouse wheel flashes blue when the
battery is low.
• You can also use AA alkaline batteries in the
mouse if the rechargeable batteries are weak.
If you do this, be sure not to place the mouse in
the charger.
• You must reset the channel when you replace
the rechargeable batteries. See “Setting the
Channel” for more information.
Step Three
Setting the Channel
Your mouse uses two
RF channels and up to
256 ID codes. Channel
and ID are
automatically selected
when you connect the
mouse to the receiver.
When you change the
batteries in your
mouse or receive
interference from
another wireless mouse,
you must set the RF channel.
To set the channel, use a pointed object to press
Connect on the bottom of the mouse.
Connect
Connecting the Charger
to the Computer
1. Plug the supplied USB receiver into the
USB socket on the back of the charger.
2. Plug the charger’s USB connector into a
USB port on your computer.
Step Five
Synchronizing the Mouse
1. Plug the supplied USB receiver into the
USB port for the supplied charger, your
computer, or keyboard.
2. Place the mouse within 1 foot of the
USB receiver.
3. Use a pointed object such as a pen to
press Connect on the bottom of the
mouse for less than 1 second.
4. Press Synchronization on the USB receiver. The blue LED on the USB
receiver flashes, showing that the mouse and USB receiver are
synchronized.
Note: If the mouse and USB receiver do not synchronize, remove the batteries
from the mouse and unplug the USB receiver. Then wait about 20 seconds. Next,
reinstall the batteries in the mouse and repeat the steps in this section.
5. Move the mouse around. The cursor on your computer screen should move,
showing that the mouse is ready to use. The blue LED on the USB receiver
lights when you use the mouse.
USB Receiver
Step Six
Using the Charger With the USB Receiver
The supplied charger with USB port and cable and
USB receiver make it easy to connect the mouse to a
notebook computer for traveling or a desktop computer
at home. When traveling, you can detach the USB receiver
from the charger and then attach it to your notebook com-
puter. When at home, you can attach the USB receiver to
the charger and then connect the charger’s USB cable to
the computer.
Note: If you attach the supplied mini USB receiver to your notebook computer,
always carry the charger separately so you can charge the mouse whenever
necessary.