


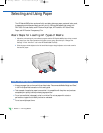
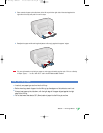

Section 1 – Printing Basics
12
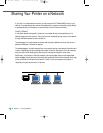
Setting up your Printer on a Network
Whatever configuration you are using to connect your printer to a network, you will need to install
the HP DeskJet 890C Toolbox and Driver software on each computer that will be printing to the
HP DeskJet 890C printer.
Windows 3.1 - Locally Shared
Not supported in Windows 3.1 by the Operating System
Windows 3.1 - Network Connect
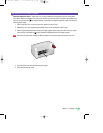
Setup the printer and make the cable connections to your print server and network.
1 Begin installing the driver by executing setup.exe, either on the "Printer Software CD," "Installation
Disk 1," or where your network administrator has installed it.
2 When prompted for the printer name and port, choose "HP DeskJet 890C Printer" and either
"None" or the Port (LPT1:) for the port that you wish to redirect to the printer. Click OK .
3 Continue installation until complete, then restart Windows.
4 Select Printers from the Windows Control Panel, click on the HP DeskJet 890Cicon, then click Connect.
5 Choose the port to which the printer is connected (for example LPT3)
6 Click Network… then select the network path for the printer. To set up the printer as a permanent
network printer on your system, click the Permanent box, and then click Connect.
Windows for WorkGroups 3.11 - Locally Shared
At the Server (where the printer is directly connected to the computer)
Setup the printer, make the cable connections to your computer, and follow the procedures for
installing the printer software as outlined in the Setup Card.
1 Launch "Print Manager" found in the "Main" program group
2 Click on the HP DeskJet 890C printer, choose Printer, and Share this printer as…
3 Follow the dialogs to complete the sharing of your printer.
At the Client (who wants to connect to the shared printer)
Follow the same steps as shown for Windows 3.1 - Network Connect.
Windows for WorkGroups 3.11 - Network Connect
Follow the same steps as shown for Windows 3.1 - Network Connect.
Windows 95 - Locally Shared
At the Server (where the printer is directly connected to the computer)
◆ Setup the printer, make the cable connections to your computer, and follow the
procedures to install the printer software as outlined in the Setup Card.
◆ Share the printer. For more information on sharing the printer, refer to
"Sharing your printer with other people" in Windows 95 Help.
At the Client (who wants to connect to the shared printer)
Begin installing the printer software at the clients computer with one of these methods:
◆ Execute setup.exe, either on the "Printer Software CD," "Installation Disk 1," or wherever your
network administrator has installed it.
◆ Use the Add Printer wizard, select Network Printer, choose Browse to find the Shared Printer and
then select Have Disk… to install the printer software.
WW US eng. Manual 21.07.1997 03.29 pm Page 12