Enabling and configuring the controller 6
Configuring an array
The HP Smart Array B110i SATA RAID Controller supports SATA drives only.
For the most efficient use of drive space, all drives within an array should have approximately the same
capacity. Each configuration utility treats every physical drive in an array as if it has the same capacity as
the smallest drive in the array. Any excess capacity of a particular drive cannot be used in the array.
Therefore, the capacity is unavailable for data storage.
The more physical drives that are in an array, the greater the probability that the array will experience a
drive failure during any given period. To reduce the risk of data loss that might occur when a drive fails,
configure all logical drives in an array with a suitable fault-tolerance (RAID) method.
The HP Smart Array B110i SATA RAID Controller supports up to two logical drives.
Newly created logical drives are invisible to the operating system. To make the new logical drives
available for data storage, format them using the instructions given in the operating system
documentation.
Option ROM Configuration for Arrays
Before installing an operating system, you can use the ORCA utility to create the first logical drive, assign
RAID levels, and establish online spare configurations.
The utility also provides support for the following functions:
• Reconfiguring one or more logical drives
• Viewing the current logical drive configuration
• Deleting a logical drive configuration
• Setting the controller to be the boot controller
If you do not use the utility, ORCA will default to the standard configuration.
For more information regarding array controller configuration, refer to the controller user guide.
For more information regarding the default configurations that ORCA uses, refer to the HP ROM-Based
Setup Utility User Guide on the Documentation CD.
The HP Smart Array B110i SATA RAID Controller does not support ORCA CLI.
To create a logical drive using ORCA:
1. Power up the server.
2. When prompted during the start-up sequence, access ORCA by pressing the F8 key.
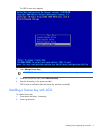
3. Select Create Logical Drive.
The screen displays a list of all unconfigured physical drives and the valid RAID options for the
system.
4. Use the Arrow keys, Spacebar, and Tab key to navigate around the screen and set up the logical
drive, including an online spare drive, if one is required.
NOTE: You cannot use ORCA to configure one spare drive to be shared among several
arrays. Only ACU enables you to configure shared spare drives.
5. Press the Enter key to accept the settings.


