


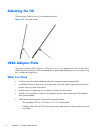
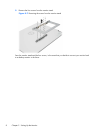
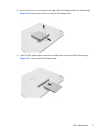

b. Secure the lower edge of the VESA adapter plate to the bracket hinge with four screws.
Figure 2-9 Securing the VESA adapter plate
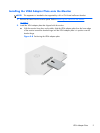
3. To attach the monitor to a VESA-compatible device (purchased separately), follow the instructions
included with that device to ensure that the monitor is safely attached.
CAUTION: This monitor supports the VESA industry-standard 100 mm mounting holes. To attach
a third-party solution to the monitor, four 4 mm, 0.7 pitch, and 10 mm long screws (purchased
separately) are required. Longer screws must not be used because they may damage the monitor.
It is important to verify that the manufacturer’s solution is compliant with the VESA standard and is
rated to support the weight of the monitor display panel. For best performance, it is important to
use the power and video cables provided with the monitor.
4. Reconnect the cables to the monitor panel.
Removing the VESA Adapter Plate
To avoid injury and equipment damage, always complete the following steps in order:
1. Turn the monitor off and disconnect the power cord from the wall outlet.
CAUTION: Static electricity can damage the electronic components of the monitor or other
equipment. Ensure that you are discharged of static electricity by briefly touching a grounded
metal object.
2. Disconnect any equipment and all attached cables from the monitor before beginning this
procedure.
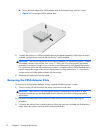
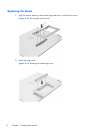
3. To remove the monitor from a mounting device, follow the instructions included with that device to
safely detach the monitor and remove any mounting hardware.
10 Chapter 2 Setting Up the Monitor