


8 Connectivity
• WiFi Protected Setup (WPS – requires WPS router)
•
Traditional wireless connection (requires router)
•
USB connection (non-network connection)
•
Change from a USB connection to a wireless network
•
Connect wirelessly to the printer without a router
•
Connect a new printer
•
Change network settings
•
Tips for setting up and using a networked printer
•
Advanced printer management tools (for networked printers)
WiFi Protected Setup (WPS – requires WPS router)
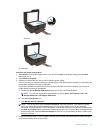
To connect the HP e-All-in-One to a wireless network using WiFi Protected Setup (WPS), you will need the
following:
A wireless 802.11b/g/n network that includes a WPS-enabled wireless router or access point.
NOTE: The HP e-All-in-One only supports connections using 2.4GHz.
A desktop computer or laptop with either wireless networking support, or a network interface card (NIC). The
computer must be connected to the wireless network that you intend to install the HP e-All-in-One on.
NOTE: If you have a Wi-Fi Protected Setup (WPS) router with a WPS push button, follow the Push Button
method. If you are not certain your router has a push button, follow the Wireless Settings Menu method.
Push Button (PBC) method
1. Press the WiFi Protected Setup (WPS) button on your router.
2. Press and hold the Wireless button on the printer until the wireless light starts blinking. Press and hold for 3
seconds to start WPS push button mode .
NOTE: The product begins a timer for approximately two minutes in which the corresponding button on the
networking device needs to be pressed.
Wireless Settings Menu method
1. Press the Wireless button on the printer to display the Wireless menu. If the printer is printing, in an error
state, or performing a critical task, wait until the task has been completed or the error cleared before pressing
the Wireless button.
2. Select Settings from the printer display.
3. Select Wi-Fi Protected Setup from the printer display.
4. If you have a Wi-Fi Protected Setup (WPS) router with a WPS push button, select Push Button Setup, and
then follow the onscreen instructions. If your router does not have a push button or you are not certain if your
router has a push button, select PIN Setup, and then follow the onscreen instructions.
NOTE: The product begins a timer for approximately two minutes during which the corresponding button on
the networking device needs to be pressed or the router PIN needs to be entered on the router’s configuration
page.
Connectivity 33