


5
ENGLISH
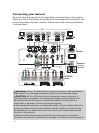
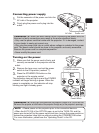
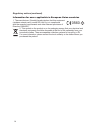
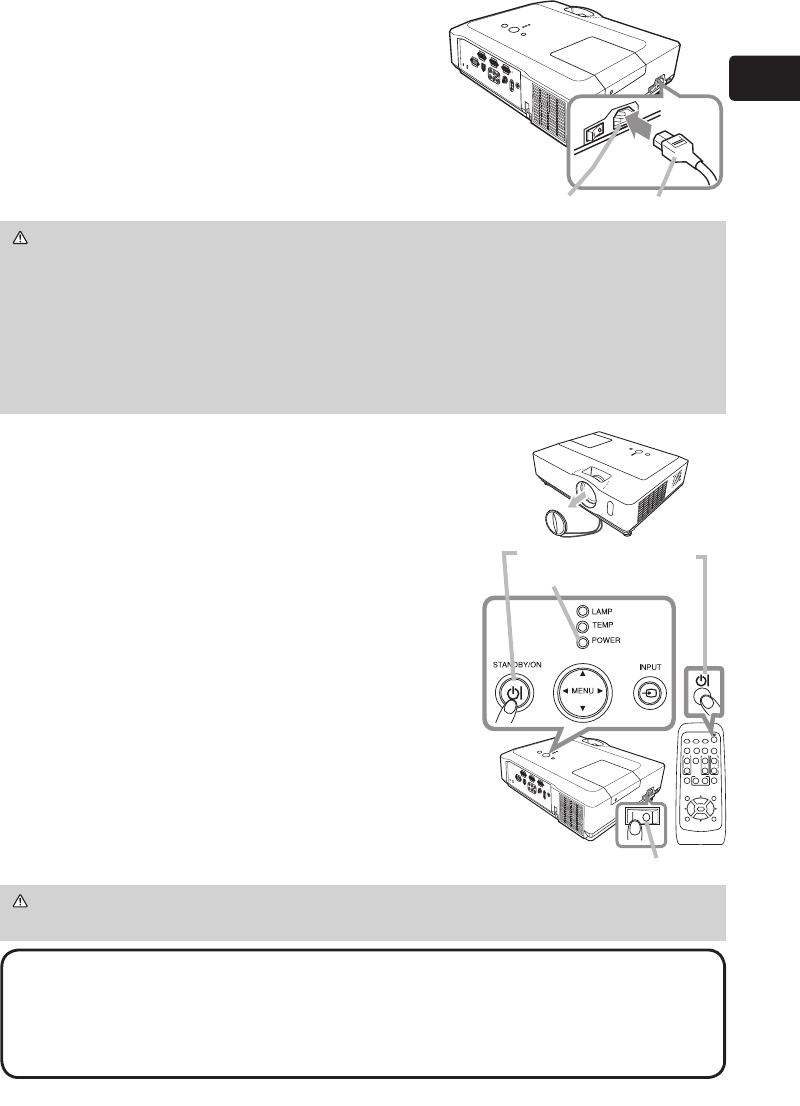
Connecting power supply
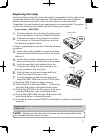
1.
Put the connector of the power cord into the
AC inlet of the projector.
2.
Firmly plug the power cord’s plug into the
outlet.
WARNING ►Please use extra caution when connecting the power cord, as
incorrect or faulty connections may result in re and/or electrical shock.
• Only use the power cord that came with the projector. If it is damaged, contact
to your dealer to newly get correct one.
• Only plug the power cord into an outlet whose voltage is matched to the power
cord. The power outlet should be close to the projector and easily accessible.
Remove the power cord for complete separation.
• Never modify the power cord.
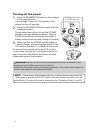
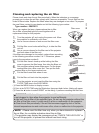
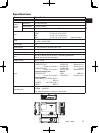
Turning on the power
1.
Make sure that the power cord is rmly and
correctly connected to the projector and the
outlet.
2.
Remove the lens cover, and set the power
switch to the ON position (marked “׀”).
3.
Press the STANDBY/ON button on the
projector or the remote control.
The projection lamp will light up and the POWER
indicator will begin blinking in green. When the
power is completely on, the indicator will stop
blinking and light in steady green.
WARNING ►
A strong light is emitted when the projector’s power is on. Do not look into
the lens of the projector or look inside of the projector through any of the projector’s openings.
NOTE • Please power on the projector prior to the connected devices.
• When the AUTO ON of the OPTION menu is set to the TURN ON, and the
power was turned off by the power switch last time, turning the power switch on
makes the projection lamp light on without pushing the STANDBY/ON button.
For more information, please see the “Operating Guide” in the CD.
AC inlet Power cord
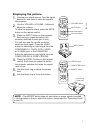
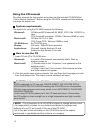
VIDEO
DOC.CAMERA
KEYSTONE
ASPECT SEARCH
BLANK
MUTE
MY BUTTON
POSITION
1 2
ESC
ENTER
MENU
RESET
COMPUTER
MY SOURCE/
AUTO
MAGNIFY
PAGE
UP
VOLUME
DOWN
ON
OFF
㧗
FREEZE
STANDBY/ON button
POWER indicator
Power switch