10
Names and functions of each part (continued)
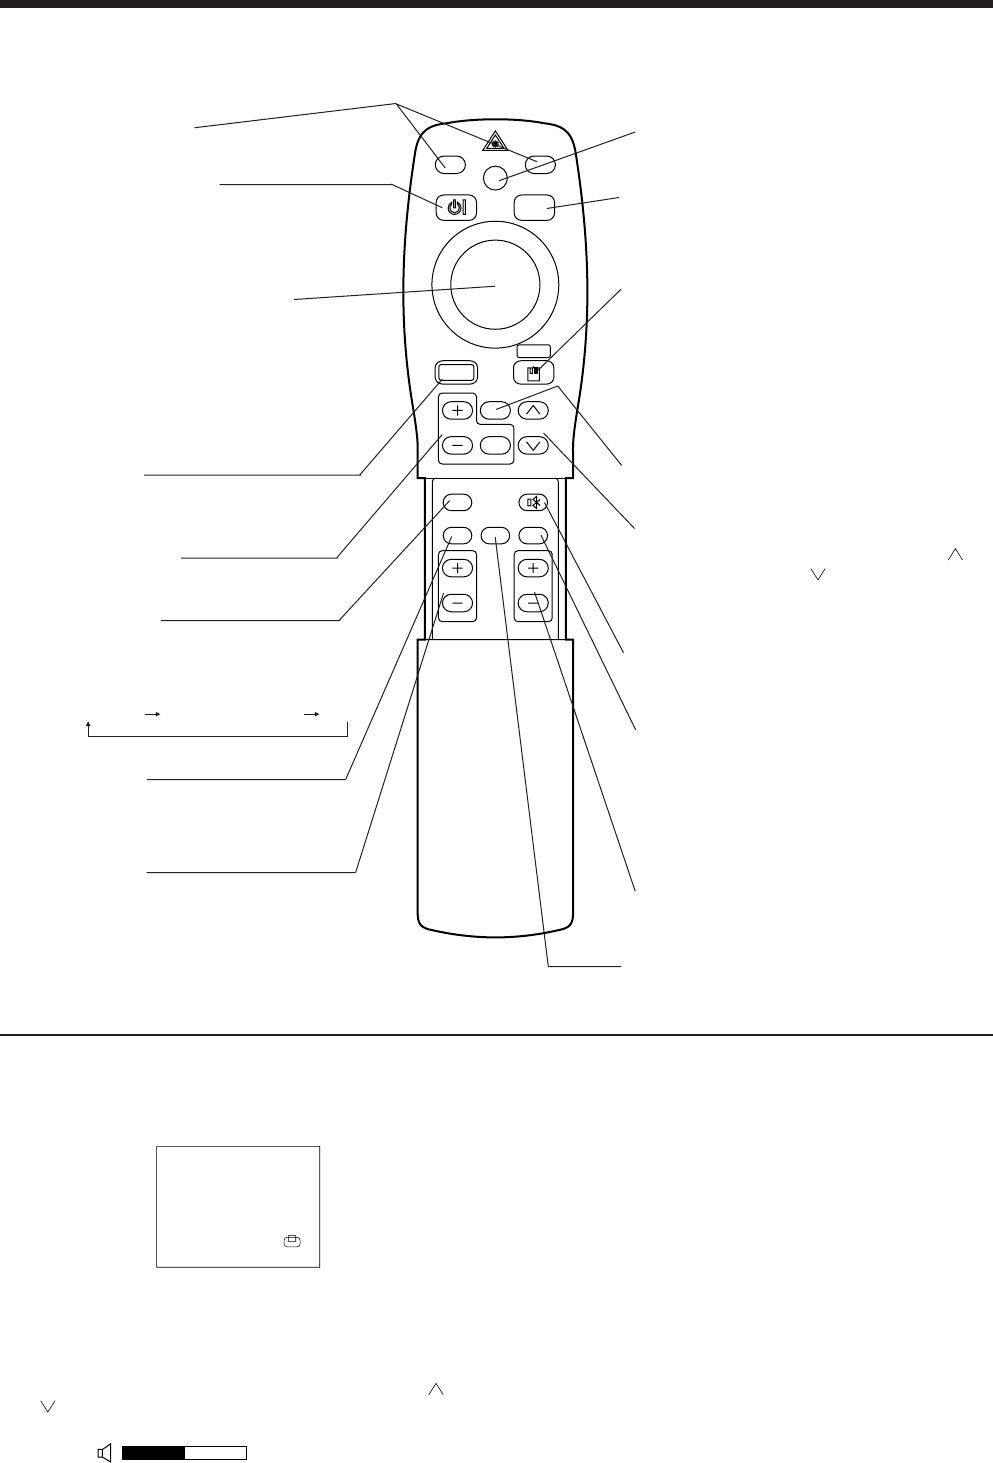
Remote control transmitter
FOCUS button
Used to adjust the focus of the image on the
screen. (Refer to page 13.)
ZOOM button
Used to adjust the size of the image. (Refer to
page 13.)
FREEZE button
Used to turn the freeze (still) image display on and off.
(Refer to page 15.)
AUTO button
Used to execute auto-adjust.
*3
*
These functions do not operate when initial screen message “NO INPUT IS DETECTED” or “SYNC IS OUT OF RANGE” is displayed.
MAGNIFY button
Used to magnify the displayed image.
(Refer to page 16.)
BLANK button
Used to turn blanking on and off.
(Refer to page 20.)
*2
P in P function
With the P in P function, signals are input to both RGB and
VIDEO. This function operates only when the RGB signal has
been selected. There is no display in the case of the no signal and
when the RGB signal is outside the sync range.
When P in P is used, audio is automatically switched to video.
In P in P, audio input can be switched by pressing the VOL and
VOL keys of the remote control, displaying the audio bar and
moving DISK PAD left and right during the display.
VIDEO, RGB button
Press to switch the input. (Refer to page 13, 19.)
VIDEO
STANDBY/ON
RGB
POSITION
LASER
MENU
RESET
MAGNIFY
FREEZE
OFF
VOLUME
P in P MUTE
AUTOBLANK TIMER
FOCUS ZOOM
STANDBY / ON button
Used to turn the power on and off.
Press for 1 sec. or more to turn the power off
(enter standby status).
(Refer to pages13 and 14.)
POSITION button
Press Position, then use the mouse Disk Pad to adjust
the image position (RGB mode only).
(Refer to page 16.)
DISK PAD / MOUSE button
(1) Used to select menu items when the menu
screen is displayed (refer to page 16 - 18).
(2) When the menu is not displayed, the mouse
shift function and left click function are active.
(3) After the POSITION button has been
pressed, the screen can be moved upward,
downward and to the left and right.
MENU button
Used to turn the menu screen display on and off.
(Refer to page 17 - 21.)
MUTE button
Applies Mute. (Press the Play button again to
cancel.)
VOLUME button
Adjusts the volume of the sound. Press [ ] to
increase the volume and ( ) to decrease the volume.
When there is no video signal input, operation is not
possible when the input video signal is outside the
sync range.
LASER button
Turns the laser beam on and off. Refer to page
11 conceming usage and observe the cautions.
RESET / MOUSE RIGHT button
(1)Operates as the RESET button when the menu
is displayed. Press this button to return to the
initial settings.
(2)Used to click the right mouse button when the
menu is not displayed (refer to page 25,26).
(3)Pressing this button after scrolling the screen
with POSITION returns the screen to the original
position.
TIMER button
Turns the display of the time set with the Timer
on the Menu screen on and off.
The timer is not displayed when no input signal
is detected or when SYNC is out of range or
during blanking or during freezing.
Refer to page 21 concerning the method used to
set the timer.
*1
POSITION icon
When the POSITION button is pressed, the moving display icon
will appear at the bottom right of the screen.
While displaying the icon, you can operate POSITION.
*3
Auto adjustment function
The projector automatically adjusts 4 items (V. POSIT, H. POSIT,
H. PHASE, H. SIZE).
When you choose AUTO (move the cursor to the right from the
manual operation position), the AUTO confirmation menu shown
below is indicated.
*4
Disk Pad method of operation
• Move and select by tilting Disk Pad in the required direction.
• Press Disk Pad in to realize the function of the mouse left
button.
• A mouse cable is necessary if a mouse is to be used.
(Refer to pages 26, 27.)
P in P button
*2
Used to turn P in P (Picture In Picture: displays sub video
signal images in the RGB signal) on and off.
Each time this button is pressed, operation will change in
the following sequence:
(1) Reduce sub screen (2) Magnify sub screen (3)Off.
(1) ∼ (3)
(Refer to page 20.)
RGB/VIDEO
*1
*1
*
*
*
*
*
*
*
*
*
*4


