


8
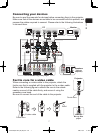
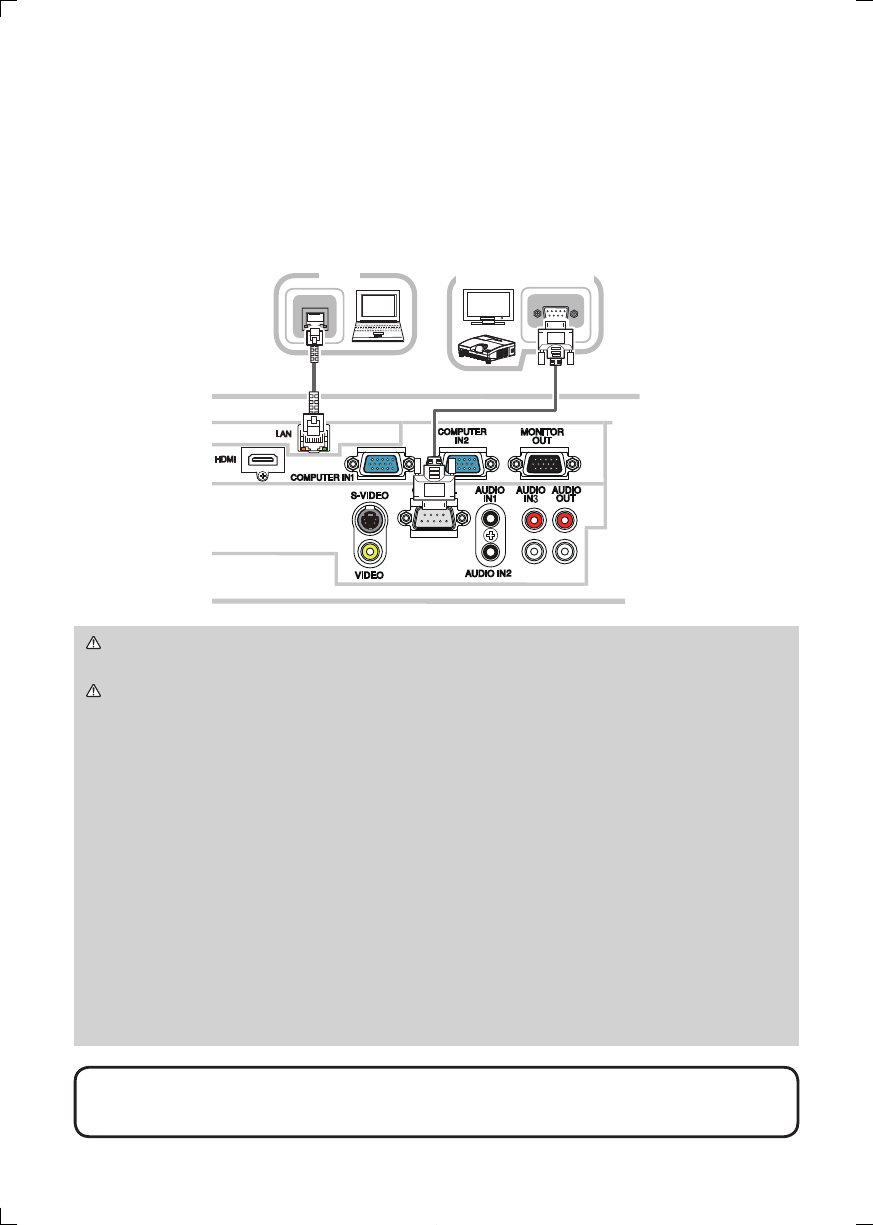
Connecting your devices (continued)
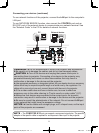
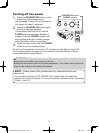
To use network functions of the projector, connect the LAN port to the computer's
LAN port.
To use NETWORK BRIDGE function, also connect the CONTROL port and an
RS-232C port of the external device to communicate as a network terminal. See
the “Network Guide” in the CD for details of network functions.
LAN
HDMI
RS-232C
LAN
PC
External device
WARNING ►Do not disassemble or modify the projector and accessories.
►Be careful not to damage the cables, and do not use damaged cables.
CAUTION ►Turn off all devices and unplug their power cords prior to
connecting them to projector. Connecting a live device to the projector may
generate extremely loud noises or other abnormalities that may result in
malfunction or damage to the device and the projector.
►
Use appropriate accessory or designated cables. Ask your dealer about non-accessory
cables which may be required a speci c length or a ferrite core by the regulations. For
cables with a core only at one end, connect the end with the core to the projector.
►If the s-video cable does not have a ferrite core, be sure to attach an
accessory core to the cable referring to "Ferrite core for s-video cable" (
7).
►Make sure that devices are connected to the correct ports. An incorrect
connection may result in malfunction or damage to the device and the projector.
►Be sure to consult the administrator of the network. Do not connect LAN port
to any network that might have the excessive voltage.
NOTICE ►Use the cables with straight plugs, not L-shaped ones, as the input
ports of the projector are recessed.
•
The COMPUTER IN1/2 port can support a component signal also. The speci c
adapter or the speci c cable is required for a component video input to the projector.
NOTE
01ED-D10N_ED-D11N_CO_ENG_2nd.indd 8 2009/12/07 11:48:48