6
Configuring your Monitor
Setup Diskette for Windows 95 or Windows 98
This section must be
completed before
continuing with the
Windows 95 or Windows 98
Auto Setup.
To use the Plug and Play feature in Windows 95 or Windows 98, files should
be loaded from the IBM Flat Panel Monitor Installation diskette:
1. Turn off the computer and all attached devices.
2. Ensure that the monitor is connected correctly.
3. Turn on the monitor and then the system unit. Allow the system to boot
into Windows 95 or Windows 98.
Your computer’s Plug and Play code may warn you that your system
hardware has changed. This probably means that it has detected your
new monitor for the first time.
4. Open the
D
ISPLAY
P
ROPERTIES
window by clicking on
S
TART
,
S
ETTINGS
,
C
ONTROL
P
ANEL
and then double clicking on the
D
ISPLAY
icon.
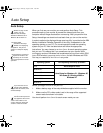
On LCD monitors,
unlike CRTs, a faster
refresh rate does not
improve display quality.
IBM recommends using
either 1024 x 768 at a refresh
rate of 60Hz.
5. Select the
S
ETTINGS
tab.
• In case of Windows 95:
6. -1. Select the Change Display Type button.
2. Select the Change Monitor Type button.
• In case of Windows 98:
6. -1. Select the ADVANCED BUTTON.
2. Select the MONITOR tab.
3. Open the UPGRADE DEVICE WIZARD windows by clicking on
Change button and then select the NEXT button.
If the UPGRADE DEVICE WIZARD is open go step 6-3. if not
continue to step 4.
4. Select the “Display a list of the known drivers for this device so that
I can choose a specific driver” and then select the NEXT button.
7. Insert the Setup diskette into drive A: and select the
H
AVE
D
ISK
button.
8. Select
OK
.
9. Choose
IBM T50
monitor and select
OK
. The files will be copied from the
diskette to your hard drive.
10. Close all open windows and remove the diskette.
11. Reboot the system.
The system will automatically select the maximum refresh rate and
corresponding Color Matching Profiles.
T50_setup.fm Page 6 Thursday, August 9, 2001 11:09 AM


