2
Table of Contents
Introduction 3
Positioning the projector 5
Video connections 6
Connecting a video device 7
Displaying a video image 8
Connecting a computer 10
Shutting down the projector 11
Troubleshooting your setup 11
Using the keypad buttons 18
Using the remote control 19
Optimizing video images 20
Customizing the projector 20
Using the menus 21
Picture menu 22
Settings menu 28
Maintenance 30
Cleaning the lens 30
Replacing the projection lamp 31
Appendix 33
Specifications 33
Accessories 33
Red LED behavior and projector errors 34
Projected image size 34
Source compatibility 35
Projector dimensions for ceiling mount installations 36
RS-232 terminal specifications 37
)RUFRPSOHWHGHWDLOVRQFRQQHFWLQJDQGRSHUDWLQJWKHSURMHFWRUUHIHUWRWKLV
8VHU·V*XLGH(OHFWURQLFYHUVLRQVRIWKLV8VHU·V*XLGHLQPXOWLSOHODQJXDJHV
DUHDYDLODEOHRQRXUZHEVLWHDWwww.infocushome.com/support
7KHZHEVLWHDOVRKDVWHFKQLFDOVSHFLILFDWLRQVDQLQWHUDFWLYHLPDJHVL]HFDO
FXODWRUODSWRSDFWLYDWLRQFRPPDQGVFRQQHFWRUSLQRXWVDJORVVDU\WKH
SURGXFWGDWDVKHHWDZHEVWRUHWREX\DFFHVVRULHVDQGDSDJHIRURQOLQH
UHJLVWUDWLRQ
Important Operating Considerations
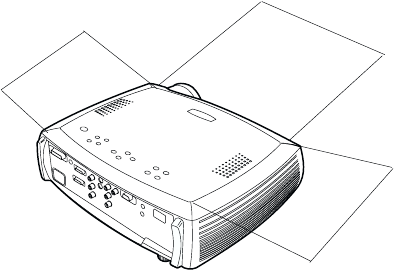
'RQRWSODFHWKHSURMHFWRURQDWDEOHFORWKRURWKHUVRIWFRYHULQJWKDWPD\
EORFNWKHYHQWV9HQWVDUHSODFHGDORQJWKHOHIWDQGULJKWVLGHVRIWKHSURMHF
WRUDVZHOODVDFURVVWKHIURQWRIWKHSURMHFWRU
'RQRWXVHDQRQDSSURYHG
FHLOLQJPRXQW,QWKHXQOLNHO\HYHQWRIWKHODPSUXSWXULQJGLVFDUGDQ\HGL
EOHLWHPVSODFHGLQWKHVXUURXQGLQJDUHDDQGWKRURXJKO\FOHDQWKHDUHD
DORQJWKHVLGHVDQGLQWKHIURQWRIWKHSURMHFWRU
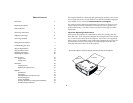
2 ft (.6m)
2 ft (.6m)
2 ft (.6m)
Do not place objects in the areas along the side and in the front of the projector


