


32
contains captions on the selected channel, then the projector must display
caption text overlaid on the image.
Ceiling Mount: turns the image upside down for ceiling-mounted projection.
Rear Project: reverses the image so you can project from behind a
translucent screen.
Auto Keystone: automatically adjusts vertical image.
Prevent PC Screen Saver: prevents your computer from going into Screen
Save mode. The projector must be connected to the PC via a USB cable for
this feature to work.
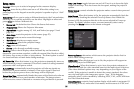
Search Screen: allows you to display a blank screen instead of the default
screen at startup, and when no source is detected.
Take Snapshot...: Captures the current image and allows it to be used as the
search screen image.
Show Messages: displays status messages (such as “Searching”) in the lower-
left corner of the screen.
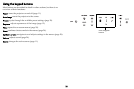
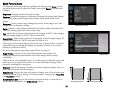
Menu Offset: allows you to change the position of the On Screen Display
items.
Menu Transparency: allows you to change how much of the projected image
behind the menu you can see. As the value increases, more of the image
behind the menu is visible.
Magnify Controls: determines whether the select key can be used to change
magnify settings when the OSD menu is not visible.
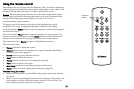
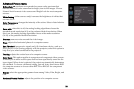
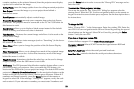
PIN Protect: The PIN (personal identification number) feature allows you to
password protect your projector. Once you enable the PIN feature, you
must enter the PIN before you can project an image. The default PIN on this
projector is Menu-Up-Down-Select-Source. Use the navigation buttons on the
remote or keypad to enter the correct 5-button press sequence. When all 5
numbers are entered correctly, press the Select button on the remote or
keypad to select OK. If the message “Wrong PIN” appears, verify the code
and re-enter it. If you mis-enter a number, you must enter 5 numbers and
press the Select button in order to access the “Wrong PIN” message and re-
enter the code.
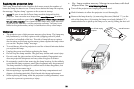
To enter the PIN at projector startup:
Power up the projector. The “Enter PIN” dialog box appears after the
startup screen. Enter the PIN. Use the navigation buttons on the remote or
keypad to enter the correct button press sequence. See the description above
for instructions.
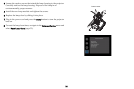
To change the PIN:
Select “Change PIN...” in the Setup menu. Enter the existing PIN. Enter the
new PIN. You can navigate between OK and Cancel by pressing the up and
down buttons on the keypad. Select OK or Cancel by pressing the Select
button. Verify the new PIN.
If you lose or forget your custom PIN:
Contact InFocus support. Go to www.infocus.com/support
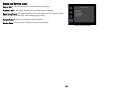
Computer 2 SCART: Selects SCART connection type between RGB and
composite.
Serial Port, Baud Rate: selects the serial port and baud rate.
Serial Port Echo: controls whether the serial port echoes characters.