


Copyright © 2010, Juniper Networks, Inc. 7
IMPLEMENTATION GUIDE - Juniper Networks SRX Series Services Gateways/Websense V10000
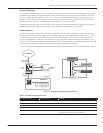
Junos OS could automatically configure all 10 steps described in the previous section using the following SRX Series
configuration.
[edit]
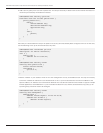
admin@SRX# show groups
websense {
apply-macro V10000-alpha {
c-port 172.25.44.19;
p1-port 192.168.10.12;
}
apply-macro user-lan {
interface ge-0/0/1;
address 192.168.5.1/24;
redirect V10000-alpha;
}
apply-macro zones {
management ge-1/0/1;
web-redirect ge-2/0/1;
}
}
This configuration shows an example use of Junos OS groups and apply-macros that can be used to organize the
relevant information. This configuration concisely describes the solution details in one location under the “websense”
group. A Junos OS commit script tailored for the Websense solution uses this information to automatically create the
configuration outlined in the 10 steps.
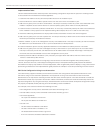
SRX Series Configuration Step by Step
The alternate approach to using Junos automation is to create the configuration manually. This section presents the 10
steps outlined in the previous section.
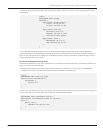
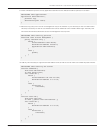
1. Create the web-redirect security zone that provides access to the V10000 P1 port. This step is accomplished by
defining a new security zone and identifying the interface toward the V10000 P1 port.
[edit]
admin@SRX# show security zones
security-zone web-redirect {
interfaces {
ge-2/0/1.0;
}
}
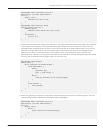
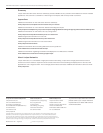
Note that you should follow this step if the physical interface toward the V10000 P1 interface was already configured. If
this is not the case, then use the following configuration at the interface hierarchy.
admin@SRX# show interfaces ge-2/0/1
description “To Websense V10000 P1 network”;
unit 0 {
family inet {
address 192.168.10.1/24;
}
}