


13
English
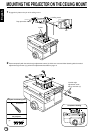
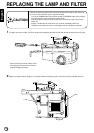
1 Use the accessory hex wrench to loosen 6
bolts.
2 Move the projector left and right to center the
projected image horizontally on the screen.
3 When the angle has been correctly adjusted,
fasten the projector securely by tightening the
bolts.
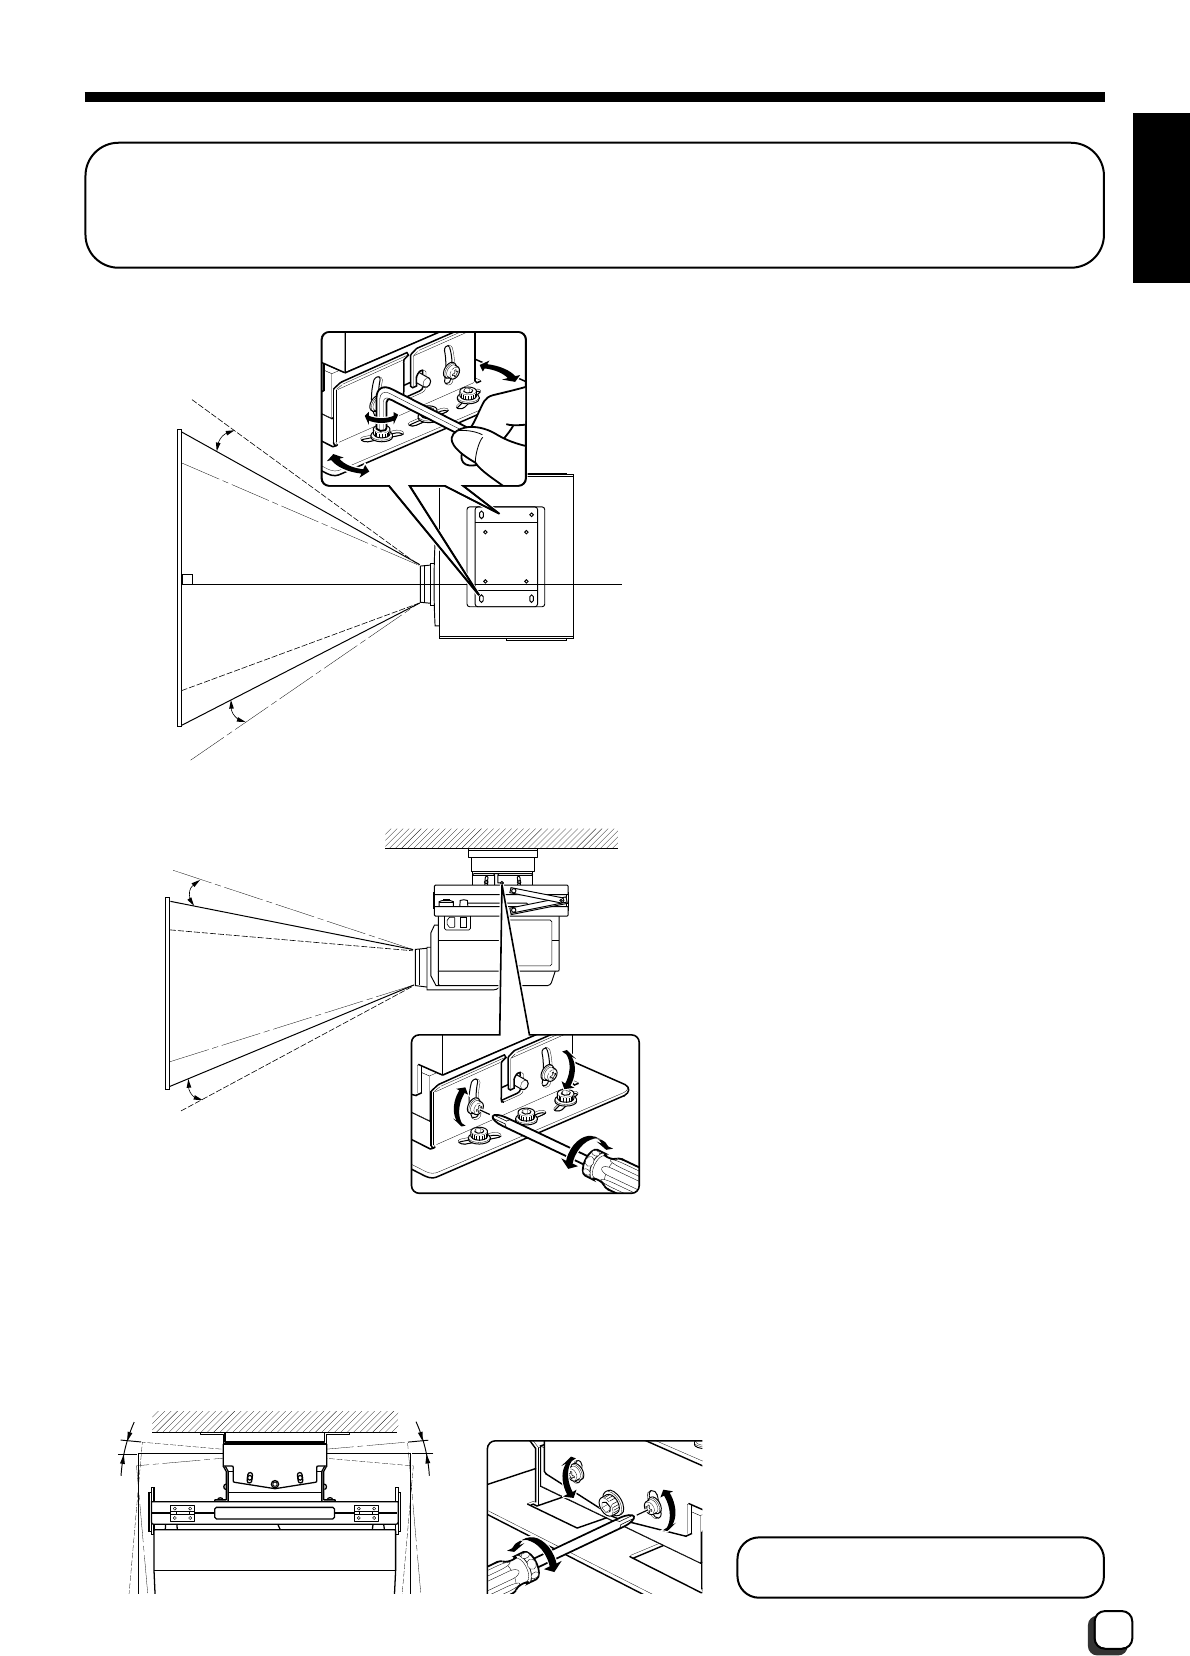
4 Center the projected image on the screen
vertically and then fasten the projector
securely by tightening the bolts.
5 Use the tilt adjustment screws (4 locations: 2
in front and 2 at the rear) to adjust the
projector so that the projected image is not
tilted in relation to the screen, then securely
tighten the screws.
15˚
15˚
7˚
7˚
5˚
5˚
PROJECTION ANGLE ADJUSTMENTS
Pre-adjustment Operations
· Look at the projector instruction manual and turn on the power.
· Use the zoom lens to match the projected image size to the size of the screen.
Perform the above operations before starting the projection angle adjustments.
Horizontal angle adjustment (top view)
Vertical angle adjustment (side view)
Tilt angle adjustment (rear view)
Repeat the above adjustments if the
projected image is still unsatisfactory.