4
Before Installation
7 Accessaries
• Label (x 1): For placing to the rear panel and the remote control of the monitor after installing
the Input Card.
• Slot cover (x 1): For covering the blank slot.
7 Preparation
•Wear gloves to protect your hands from metal parts on the Input Card’s board.
•You will need a 6 mm Phillips screwdriver.
•Turn off the monitor’s main power and unplug the power cable from the AC outlet.
• Place the monitor with its LCD panel side down on a soft cloth so as not to damage the LCD panel.
7 Cautions
• Do not touch the terminals or board pattern of the Input Card to keep it from being damaged by
static electricity.
• Do not damage the Input Card’s connection terminal.
• Do not put anything into the Input Card’s holes or intakes.
• Do not force the Input Card into the monitor’s slot.
• Attach the slot cover on the monitor’s slot in which no Input Card is installed.
• Attach the Input Card before mounting the monitor on the stand or wall mounting unit.
Installation
7 Installation procedure
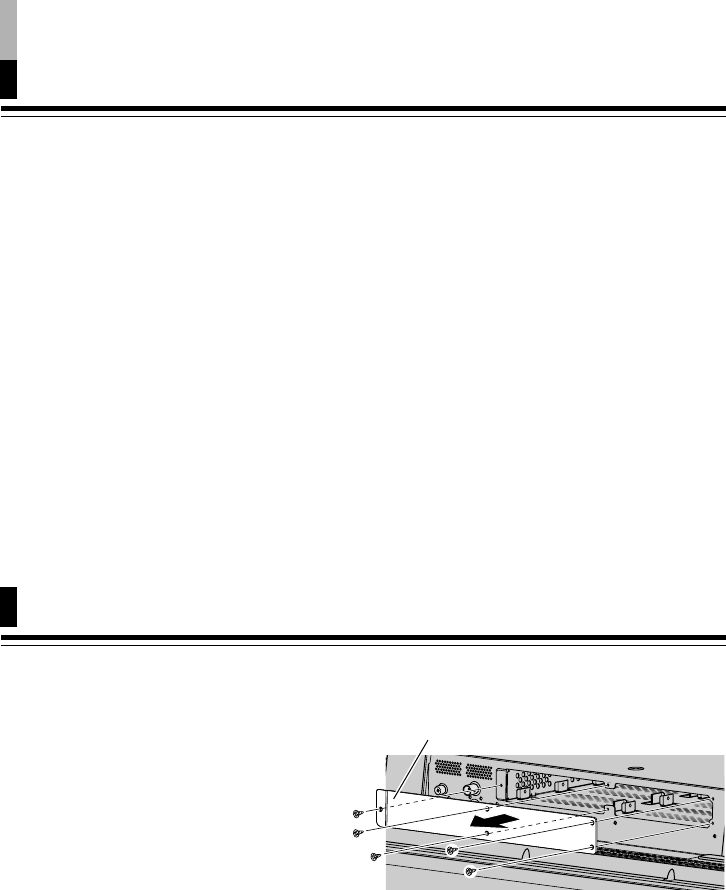
1.
Remove the slot cover from the
slot on the bottom side of the
monitor.
The monitor in the illustration is GM-H40L2.
Slot cover
01_IF-CF01PNG_EN-f.p65 06.3.17, 10:41 AM4


