


1
INSTRUCTIONS
Model
VM-4200
Thank you for purchasing this JVC Monitor.
Before using the monitor, read this manual carefully so
that you know how to use the Monitor correctly.
Refer to this manual whenever questions or problems
about operation arise. Be sure to read and observe the
safety precautions.
Keep this manual where the user can see it easily.
* Installation and removal require special expertise.
Consult your product dealer for details.
Contents
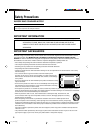
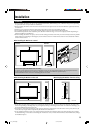
* This monitor does not have the following input terminals—VIDEO A, VIDEO B, and
COMPONENT/RGB B. To input video, S-video, and component signals, you need to install
video input unit (IF-C42P1G), which is separately purchased.
Ask your dealer to install the video input unit.
Page
Safety Precautions .................................................... 2
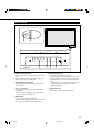
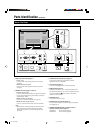
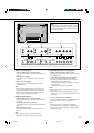
Parts Identification .................................................... 4
• Remote Control ................................................... 4
• Monitor: Front View ............................................. 5
• Monitor: Rear Views ............................................ 6
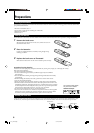
Preparations .............................................................. 8
• Checking the Accessories ................................... 8
• Installing the Batteries......................................... 8
• Attaching the Ferrite Core ................................... 8
Installation ................................................................. 9
• Precautions ......................................................... 9
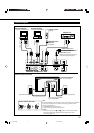
Connections ............................................................ 10
• Precautions ....................................................... 10
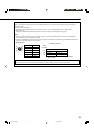
• Available Signals ............................................... 10
• Connection Diagrams ....................................... 11
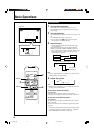
Basic Operations ..................................................... 14
• Daily Operations ............................................... 14
• Changing the Aspect Ratio ............................... 15
Video Adjustments .................................................. 16
• Adjusting the Picture Quality ............................. 16
• Adjusting the Screen Size and Position ............ 17
• Adjusting the Color Temperature....................... 19
• Adjusting the White Balance ............................. 19
• Changing the Aspect Ratio ............................... 21
• Setting the Receivable Signal Types ................. 21
• Setting the COMPONENT/RGB B Input ........... 22
• Changing the Resistance of the RGB B Input
Terminals........................................................... 23
•
Resetting the Function Selection Menu Settings ..
23
Page
Other Convenient Functions ................................... 24
• Showing On-screen Display .............................. 24
• Confirming the Use Time .................................. 25
• Showing the On-screen When Changing
the Input Mode .................................................. 25
• Prohibiting the Monitor’s Button Operations...... 26
• Setting the Remote-Controllable Input .............. 27
• Setting the High-Definition Signal Types ........... 27
• Setting the Clock and the Power On/Off
Timer ................................................................. 28
• Using the Pixel Shift Function ........................... 29
• Using the Power Save Function ........................ 29
• Preventing the Afterimage Effect ...................... 30
• Refreshing the Screen ...................................... 31
• Checking the Timer Battery............................... 32
• Resetting All the Setup Menu Settings ............. 33
• Resetting All the Menu Settings ........................ 33
Menu Classifications ............................................... 34
• Main Menu ........................................................ 34
• Setup Menu....................................................... 36
Troubleshooting ....................................................... 38
• Self-diagnostic Indication .................................. 39
Specifications .......................................................... 40
01-03_VM-4200.p65 03.7.23, 9:29 AM1