


Replacements and Installations
SM5440-1 – 18NOV97 23
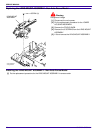
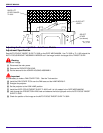
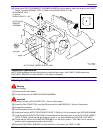
Installing the FOCUS SHAFT ASSEMBLY
Important
Do the adjustments for the PHOTOCELL NULL and AUTO-FOCUS CLAMP after installation. See the Adjustments
section.
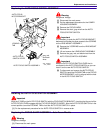
Replacing the FOCUS SHAFT ASSEMBLY - Non Auto-Focus Models
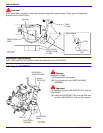
Warning
Dangerous Voltage
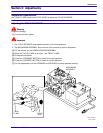
[1] Disconnect the main power.
[2] Do the replacement procedure for the LOWER HOUSING ASSEMBLY.
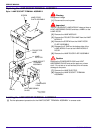
[3] Remove the FOCUS KNOB.
[4] Remove the 3 SCREWS from the LENS MOUNT ASSEMBLY.
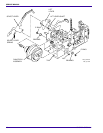
[5] Lift and remove the LENS MOUNT ASSEMBLY.
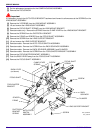
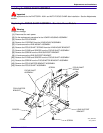
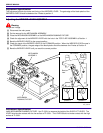
[6] Remove the FOCUS SHAFT SPRING from the LENS MOUNT BRACKET.
[7] Remove the E-RING and SPACER from the FOCUS SHAFT ASSEMBLY.
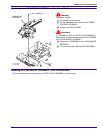
[8] Remove the SCREW from the LENS SUPPORT BRACKET.
[9] Lift and remove the LENS SUPPORT BRACKET.
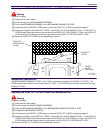
[10] Remove the E-RING and SPACER from the FOCUS SHAFT ASSEMBLY.
[11] Remove the SCREW from the FOCUS MOTOR BRACKET ASSEMBLY.
[12] Remove the FOCUS MOTOR BRACKET ASSEMBLY.
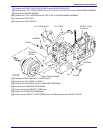
[13] Remove the FOCUS SHAFT ASSEMBLY.
A091_0020HA
SCREW
E-RING
SPACER
ASSEMBLY
FOCUS SHAFT
FOCUS MOTOR
BRACKET
BRACKET
LENS SUPPORT
SCREW
A091_0020HCA
FOCUS SHAFT
SPRING