D1200mkII EasyStart
Now to record a blues guitar solo:
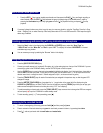
7. Press the REC [ ] key to enter standby record mode, and then press the PLAY [] key, and begin recording Ä
when finished, press the STOP [] key and reset the song to the beginning Ä Play-enable tracks 1 and 2 by
pressing the track status keys until they light green Ä Press [] to playback the song, and press [] to stop
playback.
! If you want to keep the demo song intact, copy the song to a new song location, using the “CopySong” function in Song
mode – “EditSong” tab, or make a backup of the factory demo data to CD or via USB connection. Then keep the original
demo song Protected.
Creating a new song and recording with any instrument or microphone
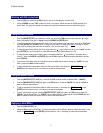
1. Select the “New” button in the display using the CURSOR and [ENTER] keys Ä select the “Song Type” as
“16Bit/12Track” and the “Mixer Set” as “New” Ä press “OK”. The display will indicate “NEW SONG” in the next
available empty song location.
! You can rename your song by selecting the “Rename” button in the display.
Assigning inputs and recording
2. Press the [INPUT/OUTPUT/SOLO] key.
3. Connect your audio source (mic, keyboard L/R outputs, etc.) to the analog inputs on the top of the D1200mkII. If you are
connecting a guitar to the D1200mkII directly, use the GUITAR IN jack on the front panel.
4. Use the CURSOR keys to move to the track to be recorded, highlighting the display “icon” that looks like a phone jack Ä
Use the DIAL to set the input (Note: if using the GUITAR IN jack, you will need to dial-in “1” as the input source for the
desired record track, or simply use track 1, default assigned to input 1, as the record track for guitar).
5. Press the [TRACK SELECT] keys for each of the tracks that you assigned in the previous step, so that the green LED
changes to orange.
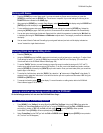
6. Press the [METER/ TRACK VIEW] key, then select the “” popup button in the upper left of the display using the
CURSOR and [ENTER] keys
Ä Select “PreFdr” from the list and then press the [YES/OK] key ÄNow you can play your
audio sources and adjust the levels so that they do not clip (“CLP” line in display).
7. To enable recording on those tracks, press the [TRACK SELECT] keys one more time to change the LED from orange to
red, and press [ ] to put the D1200mkII in record standby mode.
8. To start recording, press []. To stop recording, press [].
Listening to the recorded tracks
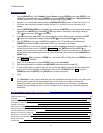
9. To return to the beginning of the song, press and hold [] and then press [] once.
10. Press to set each of the track status keys to green for each track you want to listen to, by pressing them twice.
11. Press [] and set your levels with the track faders and master fader.
5


