


REMARKS
214
5
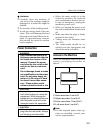
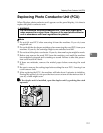
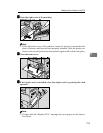
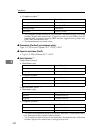
Important
❒ Remove the photo conductor unit keeping the unit parallel to the ground
as shown in the illustration. Otherwise, the toner in the unit might scatter.
❒ Do not touch the inside of the unit or the green parts, after the black pro-
tection sheet is removed.
I
II
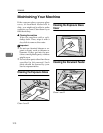
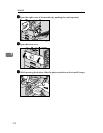
I
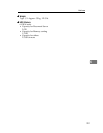
Align the new photo conductor unit onto the rail of the machine. Slide the
unit all the way into the machine.
J
JJ
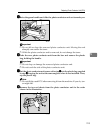
J
Push the unit into the machine until it clicks into place.
K
KK
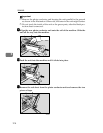
K
Remove the red sheet from the photo conductor unit and remove the two
pieces of tape.