1. Run DeviceInstaller
Click: Start > Programs > Lantronix > DeviceInstaller > DeviceInstaller.
2. Click the Search icon and select the unit from the list of Lantronix device
servers on the local network.
3. Click the Assign IP icon.
4. If prompted, enter the MAC address (on the product label) and click Next.
5. Select Assign a specific IP address and click Next.
6. Enter the IP address. The Subnet mask displays automatically
based on the IP address. If desired, you may change it. On a local
network, you can leave the Default gate way blank (all zeros). Click
Next.
7. Click the Assign button and wait several seconds until a confirma-
tion message displays. Click Finish.
•
Check the wireless settings for the Wi-Fi adapter: Adhoc, SSID =
Lantronix Initial Adhoc Network, No Encryption.
•
Check that the Wi-Fi adapter is connected and associated to the
PremierWave XN.
PremierWave
®
XN Quick Start Guide
REQUIREMENTS: Computer must have a working Wi-Fi adapter run-
ning Windows as the Operating System (OS).
3. Respond to the installation wizard prompts.
1. Download the latest version of DeviceInstaller from
http://www.lantronix.com/downloads. The minimum version required
version for DeviceInstaller is 4.3.0.4.
2. Run the executable to start the installation process on the computer
being used to configure the PW-XN.
1
INSTALL DEVICEINSTALLER™
© 2011, Lantronix, Inc. Lantronix is a registered trademark, and DeviceInstaller is a trademark of Lantronix, Inc. All rights reserved. 900-605 Rev A1 02/12
If DeviceInstaller is unable to discover the PW-XN:
•
In Windows Device Manager, ensure that the wireless Wi-Fi adapter is
installed and working properly
•
Check that the correct IP address (169.254.1.10) and Subnet mask
(255.255.0.0) is assigned to the Wi-Fi adapter
3
IP ADDRESS CONFIGURATION
4
TROUBLESHOOTING
1. Configure the wireless Wi-Fi adapter to connect wirelessly to the PW-XN
For example, if using Windows utility in XP select Start >> Control Panel >>
Network Connections, right click on Wireless Connection >> Properties >>
Wireless Networks tab >> click Add under Preferred Network:
a. Set the Network name (SSID) to “Lantronix Initial Adhoc Network”
b. Set Encryption to None (no encryption)
c. Set the option to “Adhoc” for the Connection type
d. Select “Auto” for Wireless mode
e. Start >> Control Panel >> Network and Internet Connections,
right click on Wireless Connection >> Properties >> General
tab, select Internet Protocol (TCP/IP) >> click Properties.
Assign the following IP address and Subnet mask to the Wi-Fi
adapter:
IP address: 169.254.1.10 Subnet mask: 255.255.0.0
2. Power up the unit with the included power supply.
2
QUICK CONNECT
CONTACT
For technical support queries, visit
http://www.lantronix.com/support
or call (800) 422-7044 Monday – Friday from
6:00 a.m. – 5:00 p.m., Pacific Time, excluding holidays.
Latest Firmware
For the latest firmware downloads, visit
http://www.lantronix.com/support/downloads
IP Address Assignment Tutorial
To view a tutorial on how to assign an IP address, visit
http://www.lantronix.com/support/tutorials
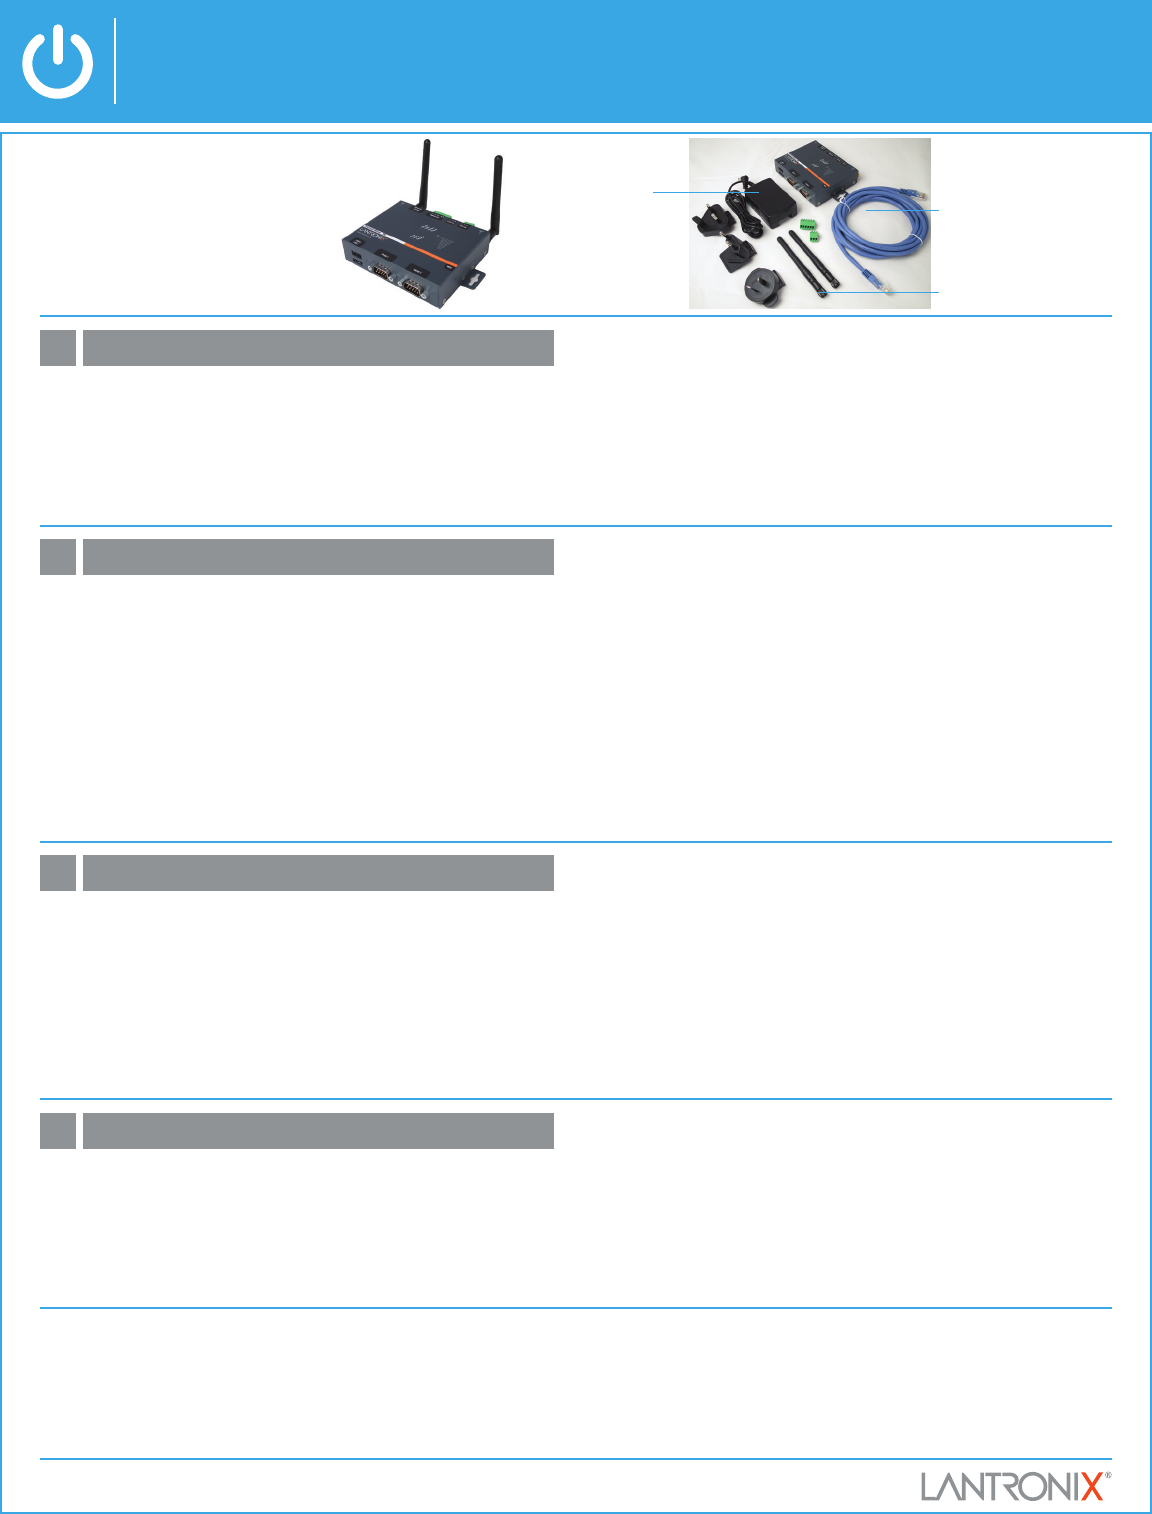
WHAT’S IN THE BOX
Ethernet Cable
WiFi Antennas
PremierWave® XN Device Server
Power Supply


