Figures
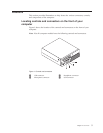
1. Controls and connectors . . . . . . . . .5
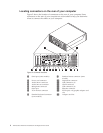
2. Connector locations . . . . . . . . . .6
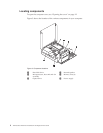
3. Component locations . . . . . . . . . .8
4. System board parts locations . . . . . . .9
5. Opening the cover . . . . . . . . . .12
6. Pivoting the drive bay . . . . . . . . .13
7. Retaining clips . . . . . . . . . . .14
8. Positioning the memory module . . . . .14
9. Installing the adapter card . . . . . . .15
10. Drive bay locations . . . . . . . . . .17
11. Installing a drive in bay 2 . . . . . . . .18
12. Connecting the five-wire power cable and
signal cable to the drive . . . . . . . .19
13. Removing the old battery . . . . . . . .20
14. Installing a new battery . . . . . . . .20
15. Power-supply-retaining screws . . . . . .21
16. Power connectors on the system board 22
17. Removing the power supply . . . . . . .22
18. Accessing the heat sink . . . . . . . .23
19. Removing the heat sink and fan assembly 24
20. Removing the hard disk drive . . . . . .25
21. Removing the hard disk drive from the bracket 26
22. Accessing the optical drive . . . . . . .27
23. Removing the optical drive . . . . . . .27
24. Installing the optical drive . . . . . . .28
25. Accessing the system board . . . . . . .29
26. Removing the memory module . . . . . .29
27. Installing the memory module . . . . . .30
28. Installing an adapter card . . . . . . . .31
29. Removing the card reader . . . . . . . .32
30. Keyboard connectors . . . . . . . . .33
31. Mouse connectors . . . . . . . . . .34
32. Cable routing . . . . . . . . . . . .35
33. Integrated cable lock . . . . . . . . .37
© Copyright Lenovo 2008 v


