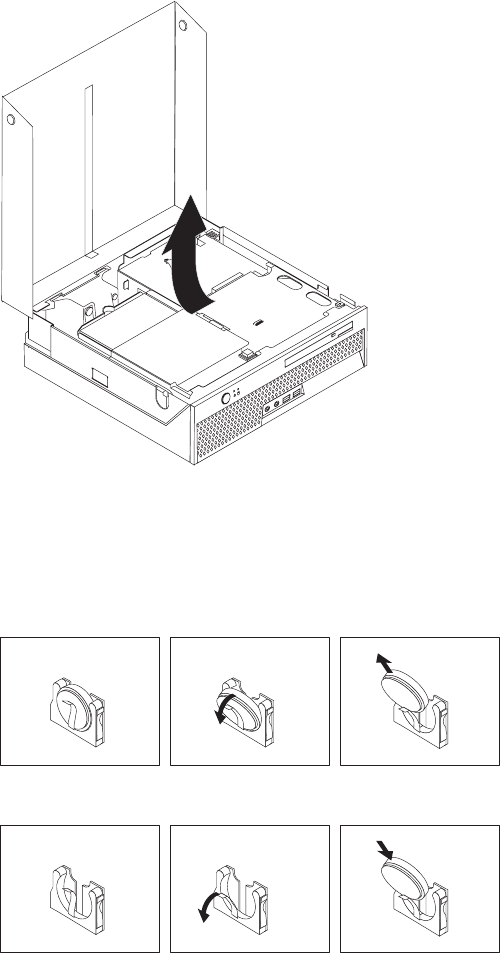
3. Locate the PCI riser. See “Locating components” on page 20.
4. Remove the PCI riser to gain access to the battery. See “Installing a PCI
adapter” on page 23.
5. Locate the battery. See “Identifying parts on the system board” on page 20.
6. Remove the old battery using the following illustration.
7. Install the new battery using the following illustration.
8. Reinstall the PCI riser.
9. Close the computer cover, and plug in the power cord. See “Closing the cover
and connecting the cables” on page 31.
Note: When the computer is turned on for the first time after you replace the
battery, an error message might be displayed. This is normal after
replacing the battery.
10. Turn on the computer and all attached devices.
11. Use the Setup Utility program to set the date and time and any passwords.
See Chapter 5, “Using the Setup Utility,” on page 41.
Chapter 3. Installing options 29
