


Connecting drives
The steps to connect a drive are different depending on the type of drive you are
connecting. Use one of the following procedures for your drive connection.
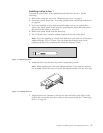
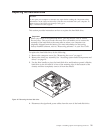
Connecting a parallel ATA drive:
1. Locate the two-connector signal cable that comes with your computer or with
the new drive.
2. Locate the IDE connector on the system board. See “Locating parts on the
system board” on page 8.
3. Connect one end of the signal cable to the drive and the other to the IDE
connector on the system board.
4. Locate the extra four-wire power connector labelled P4 and connect it to the
drive.
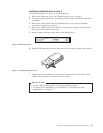
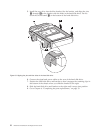
Connecting a serial ATA drive: A serial optical or hard disk drive can be
connected to any available SATA connector.
1. Locate the signal cable that comes with the new drive.
2. Locate the available SATA connector on the system board. See “Locating parts
on the system board” on page 8.
3. Connect one end of the signal cable to the drive and the other to the available
SATA connector on the system board.
4. Locate one of the extra five-wire power connectors and connect it to the drive.
What to do next:
v To work with another option, go to the appropriate section.
v To complete the installation, go to Chapter 4, “Completing the parts
replacement,” on page 33.
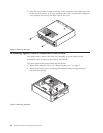
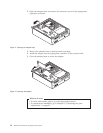
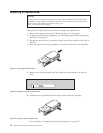
Figure 16. Connecting a parallel ATA drive
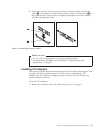
Figure 17. Connecting a serial ATA drive
18 Hardware Installation and Replacement Guide