


Replacing the heat sink and fan assembly
Attention
Do not open your computer or attempt any repair before reading the “Important safety
information” in the Safety and Warranty Guide that was included with your computer. To
obtain copies of the Safety and Warranty Guide, go to
http://www.lenovo.com/support.
This section provides instructions on how to replace the heat sink and fan
assembly.
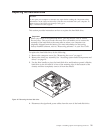
1. Remove the computer cover. See “Removing the cover” on page 9.
2. Disconnect the microprocessor fan cable from the system board. See “Locating
parts on the system board” on page 8.
3. Remove the fan plenum from the heat sink and fan assembly. See “Locating
components” on page 7.
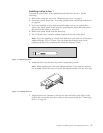
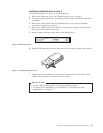
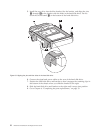
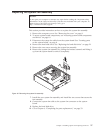
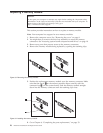
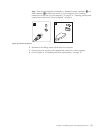
4. Remove the four screws 1 securing the heat sink and fan assembly to the
system board.
Note: You might have to gently twist the heat sink to free it from the
microprocessor.
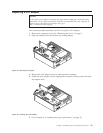
5. Lift the heat sink and fan assembly off the system board.
Figure 30. Removing the heat sink and fan assembly
Chapter 3. Installing options and replacing hardware 25