


If you see Ready on the printer display screen after you have replaced a photoconductor, follow Steps 1 through 7
below.
1 To specify the replaced photoconductor, press .
Supplies Menu appears.
2
Press .
Replace Supply appears.
3
Press .
4
Press the down arrow button until All, Cyan photoconductor, Magenta photoconductor,
Yellow photoconductor, or Black photoconductor appears, depending on the photoconductor you
just replaced.
5
Press .
<color> photoconductor replaced appears.
Yes appears.
6
Press .
7 Press until Ready appears.
The task is complete.
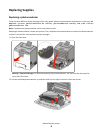
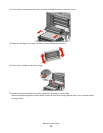
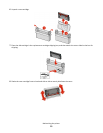
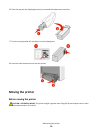
Replacing a toner cartridge
When 88 Replace <color> cartridge, 88 <color> cartridge nearly low, or 88 <color>
cartridge low appears on the printer control panel, or when print becomes faded, try to extend the life of the
specified cartridge.
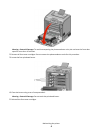
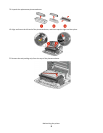
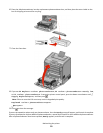
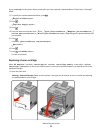
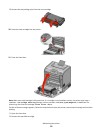
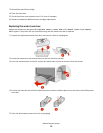
1
Open the front door.
Warning—Potential Damage: Make sure the printer is not open for 10 minutes or more to avoid overexposing
the photoconductor units to light.
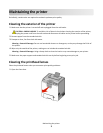
Maintaining the printer
11