


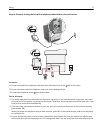
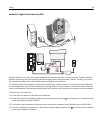
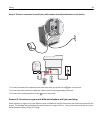
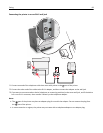
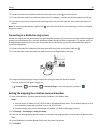
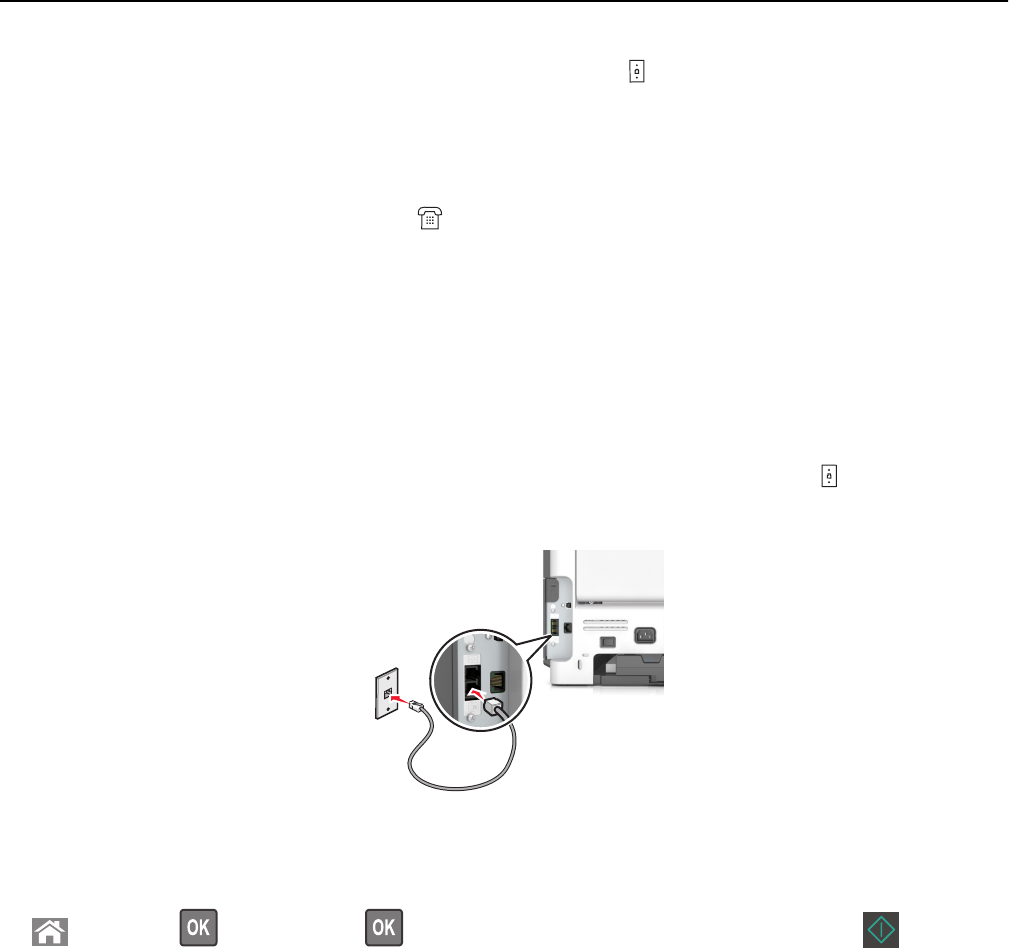
1 Connect one end of the telephone cable that came the printer to the port of the printer.
2 Connect the other end of the telephone cable to the RJ‑11 adapter, and then connect the adapter to an N port.
3 If you want to connect a telephone and answering machine to the same wall jack, then connect the devices as
shown.
Note: Do not remove the adapter plug from the
port of the printer if you are connecting to a serial or cascaded
telephone system.
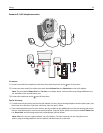
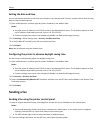
Connecting to a distinctive ring service
A distinctive ring service may be available from your telephone company. This service lets you have multiple telephone
numbers on one telephone line, with each telephone number having a different ring pattern. This may be useful for
distinguishing between fax and voice calls. If you subscribe to a distinctive ring service, then follow these steps to
connect the equipment:
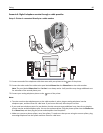
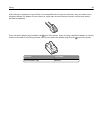
1 Connect one end of the telephone cable that came with the printer to the printer LINE port .
2 Connect the other end of the telephone cable to an active analog telephone wall jack.
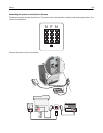
3 Change the Distinctive Rings setting to match the setting you want the printer to answer.
From the printer control panel, navigate to:
> Settings > > Fax Settings > > Distinctive Rings > select the ring tone you want >
Setting the outgoing fax or station name and number
1 Open a Web browser, and then type the printer IP address in the address field.
Notes:
• View the printer IP address in the TCP/IP section in the Network/Ports menu. The IP address appears as four
sets of numbers separated by periods, such as 123.123.123.123.
• If you are using a proxy server, then temporarily disable it to load the Web page correctly.
2 Click Settings > Fax Settings > Analog Fax Setup.
3 From the Fax Settings menu, type the name to be printed on all outgoing faxes in the Fax Name or Station Name
field.
4 In the Fax Number or Station Number field, enter the printer fax number.
5 Click Submit.
Faxing 85