


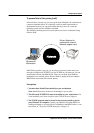

Configuring the adapter
3-4 PagePrinter Network Adapter: Utilities & Environments
Step 5: set the NetWare-specific information
1 On the NetWare Settings tab, set the print mode to PSERVER or
NPRINTER/RPRINTER.
If you need help deciding which mode to
use, see “Deciding whether to use NPRINTER/RPRINTER mode or
PSERVER mode” on page 5-7.
2 Fill in the other fields on the dialog box to configure the port for
NetWare print jobs.
If you need help, click the question mark button,
then click the field.
3 After you finished setting all the fields on this tab, click Apply.
4 On the NetWare Settings tab, click Manage Queues. You’ll be setting up
queues for the adapter to service.
5 In the Queue Manager dialog box, select existing queues or create new
queues for the adapter to service.
If you need help, click the question
mark button, then click the field.
6 When you finish setting up queues, click OK.
7 If you are using the Network Adapter, on the NetWare Settings tab, click
Advanced Settings. Fill in the fields.
If you need help, click the question
mark button, then click the fields you need help on.
8 After you finished with the Advanced Settings dialog, click OK.
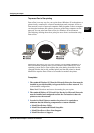
Step 6: enable the adapter port
1 On the NetWare Settings tab, enable the adapter port by putting a check-
mark in the Port Enabled box.
2 Click Apply to activate your changes.
3 MarkVision asks if you want to reset. Click Yes if you want to start using
the adapter for NetWare print jobs now.
Congratulations! Your adapter is ready to process NetWare print jobs.
-7.