


In Windows 7 or earlier
a
Click or Start.
b Click All Programs or Programs, and then select the printer program folder from the list.
c Navigate to:
Printer Home > select your printer > Scan
3 Select Email photo, Email document, or Email PDF.
Note: You can select Email document only when an OCR application is stored on your computer.
Scanning starts and the scan progress dialog appears. When the scan is finished, a new e‑mail message
is created with the scanned document automatically attached.
4 Compose your e‑mail message.
Note: If your e-mail program does not open automatically, then you can scan the document to the
computer, and then send it through e-mail as an attachment.
For Macintosh users
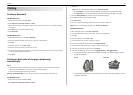
1 Load an original document faceup into the ADF or facedown on the scanner glass.
2 From the Finder, select Applications, and then launch the application you want to use.
Note: Use any application that supports both your printer and an e‑mailing option, such as Image
Capture.
3 From the list of devices, select your printer.
Note: For information on finding the list of devices, check the documentation that came with the
application, or search for Scanning an image in the Search field of the Help menu.
4 Adjust the scan settings as needed.
If applicable, click
?
on the preview dialog for more information.
5 Set the e‑mail application as the scan destination, and then start the scan job.
6 Compose your e‑mail message.
Scanning to a PDF
For Windows users
1 Load an original document faceup into the ADF or facedown on the scanner glass.
2 From the computer, do the following:
In Windows 8
From the Search charm, type Printer Home, and then navigate to:
Printer Home > select your printer > Scan > PDF
In Windows 7 or earlier
a
Click or Start.
b Click All Programs or Programs, and then select the printer program folder from the list.
c Navigate to:
Printer Home > select your printer > Scan > PDF
Scanning starts and the scan progress dialog appears.
3 Save the document as a PDF.
For Macintosh users
1 Load an original document faceup into the ADF or facedown on the scanner glass.
2 From the Finder, select Applications, and then launch the application you want to use.
Note: Use any application that supports your printer.
3 From the list of devices, select your printer.
Note: For information on finding the list of devices, check the documentation that came with the
application or search for Scanning an image in the Search field of the Help menu.
4 Adjust the scan settings as needed.
If applicable, click
?
on the preview dialog for more information.
5 Set the application that supports the PDF format as the scan destination, and then start the scan job.
6 Save the document as a PDF.
Canceling scan jobs
Press on the printer control panel, or click Cancel on the computer screen.
Scanning 25