


40
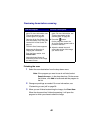
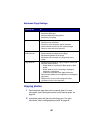
Previewing items before scanning
Finishing the scan
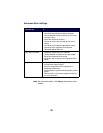
1 Select the scan destination from the drop-down menu.
Note: If the program you want to use is not listed, select
Search for more... in the drop-down box. On the screen
that follows, click Add to locate and add the program to
the list.
2 Change any settings as needed. For more information, see
“Customizing a scan job” on page 38.
3 When you are finished customizing the image, click Scan Now.
When the document has finished processing, it will open the
program to which you chose to send the image.
From the computer From the control panel
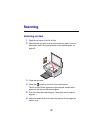
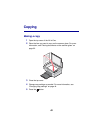
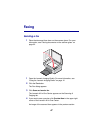
1 Place the item on the scanner
glass. For more information, see
“Placing documents on the
scanner glass” on page 32.
2 Open the All-In-One Center. For
more information, see “Using the
Lexmark All-In-One Center” on
page 15.
The All-In-One Center appears.
3 Make sure the Scanning &
Copying tab is selected.
4 From the Scan section, click
Preview Now.
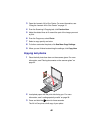
5 Adjust the dotted lines to fit
around the portion of the image
you want to scan.
1 Place the item on the scanner
glass. For more information, see
“Placing documents on the
scanner glass” on page 32.
2 Press the button.
On the computer screen, the
All-In-One Center appears with a
preview of the item.
3 Adjust the dotted lines to fit
around the portion of the image
you want to scan.