LNPAP100T 108M Wireless PCI Adapter User Guide
- 4 -
Chapter 2: Installation Guide
2.1 Hardware Installation
2.1.1 LNPAP100T Hardware Installation
To install the adapter, follow these steps listed below:
1. Turn off your desktop PC and disconnect the power.
2. Open your PC case and locate an available PCI slot on the motherboard. Remove
the metal slot cover on the back of the PC. Check with your computer manufacturer
for instructions if needed.
3. Slide the PCI Adapter into the PCI slot. Make sure that all of its pins are touching the
slot's contacts. Once the adapter is firmly in place, secure its fastening tab to your
PC's chassis with a mounting screw. Then, close your PC case.
4. Reconnect your PC’s power and turn on your desktop PC.
2.2 Software Installation
2.2.1 Overview
The Adapter’s Setup Wizard will guide you through the Installation procedure for Windows
98Se, ME, 2000, XP. The Setup Wizard will install the Wireless Client Utility
and drivers.
When you install the ha
rdware be
fore installing the software, the system will prompt
“Found New Hardware Wizard” window, click Cancel, and run the Setup Wizard program
on the CD-ROM.
The Setup steps for Windows 98Se, Me, 2000 and XP are very similar. The following
setup steps are for Windows 2000.
2.2.2 Software Installation for Windows 2000
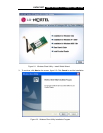
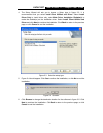
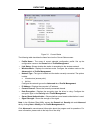
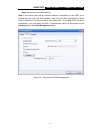
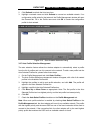
1. Insert the Resource CD into your CD-ROM drive, click Start and choose Run. In the
field that appears, enter F:\XXX\Setup.exe (if “F” is the letter of your CD-ROM drive;
XXX is the setup program path, which is labeled on the Resource CD), figure 2-1
should then appear. The above instructions should be followed if the Installation
Wizard does not start automatically from the CD. Please check the path for the
correct installation software, they are to find in two different folders on the CD. The
Driver98 folder contains the drivers for Windows 98SE and Me, the DriverXP folder
contains the drivers for Windows 2000 and XP.
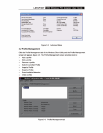
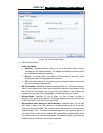
2. You can click Cancel to end the installation on the Preparing Setup screen, figure 2-1.
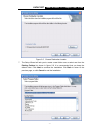
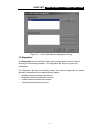
Otherwise, the Setup Wizard will display a screen similar to that shown in figure 2-2
after a moment.