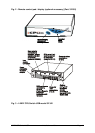
LINDY CPU Switch USB Installation and Use Page 21
3. Using the LINDY CPU Switch USB
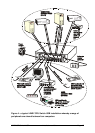
This section explains the general operation of the LINDY CPU Switch USB. We
recommend that you read this section before starting to use the product.
3.1 Power on status
At power on the LINDY CPU Switch USB selects computer number 1 and displays
’1’ on the front panel numerical display.
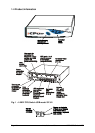
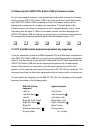
3.2 Front panel key
The front panel key is used to select which channel (1 to 4) is currently connected to
the user ports (coloured green on the rear panel) and which is currently controlled
by the shared keyboard, mouse and monitor. Pressing the key during normal
operation will cause the next computer channel to be selected.
Depending on the position of option switch 8, pressing the front panel key will either
select the next active computer channel or the next computer channel in numerical
sequence (1,2,3,4,1,2,3 etc.).
Using the front panel key you may cycle through the available computer channels
until you find the required port. When the LINDY CPU Switch USB detects that no
new key presses have occurred for a second it will start the channel lock-on
process. During the lock-on process the display will flash to indicate that the LINDY
CPU Switch USB is currently waiting for the enumeration guard period (see section
2.4.1). The channel may not be changed again until this process is complete and
the display stops flashing.
The front panel key may be used to select autoscan mode. Autoscan mode is
activated by holding the key down for more than 5 seconds until the display starts to
show a rotating segment. Autoscan mode may be cancelled by pressing the front
panel key whilst within autoscan mode.