Chapter 3
Advanced Configuration
3
Wireless-N Access Point with Dual-Band
Chapter 3:
Advanced Configuration
After setting up the Access Point with the Setup Wizard
(located on the CD-ROM), the Access Point will be ready
for use. However, if you want to change its advanced
settings, use the Access Point’s browser-based utility. This
chapter describes each page of the utility and each page’s
key functions. You can access the utility via a web browser
on a computer networked with the Access Point.
The browser-based utility has these main tabs: Setup,
Wireless, Administration, and Status. Additional tabs will
be available after you click one of the main tabs.
How to Access the Browser-based Utility
In order to access the browser-based utility, you need a
web browser and the IP address of the Access Point.
If the Access Point is connected to a network with a DHCP
server (usually the network router), then the Access Point will
obtain its IP address from the DHCP server.
To determine
the Access Point’s IP address, look for it in
your router’s DHCP client table. (Refer to your router’s
documentation for instructions on accessing the DHCP
client table.)
If you cannot find the Access Point’s IP address, then reset
the Access Point. Press the Reset button on the Access
Point for approximately five seconds, using a straightened
paper clip. This will restore the Access Point’s factory
default settings. The Access Point will then request an
IP address from the DHCP server (usually the network
router).
After you have determined the Access Point’s IP address,
launch your web browser, and enter the Access Point’s IP
address in the Address field. Press Enter.
A password request screen appears. (Non-Windows XP
users will see a similar screen.) Leave the User name field
blank. Enter the password you created during the Setup
Wizard. If you did not create a new password, use the
default password admin. (You can set a new password
from the Administration > Management screen.) Click OK
to continue.
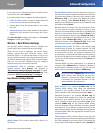
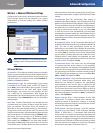
Password Screen
NOTE: If the password request screen does not
appear, wait two minutes and try again.
Setup > Basic Setup
The first screen that appears is the Basic Setup screen.
Use this screen to change the browser-based utility’s
language, or to change the Access Point’s wired, Ethernet
network settings.
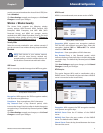
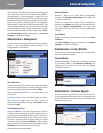
Setup > Basic Setup (Automatic Configuration - DHCP)
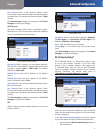
Setup > Basic Setup (Static IP)
Language
Language This is used to set the language displayed by
the browser-based utility. Select the desired language
from the drop-down menu.
Network Setup
This section determines if the Access Point’s IP address is
obtained automatically from a DHCP server, such as your
network router (Automatic Configuration - DHCP), or set
manually (Static IP).
Access Point IP If your network has a DHCP server,
such as your network router, assigning IP addresses to
your network devices, then keep the default, Automatic
Configuration - DHCP. The Access Point will request an
IP address from the DHCP server (usually the network
router).


