Shared Storage Plus
+
Quick Start Guide
For more detailed information, please refer to the Maxtor Shared Storage Plus User’s Guide located on the Documentation CD.
2
2
Power up your drive
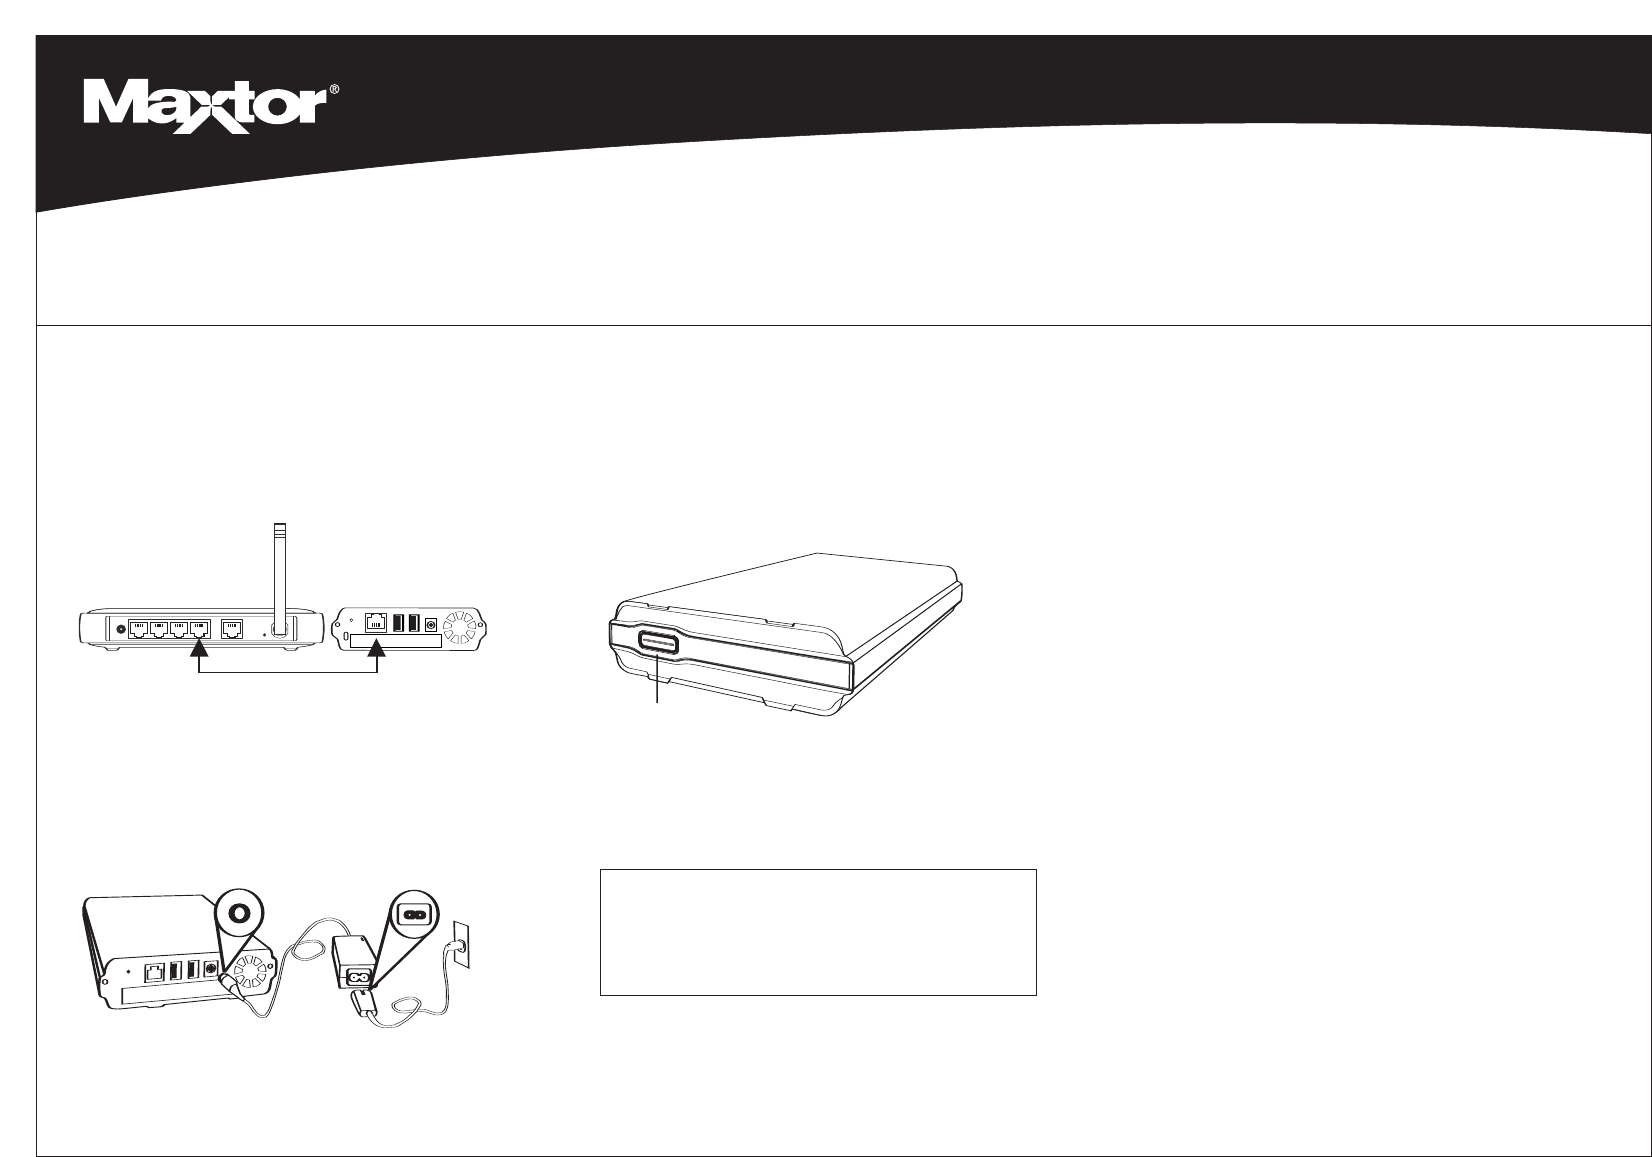
Press the power button on the front of your new Maxtor Shared
Storage Plus drive.
Your drive will now start. The start up process can take up to one
minute to complete.
• The light inside of the button will turn yellow.
• When the light pulses green, your drive is ready and you can go to
step 3.
3
Set up your drive
1
Connect your drive
Connect the Ethernet cable
1. Plug one end of the supplied Ethernet cable into your network,
router or switch.
2. Plug the other end of the Ethernet cable into the Ethernet port on
your Shared Storage Plus drive.
Connecting the power
1. Plug the round female connector from the power adapter into the
drive’s power connector.
2. Plug the two-pin female connector on the power cord into the
power adapter.
3. Plug the standard electrical plug from the power adapter into your
power source.
Power
Button
1. Insert the Maxtor Quick Start CD.
2. Select your language and click OK.
3. The InstallShield Wizard screen will appear, followed by the Welcome
screen. Click Next.
4. When the License Agreement appears, click Yes.
5. The Choose Destination Location screen will appear. To change the
installation location, click
Browse and select a new location. Click Next.
6. The Setup Status will appear as the software is installed, followed by
the
InstallShield Wizard Complete screen. Click Finish to restart your
system.
7. When the system is ready, double-click on the Maxtor Quick Start icon
on your Desktop.
8. The Quick Start software will open with the message: “Locating Shared
Storage drives on Network.” When found, you will see the Network ID
number and IP address for your drive in a drop-down menu. For
example: MSS-000335 (192.168.0.5)
9. Click Next. The next screen will show the Network ID of your drive. Click
Manage to set an administrative password, and then click Next to Set
up Shared Storage
on this computer. When the Main Menu appears,
click on the
Shared Storage Setup icon. Choose an account type
(
Public Account or Private Account) and click Next.
10. Enter a Name for the new account and click Next.
11. Select your account type (Home or Business use) and click Finish. The
Quick Start software will now create your new user account and the
appropriate folders for the account.
Note: Maxtor Quick Start software must be installed on each Windows
2000/XP system in order for each user to take advantage of a Personal
folder.
Ethernet Ports
Router/Switch
Using the Backup & Restore Feature
See page 15 of the Shared Storage Plus User’s Guide, located on
the Documentation CD, for more information.
Media Serving
See page 66 of the Shared Storage Plus User’s Guide, located on
the Documentation CD, for more information.
