


EN – 6
Overview
POWER STATUS
VIDEOKEYSTONE
ENTER
MENU
COMPUTER
AUTO POSITION
4
1
2
3
5
6
7
8
9
POWER STATUS
VIDEOKEYSTONE
ENTER
MENU
COMPUTER
AUTO POSITION
10
11
10
1
2 3 4 5
7 8 9
6
2
10
5431
9 8 67
11
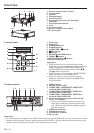
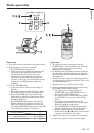
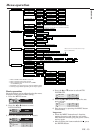
1 Remote control sensor (Front)
2 Control panel
3 Speaker
4Terminal panel
5 Air outlet grille
6 Kensington Security Lock Standard
connector
7 Foot adjustment button
8 Lens
9 Air outlet grille
10 Remote control sensor (Rear)
11 Air inlet grille
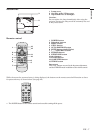
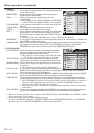
Control panel
1Focus ring
2Zoom ring
3 POWER indicator
4 POWER button
5 COMPUTER /
$$
$$
$ button
6 MENU button
7
}}
}}
} button
8 KEYSTONE/ENTER button
9 VIDEO /
%%
%%
% button
10 AUTO POSITION /
{{
{{
{ button
11 STATUS indicator
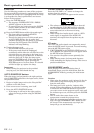
Important:
•While the menu or the screen for the keystone
adjustment is being displayed or image capturing is
being executed, the COMPUTER, VIDEO, and
AUTO POSITION buttons function as the $, %,
and { buttons respectively.
• While the menu is on the screen, the KEYSTONE
button functions as the ENTER button.
• While the screen for password entry is being
displayed, all buttons except the POWER button
will not function.
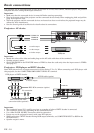
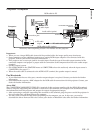
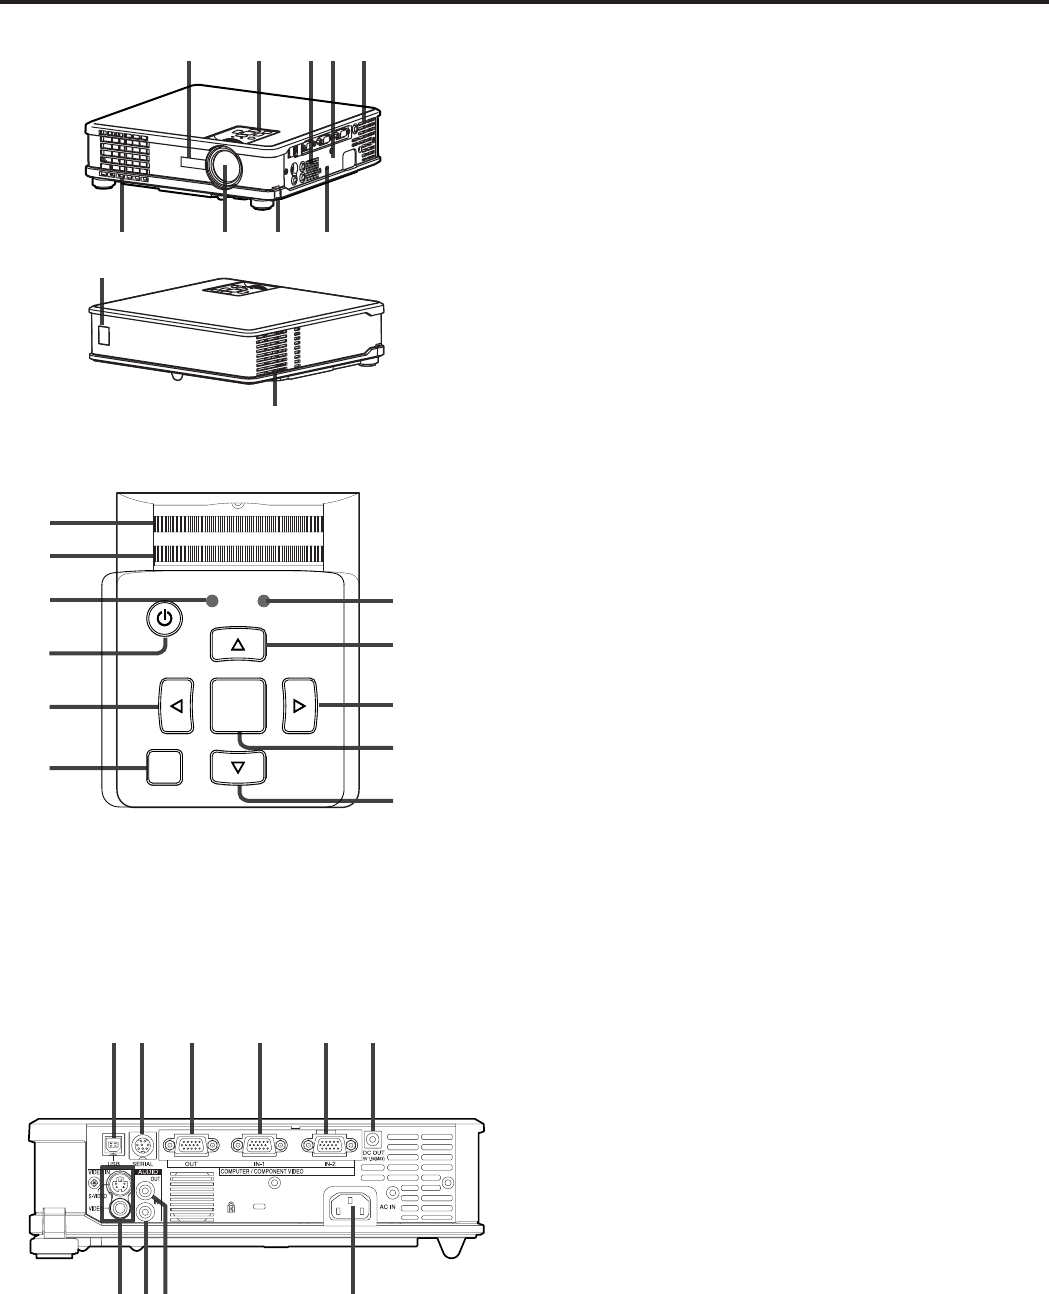
Terminal panel
1 USB terminal
2 SERIAL terminal (8P)
3 COMPUTER / COMPONENT VIDEO OUT
terminal (Mini D-SUB 15P)
4 COMPUTER / COMPONENT VIDEO IN-1
terminal (Mini D-SUB 15P)
5 COMPUTER / COMPONENT VIDEO IN-2
terminal (Mini D-SUB 15P)
6 Power terminal for wireless LAN unit (DC
OUT 5 V 1.5 A(MAX))
• Do not use the power terminal as a power for
other devices than the specified wireless LAN
unit. (Wireless LAN unit isn’t packaged together
with the projector.)
7 VIDEO IN terminals
8 AUDIO IN terminal
9 AUDIO OUT terminal
10 Power jack
Important:
• By connecting your computer to the USB terminal using an optional USB cable, you can use the mouse control
function of the computer with the optional remote control (R-SC1). (The provided remote control can't use the
function.) Ask your dealer for purchase of the optional remote control.