


2
1. Introduction
This projector is controllable by a personal computer with RS-232C terminal.
PC-controllable functions:
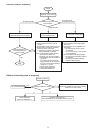
• Turning the power ON or OFF
• Changing input signals
• Inputting commands by pressing the buttons on the control panel and remote control
• Menu setting
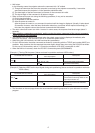
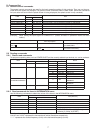
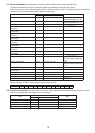
[Compatibility with the former models]
To use the RS-232C commands designed for the former models of Mitsubishi projector, by inputting
“00COMMAND0”, the projector responds in the same way as the former models. (No NAK is returned. For NAK
response, see page 4.)
(For the recommended procedure to use the former command systems, see “Controlling the projector using a
personal computer” for FL7000U.)
ITEM
Function
Data
Character ASCII code
Changing the RS-232C
command system
COMMAND
43h 4Fh 4Dh 4Dh 41h 4Eh 44h
0 (Former command system), 1 (New
command system)
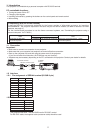
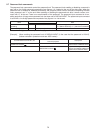
1.1 Connection
Important:
• Make sure to connect one computer to one projector.
• Make sure that your computer and projector are turned off before connection.
• Boot up the computer rst, and then plug the power cord of the projector.
(If you do not follow this instruction, the COM port may not function.)
• Adapters may be necessary depending on the PC connected to this projector. Contact your dealer for details.
RS-232C crossover cable
D-SUB 9-pin
To SERIAL
terminal
To RS-232C terminal
D-SUB 9-pin
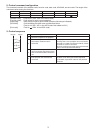
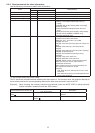
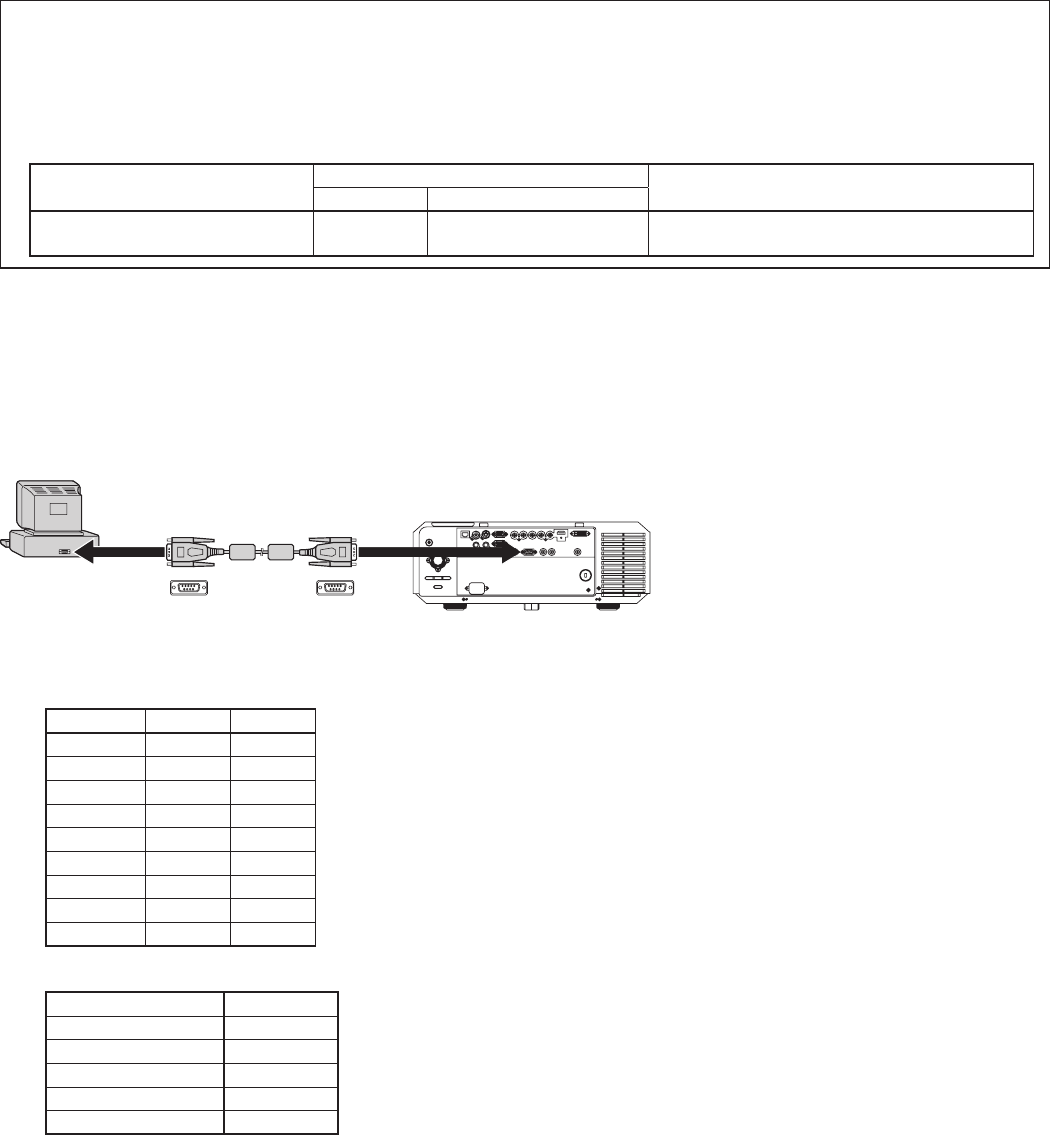
1.2 Interface
1.2.1 Pin assignment of SERIAL terminal (D-SUB 9-pin)
Pin No. Name I/O
1 OPEN
2 RXD IN
3 TXD OUT
4 OPEN
5 GND
6 OPEN
7 OPEN
8 OPEN
9 OPEN
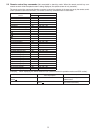
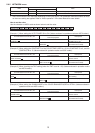
1.2.2 Communications format
PROTOCOL RS-232C
BAUD RATE 9600 [bps]
DATA LENGTH 8 [bits]
PARITY BIT NONE
STOP BIT 1 [bit]
FLOW CONTROL NONE
This projector uses RXD, TXD and GND lines for RS-232C control.
For RS-232C cable, the supplied cable (crossover cable) should be used.