— 4 — —5 — — 6 —
4. The next window that opens cautions you that although this software
has not passed Windows logo testing, this driver has already been
tested and shown that it can support the Windows OS. Click Continue
Anyway to proceed. Then, click Finish to complete the driver
installation.
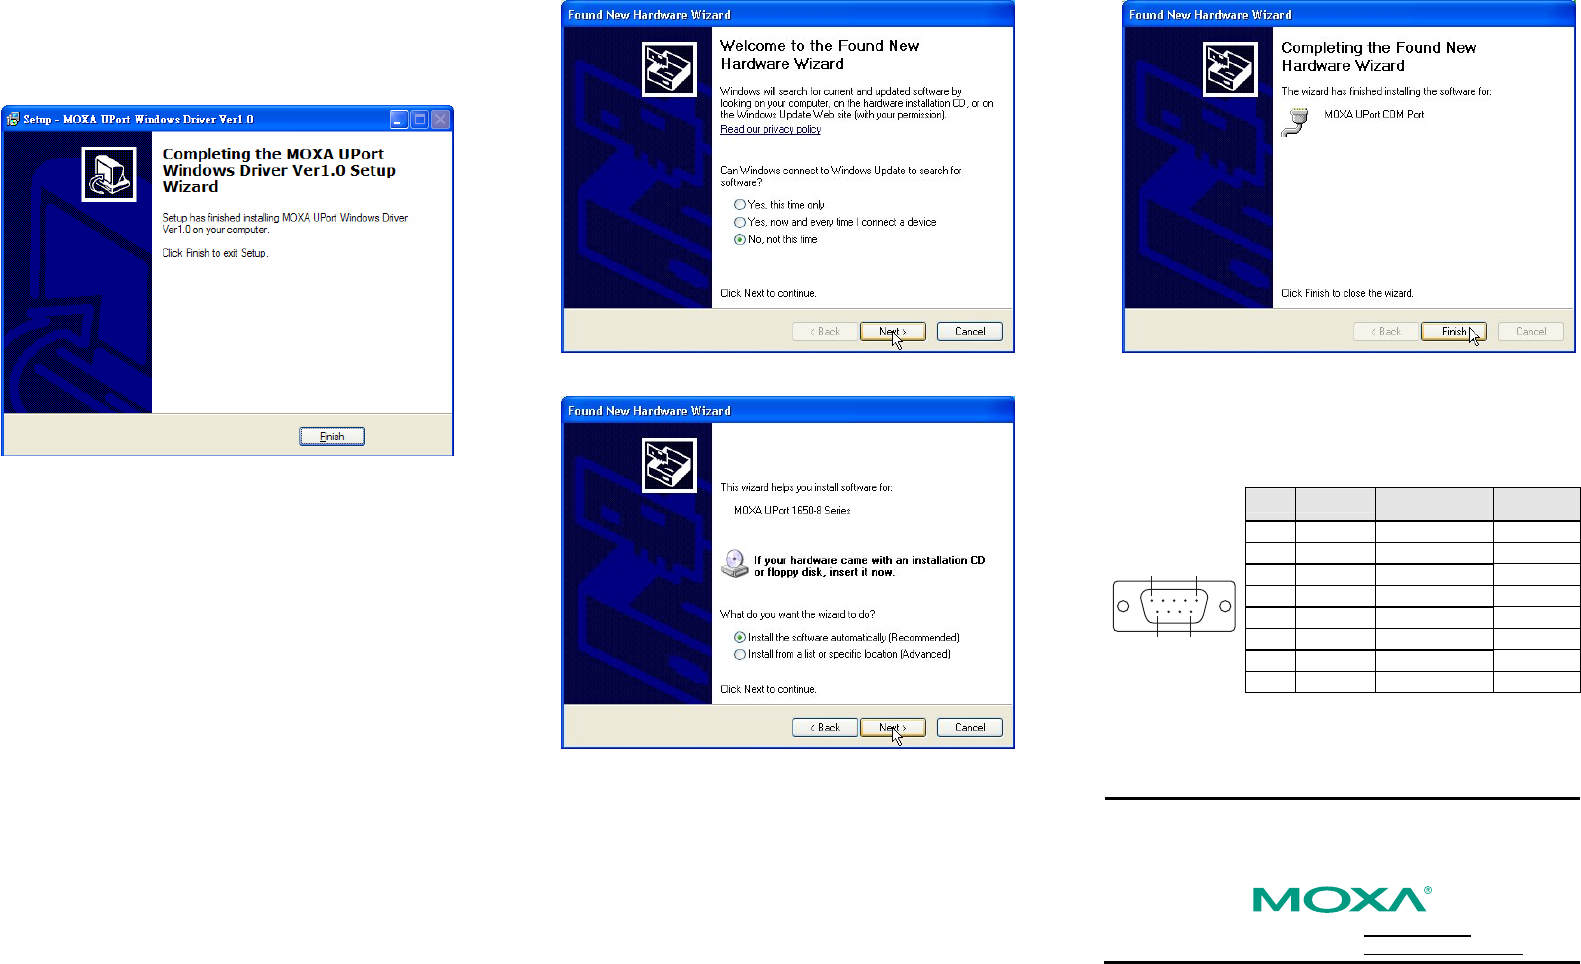
4. Installing the UPort 1400/1600 Hardware
1. Power on UPort 1400/1600
• For UPort 1400, you can use bus power or external power. For
external power, you need to plug in the power adaptor.
• For UPort 1600-8, you need to plug in the power adaptor.
• For UPort 1600-16, you need to plug in the power cord and turn on
the power switch.
2. Connect the UPort to the PC using the USB cable.
3. After powering on your PC, Windows 2000/XP/2003 will
automatically detect the UPort 1400/1600.
4. Click Next to Start the installation.
5. Select Install the software automatically (Recommended).
6. The next window that opens cautions you that although this software
has not passed Windows logo testing, this driver has already been
tested and shown that it can support Windows OS. Click Continue
Anyway to proceed. Then, click Finish to complete the driver
installation.
7. Repeat steps 4 to 6 till all COM ports are installed.
5. Serial Port Pin Assignments
UPort 1400/1600’s serial ports use male DB9 connectors. Refer to the
following table for the RS-232 and RS-422/485 pin assignments.
Male DB9
Pin RS-232
RS-422/
4-wire RS-485
2-wire
RS-485
1 DCD TxD-(A) ---
2 RxD TxD+(B) ---
3 TxD RxD+(B) Data+(B)
4 DTR RxD-(A) Data-(A)
5 GND GND GND
6 DSR --- ---
7 RTS --- ---
15
69
8 CTS --- ---
Copyright © 2006
Moxa Technologies Co., Ltd.
All rights reserved.
Reproduction without permission is prohibited.
Tel: +886-2-8919-1230
www.moxa.com
Fax: +886-2-8919-1231
support@moxa.com.tw


