


Using the DiskOnChip with Linux OS
91-SR-005-10-7L REV. 2.0 7
4 Installing the DiskOnChip as an Additional Drive
Before the DiskOnChip can be used as the boot disk for Linux (see Chapter 5), it first needs to be installed
as an additional disk in the system (Linux is booted from a HDD). This chapter describes how to prepare
the DiskOnChip and Linux to configure the DiskOnChip as an additional disk in the system. To achieve this,
the firmware on the DiskOnChip needs to be updated (par. 4.1) and then the TrueFFS device driver needs
to be integrated into Linux (par. 4.2). This is done as follows:
1. Configure Linux with the required devices (par. 4.2.1 Preparing Linux for Integration).
2. Add the TrueFFS driver to the kernel and recompile the kernel (par. 4.2.2 Adding the Driver to the
Kernel).
3. Boot the compiled kernel from your HDD (par. 4.2.3 Booting the Compiled Kernel from HDD).
4. Create a Linux partition on the DiskOnChip (par. 4.2.4 Creating a Linux Partition on the
DiskOnChip).
5. Create a native Linux file system on the DiskOnChip (par. 4.2.5 Creating a Native Linux File System
on the DiskOnChip).
4.1 Updating the Firmware
Before the DiskOnChip can be used as the boot disk or as an additional disk in Linux, it needs to be
formatted with the alternative firmware image.
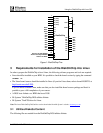
1. Plug the DiskOnChip into its socket and boot DOS from your HDD.
2. Format the DiskOnChip with the alternative firmware:
dformat /win:d000 /s:doc2.fff /y
Note: If you receive the error: “No DiskOnChip 2000 (R) was found at D000:0”, then run the DOS command docpmap /i
to find out at which address the DiskOnChip is located.
4.2 Integrating the TrueFFS driver into Linux
4.2.1 Preparing Linux for Integration
To prepare Linux for integration of the driver, perform the following steps:
Note: To perform these steps, you must be logged in as the superuser (root).