


NEC PowerMate ML5 Disassembly Manual
Page 6
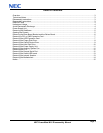
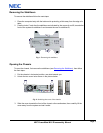
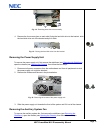
Fig. 3: Removing the cover of the chassis
Note: To prevent damaging the system, make sure no cables or other devices protrude from the
chassis before replacing the cover.
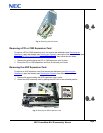
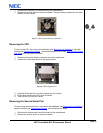
Removing the Riser Board Bracket and the Raiser Board
To remove the riser board bracket first remove the stabilisers (see Removing the Stabilisers),
open the chassis (see Opening the Chassis), then follow the next steps:
1. After removing the cover, put the chassis in the horizontal position, rear side towards you.
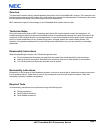
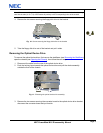
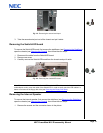
2. Hold the riser board bracket by its rear edge (A) and the other end (B) and lift it carefully
until the riser board is disengaged from the PCI slot on the motherboard and the bracket
is disengaged from the tabs marked with the squares in the picture below.
Fig. 4: Removing the riser board bracket
Note: When putting the riser board bracket in place, pay attention to correctly fit the tabs in the latches
marked in Fig. 4: and the raiser board to its slot.
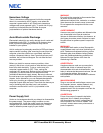
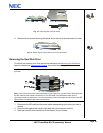
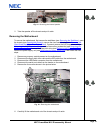
3. Remove the one screw holding the riser board in place
4. Slide the riser board as shown to free it from the latch and put the riser board and the
riser board bracket aside.