


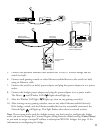
4. Turn off the gaming console or other Ethernet-enabled device.
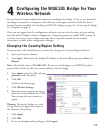
5. Connect the provided Ethernet cable between the WGE101 Wireless Bridge and the
gaming console or other Ethernet-enabled device.
6. Connect the power adapter to the bridge and plug the power adapter in to a power outlet.
The Power and Wireless LAN lights should light up.
7. After you see the Wireless LAN light light up, turn on the gaming console or other
Ethernet-enabled device.
If the bridge and the Ethernet-enabled device are successfully connected, the Network
light will light up. This light flashes when there is network activity.
Note: If your setup works with the default settings, you don’t need to configure the bridge
unless you need to change the Country/Region setting from the default setting (United States)
or you need to assign a unique IP address to subsequent WGE101 bridges. See page 12 for
information on configuring the bridge.
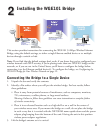
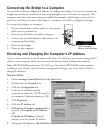
Connecting the Bridge to Multiple Devices
1. Unpack the box and verify the contents.
2. Identify a flat surface where you will put the wireless bridge. For best results, follow
these guidelines:
• Place it away from potential sources of interference, such as computers, monitors,
TVs, microwaves, cordless phones, or large metal surfaces.
Warning: Failure to follow these guidelines can cause intermittent or complete failure
of wireless connectivity.
• Place it in an elevated location such as a high shelf or on a wall in the center of
your wireless access area. If you mount the bridge on a wall, do not place the bridge
in such a way that it is vertical with the NETGEAR name upside-down and the power
adapter plug hanging from the bottom of the unit. Having the unit in this position
violates power adapter regulations.
3. Lift the bridge’s antenna so it is vertical.
4. Turn off the gaming consoles or other Ethernet-enabled devices.
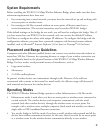
Gaming console or other
Ethernet-enabled device
WGE101 54 Mbps
Wireless Ethernet Bridge
5