


Using the adapter (for Windows/Macintosh)
1
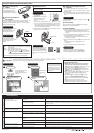
Insert a card into the
adapter.
Make sure the card is level and
that the gold-colored contact
area is facing down. Insert the
card all the way into the card slot.
Status lamp
Lights : When the adapter is connected to the computer and
is ready to use.
Blinks : When reading/writing to a card.
Goes out : When there is no card in the adapter, or when
performing the procedure* in “ 3 Remove the card.”
or “ 4 Disconnect the adapter from the computer”.
* Depending on your Mac OS version, the status lamp may go
out when you drag & drop the card’s icon onto the Trash icon.
Goes out after lighting : When the card is not recognized.
2
Connect the adapter to
the computer.
When the adapter is recognized
by the computer, the
[Removable Disk] icon will be
added to [My Computer].
Connect the adapter’s connector to the computer’s USB port. (You
can plug in the USB connector while the computer is in use.)
The status lamp lights up. (When there is no card in the adapter,
the status lamp does not light.)
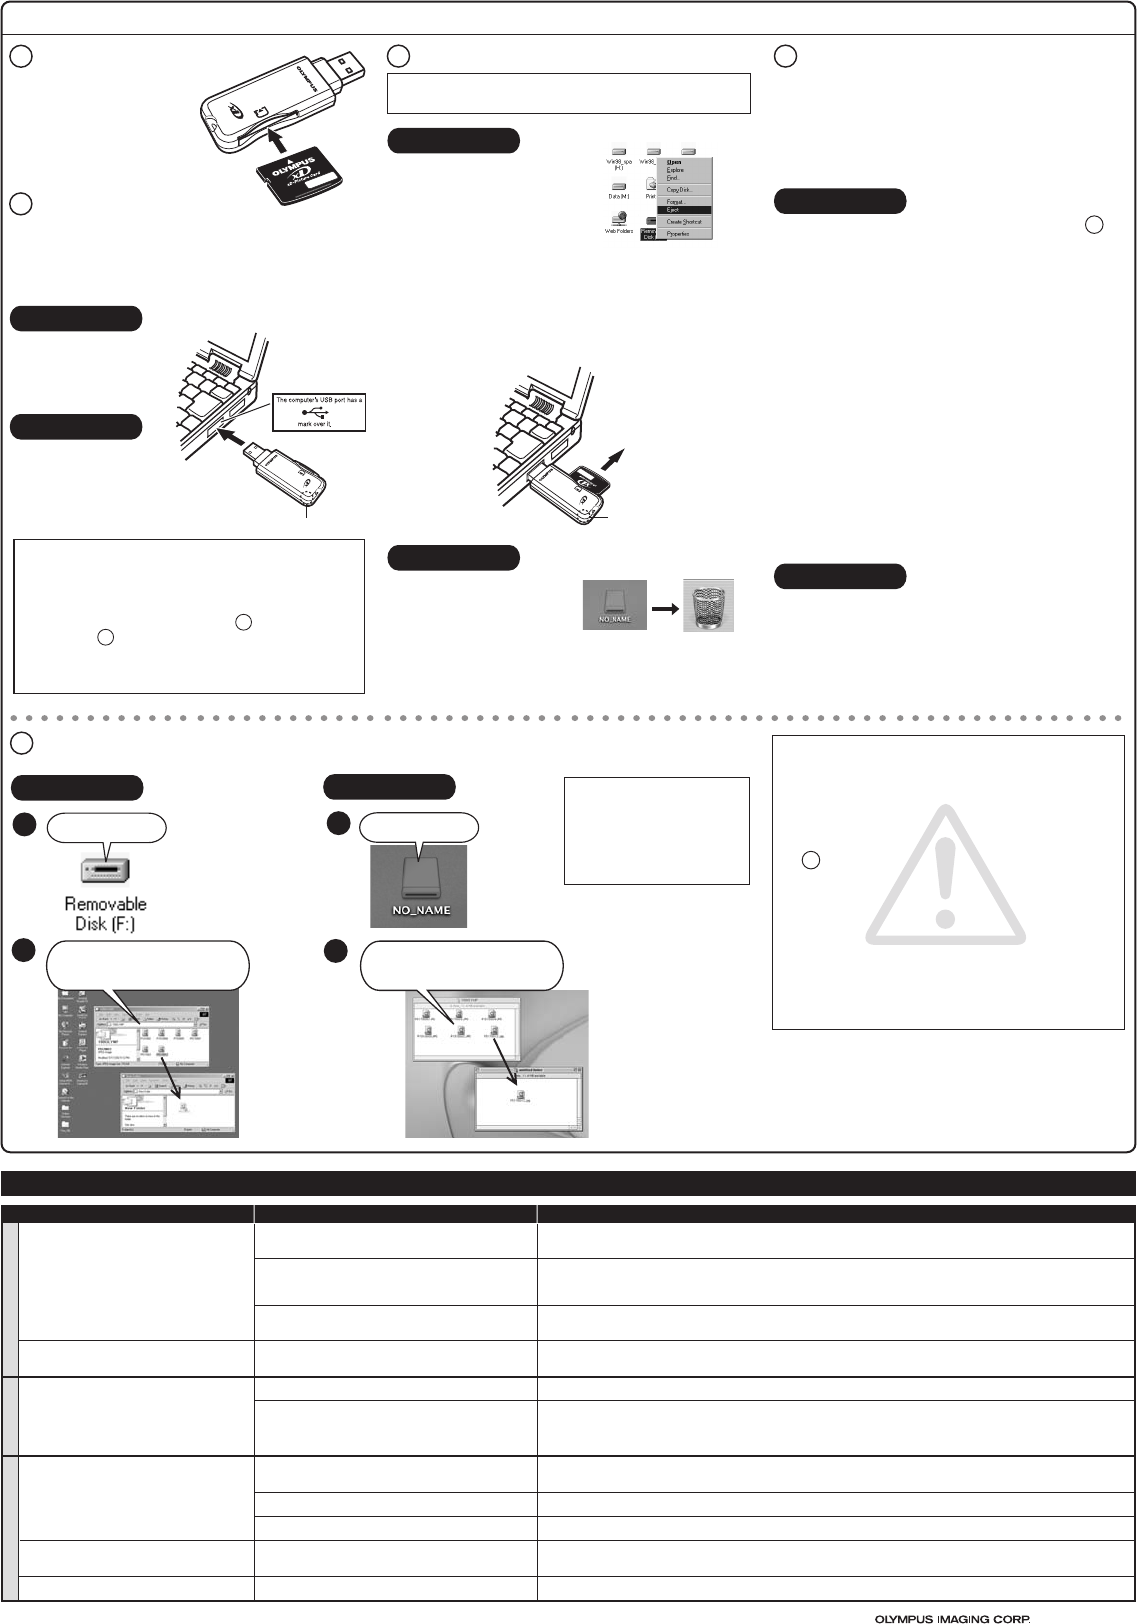
3
Remove the card.
Attention!: If you do not follow the steps below, the data on the
card may be damaged.
1. Drag & drop the card’s icon onto the Trash icon.
2. Make sure that the status lamp is NOT blinking.
3. Unplug the adapter from the computer’s USB port.
For Macintosh
4
Disconnect the adapter from the
computer.
For Windows
[Windows 98/98SE]
[Windows Me/2000/XP]
If a card is inserted in the adapter, follow steps 1 and 2 in “ 3
Remove the card”.
Make sure that the status lamp is NOT on, then unplug the
adapter from the computer’s USB port.
1. Left-click the [Safely Remove Hardware] icon on the taskbar.
● The message that appears with the [Safely Remove
Hardware] icon may differ depending on the computer you
are using.
2. A message titled [Safely remove USB Mass Storage Device -
Drive (K:)] appears on the taskbar. Click on it.
● The drive letter (K:) above will differ depending on the
computer you are using.
3. Make sure that the status lamp is NOT on, then click the [OK]
button.
● For Windows XP, the message appears in the
balloon help.
4. Unplug the adapter from the computer’s USB port.
For Windows
For Macintosh
When the card is inserted
correctly and the adapter is
recognized by the computer, the
card icon appears on the
desktop.
Printed in Japan
1. Double-click [My Computer]
on the desktop.
2. Right-click the corresponding
[Removable Disk] icon, then
click [Eject] in the pop-up
menu.
For Windows
●
You can unplug the adapter with the computer’s power on.
(You do not need to turn off the computer, restart it, or put it in
the sleep mode.)
●
Close all software programs that are using data on the card
(e.g. graphics applications). Otherwise, you cannot perform this
step.
3. Make sure that the lamp is NOT on, then pull the card out of the
card slot as shown in the illustration.
Drag & drop the card’s icon onto
the Trash icon. Make sure that
the status lamp is NOT blinking,
then pull the card out of the card
slot as shown in the above illustra-
tion.
For Macintosh
● The card will not be ejected when [Eject] is clicked in this step.
● If you are using a Windows 2000/XP and you want to remove
the card, log on with the user name [Administrator] or a user
name with administrator privileges. Without these privileges,
you cannot perform [Eject] operation.
USB Port
(Type A)
Notes on inserting/removing a card
(For Windows/Macintosh)
● NEVER pull a card out of the card slot or unplug the
adapter from the computer while the status lamp is
blinking. Doing so may destroy the data on the card or the
card itself, or cause the computer to malfunction.
● When removing a card, be sure to follow the procedure in
“ 3 Remove the card”. Otherwise, the data on the card
may be damaged.
● Before removing a card, close all software programs that
are using data on the card (e. g. Explorer, graphics
applications).
● DO NOT apply force to the computer’s USB port or the
adapter when removing/inserting a card from/into the
adapter if it is directly connected to the computer’s USB
port.
● Make sure that the card is facing the right way.
● DO NOT insert the card at an angle. Forcing a card in
diagonally may damage the adapter and/or the card.
5
Copy files.
You can copy files the same way as you would copy files from a floppy disk, etc. Simply drag & drop the
original files you want to copy onto the hard drive or other storage medium.
For Windows
Double-click the
corresponding
icon.
Double-click
Double-click
Drag & drop the files onto the
hard drive or other storage
medium.
Drag & drop the files onto the
hard drive or other storage
medium.
1
2
1
2
For Macintosh
Troubleshooting
PROBLEM CAUSE SOLUTIONS
The [Removable Disk] icon does not appear after
installation and connection.
[!] or [?] appears in Device Manager.
The adapter does not recognize the card.
[Please insert a disk into drive.] appears.
The adapter’s USB connector is not connected properly to
the computer.
The Universal Serial Bus Controller is disabled.
(Only for Windows Me/2000/XP)
The USB port is disabled in the BIOS settings.
The card is not inserted correctly.
Insert the USB connector fully into the computer’s USB port to ensure that it is firmly connected.
Change the Controller settings on [Universal Serial Bus Controllers] by selecting [Start] - [Setting] (only for Windows Me/2000) -
[Control Panel] - [System] - [Hardware] - [Device Manager]. ([X] appears on the controller’s name. Select [Enable] by right-clicking
from the pop-up menu.)
Set the USB port to “Enable” in the BIOS settings. Take extra care when making this setting, referring to your computer’s instruction
manual.
Make sure the card is properly oriented (front/reverse face, top/bottom part), then insert it slowly into the adapter until it is secure.
The card is not inserted correctly.
Make sure the card is properly oriented (front/reverse face, top/bottom part), then insert it slowly into the adapter until it is secure.
Double-click [My Computer],
then double-click the
corresponding [Removable
Disk] icon.
●
Drag & Drop
To perform a drag & drop, press
and hold the mouse button over
the selected file(s), then move
the mouse (drag) to the desired
location and release the button
to copy (drop).
The status lamp does not light. The adapter is not connected correctly to the computer’s
USB port.
The power supply from the USB port is insufficient.
Make sure that the adapter is facing the right way and connect it to the computer’s USB port firmly.
If you are using a USB hub, connect the adapter directly to the computer’s USB port.
You can read a card, but not write to it.
The card is not recognized correctly.
There is a problem with the card.
Disconnect the adapter from the computer, pull the card out of the adapter, then wipe the contact area with a dry cloth, and insert
the card again. If the problem persists, the card may be damaged.
Save the data to another storage medium, then use the new card for writing.
No card icon appears on the computer’s screen. The card is not inserted correctly.
File Exchange is not installed on your computer. (Mac OS 9)
Make sure the card is properly oriented (front/reverse face, top/bottom part), then insert it slowly into the adapter until it is secure.
You must have File Exchange (provided with Mac OS) to read/write a DOS/Windows formatted card.
(Check Control Panels under the Apple menu to see if File Exchange is installed. For more details, refer to Mac OS [Help].)
Macintosh
Common
Windows
Pull the card out.
© 2004-2005
All rights reserved.
The status lamp goes out after lighting.
Status lamp
Status lamp