PUSH
A
B
C
D
E
IO
PCDOCK
O
K
STORING ONLY
EXIT
20SEC. TILL AUTO-STORE
STORE PRINT
DOCK MODE
STORE SEL. PRINT
O
K
A
B
C
D
E
IO
PCDOCK
Shoot pictures and make print reservations with your digital camera in
advance. For details on using the digital camera, refer to the reference
manual supplied with the digital camera.
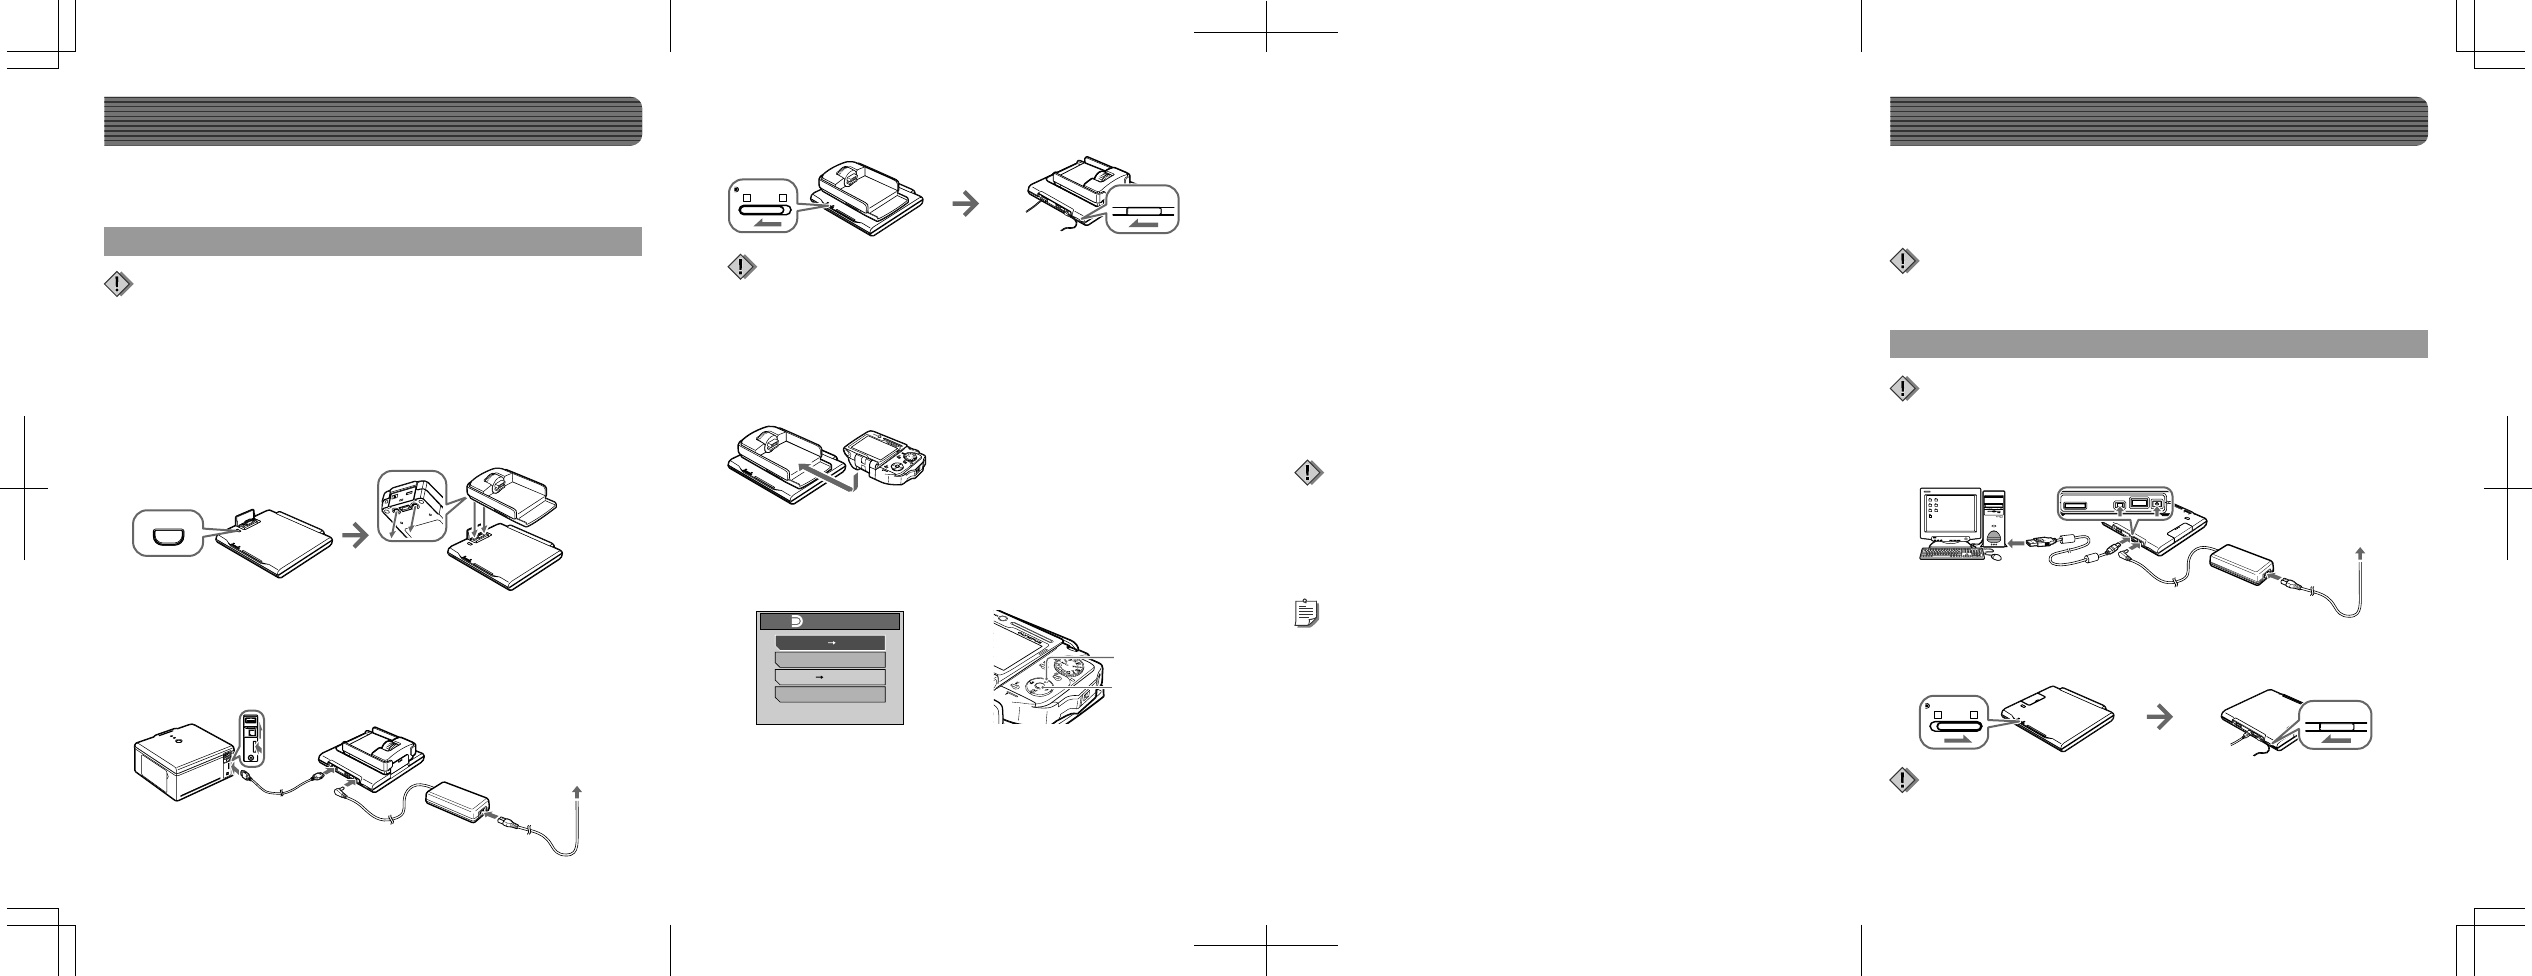
Using in the Dock&Done mode
Example: When connecting the digital camera IR-500 and the printer P-S100.
Display items on the camera monitor and the shape of the camera cradle
differ depending on the digital camera.
a
Dock the cradle of the digital camera to the storage
unit.
Connect with the printer and the digital camera
Make sure the power of the storage unit is off before connecting.
Note
b
Connect the printer and the storage unit with the
Dock&Done cable KP16 (sold separately), connect the
AC adapter and power cord to the storage unit, then
turn the printer on.
c
Set the Dock&Done mode/PC mode switch to
“
Q
DOCK,” then turn the storage unit on.
d
Set the digital camera on the cradle.
e
Operate the digital camera to select the desired store
option on the digital camera.
A Press the a/c button to select the desired item.
“STORE
:
PRINT” Stores only the newly taken image fi les of
the digital camera, and prints the image
fi les with the print order.
“STORING ONLY” Stores only the newly taken image fi les of
the digital camera.
“STORE
:
SEL. PRINT”
*
Stores only the newly taken image fi les of
the digital camera, and the print setting
screen appears.
“EXIT” Closes the “
Q
DOCK MODE” menu
without storing or printing.
• Do not turn off the storage unit, or disconnect its cable while the ACCESS indicator
(blue) is blinking, otherwise a store or print error may result. The status of
storing/printing or error messages are displayed on the LCD screen of the camera.
• Do not remove the camera while the ACCESS indicator (blue) is blinking. In this
case, use the camera to cancel the process before removing.
Notes
• The storage unit starts storing image fi les automatically if no menu operation is
performed within 20 seconds.
• To cancel storing/printing, press the
9
button on the camera, select “CANCEL,”
then press
9
in the confi rmation screen. When storing/printing is canceled, the
camera will turn off and automatically enter charge mode.
• Print order information is not cleared automatically when a print is executed. Cancel
the print order setting manually.
• If the storage unit is in the Dock&Done mode, the connected digital camera and the
printer are not accessible from the connected PC.
Tips
a
Connect the storage unit to a PC using the USB cable.
Using in the PC mode
Be sure to use the OLYMPUS Master software supplied with the storage unit. The
OLYMPUS Master software supplied with the digital camera may not work properly.
Note
Connecting with a PC
Make sure the power of the storage unit is off before connecting.
Note
b
Set the Dock&Done mode/PC mode switch to “PC,”
then turn the storage unit on.
• Do not change the setting of the Dock&Done/PC mode switch during data transfer.
If the mode is changed, data transfer stops and data is not stored correctly.
• Do not disconnect the USB cable during data transfer, otherwise transfer will stop
and may cause data corruption.
Notes
Be sure to use the supplied OLYMPUS Master software when storing image
fi les from the connected PC, or browsing, editing, printing, or managing
image fi les on the HD storage. For details, refer to the instruction manual
supplied.
B Press the 9 button.
The ACCESS indicator (blue) blinks while storing (the ACCESS
indicator on the printer blinks while printing).
Insert the power
cord plug into the
power outlet.
* The same setting as PictBridge mode. For details on the print settings, refer to
the reference manual supplied with the digital camera.
Insert the power
cord plug into the
power outlet.
• Before switching from PC mode to Dock&Done mode, perform the PC
hardware removal procedure in order to prevent a loss of data.
• Do not switch to the PC mode while the storage unit is processing in the
Dock&Done mode. The operating mode switches when the processing is
complete.
Notes
9
button
ac
buttons


