4
- -
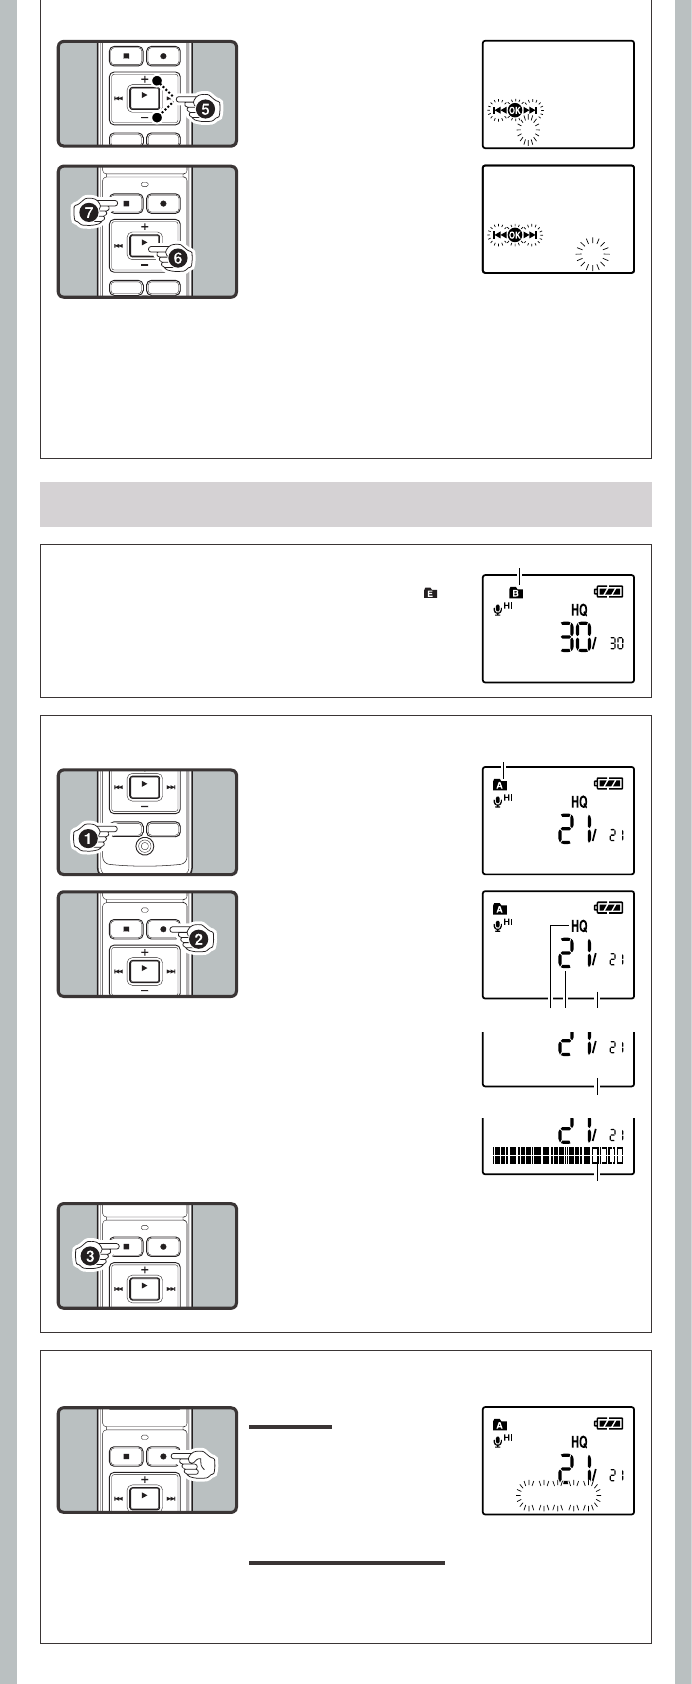
2 Press the
REC
(s) but-
ton to start recording.
• The record/play indicator light
turns red, and recording starts.
• If you start recording after in-
serting the earphone into the
earphone jack on the recorder,
you can hear the sound being
recorded. The sound volume
on the recording monitor can
be adjusted by pressing the +
or – button.
b Current recording mode
c Current file number
d Recording time
e Remaining recording time
f Recording level meter
3 Press the
STOP
(4) button to stop record-
ing.
• New recordings are saved as the last file in the folder.
Notes:
• You can choose between 12 and 24 hour display by pressing the DISP/MENU button while setting
the hour and minute.
• You can change the order of the date indication by pressing the DISP/MENU button while you
are setting the year, month, or day.
Current folder
h Notes on the Folders
The recorder provides five folders, [F], [G], [H], [I] and [ ]. To
change the folder selection, press the FOLDER/INDEX button while
the recorder is stopped.
Note:
• Up to a total of 200 les can be recorded in each folder.
To Pause:
While the recorder is during
recording mode, press the
REC
(s) button.
• [Rec Pause] appears on the display.
Recording
1 Press the
FOLDER
/
INDEX
button to select
the desired folder.
a Current folder
h To Pause Recording
5 Press the
+
or – button to
set.
• Follow the same steps by press-
ing the 9 or 0 button to
elect the next item, and press
the + or – button to set.
6 Press the
PLAY
/
OK
(`)
button to complete the
setup screen.
• The clock will start from the set
date and time.
• Press the PLAY/OK ( `) button
according to the time signal.
7 Press the
STOP
(4) button to close the menu
mode.
• This completes the time and date setup procedure.
h Recording
1. 1‘08
12:00
AM
7.25‘08
3:00
PM
15m15s 14m15s
a
15m15s 14m15s
e
Remain 22h52m46s
f
Rec Pause
To Resume Recording:
Press the
REC
(s) button again.
• Recording will resume at the point of interruption.
