4
GB
To manually set the clock:
1. Press [CLOCK] and hold for two seconds. The hour will start
to flash.
2. Enter the correct hour using the [ ] button. Hold to rapidly
increase the value.
3. Press [CLOCK] to confirm and proceed to set the minute.
Again, use the [ ] button to select the correct minute.
4. Press [CLOCK] to proceed to set the year, month, day and
language for day - of - week.
5. When finished, press [CLOCK]. The time and date are now set.
6. To select the U.S. time - zone, press [ZONE] to toggle among
Pacific(P), Mountains (M), Central(C) or Eastern (E).
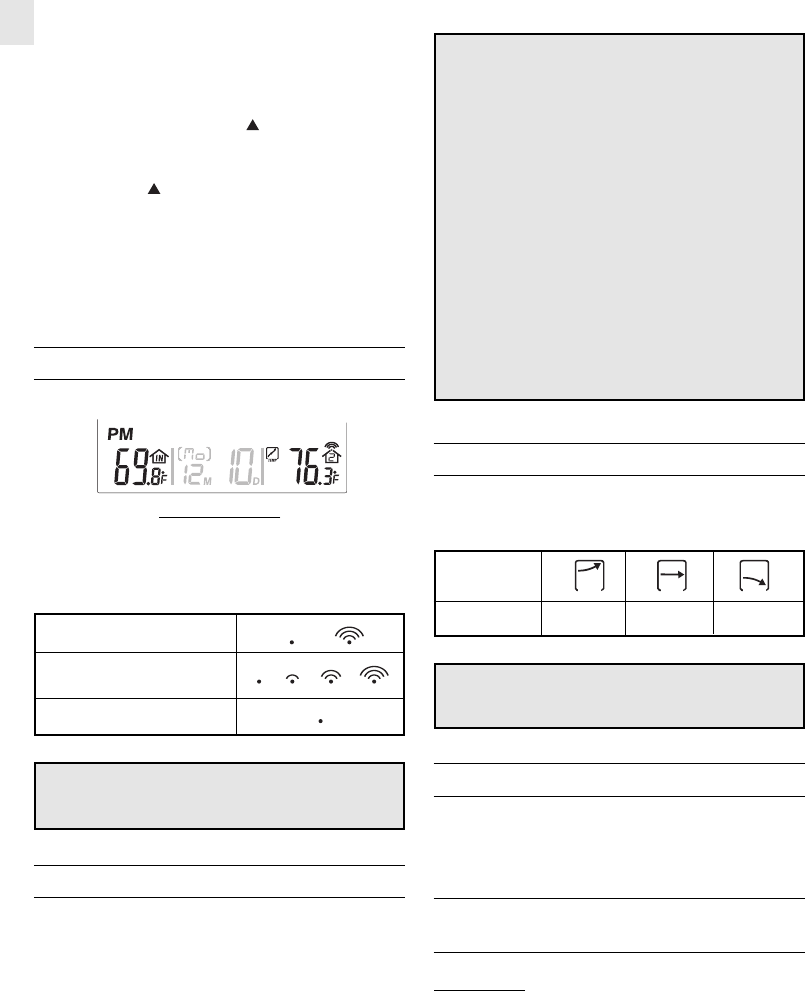
TEMPERATURE DISPLAY
This unit displays temperature in °C or °F
temperature display
The remote outdoor temperature display has a kinetic-wave display.
The kinetic-wave display shows the signal-receiving status by
the main unit. The are three possible forms.
The unit is in searching mode.
Temperature readings are
securely registered.
No signals
NOTE: JMR828A can also scan for max 3 different remote
temperature channels. To do so, simply press the CHANNEL
button once to switch to the different channel.
SENSOR TRANSMISSION STATUS
If blanks "----" appear on the remote temperature display of the
main, then the unit is not receiving a signal from the remote
thermo sensor. The user may be able to receive a signal by doing
a signal search.
Remote Sensor Signal Search:
Press [THERMO] and [CHANNEL] together for 2 seconds. The
unit will search for a remote thermo-sensor signal.
If the unit still cannot receive a signal, check the batteries to
ensure they are properly installed and have ample power. Try
repositioning the units as they might be having a temperature
transmission block due to signal interference.
Note:
Reasons for not receiving a signal from the remote thermo
sensor may include:
1. The batteries of the remote sensor, the main unit, or both
may be low. Low-battery icons should indicate that battery
power is low and the batteries require changing.
• When the temperature falls below freezing point, the
batteries will freeze. Frozen batteries will have a
lower voltage and result in a lower transmission
radius.
2. The transmission range is too far.
• Shorten the distance.
3. The transmission path is cluttered with obstacles and
interference.
• Shorten the distance or reposition the remote sensor
or the main unit.
TEMPERATURE TREND INDICATORS
The temperature-trend indicator show the trends of the collected
remote temperature readings for the past half hour. Arrows indicate
a rising, steady or falling trend.
Note : If the reading goes above or below the measuring
range of the remote unit (stated in specification), the
display will show "HHH" or "LLL".
HOW TO RESET THE UNIT
Press [RESET] to return all settings to the factory values.
The button is used when the unit is not operating in a favorable
way, such as in the rare case of a malfunction.
HOW TO WALL MOUNT OR
USE TABLE STAND
MAIN UNIT
Flip the table stand open to place the unit on a steady, flat surface.
Or use the recessed hole on the back to mount it on a wall.
TEMP TEMP TEMP
Arrow indicator
Temperature
Trend
Rising Falling
Steady


