22
■■
■■
■
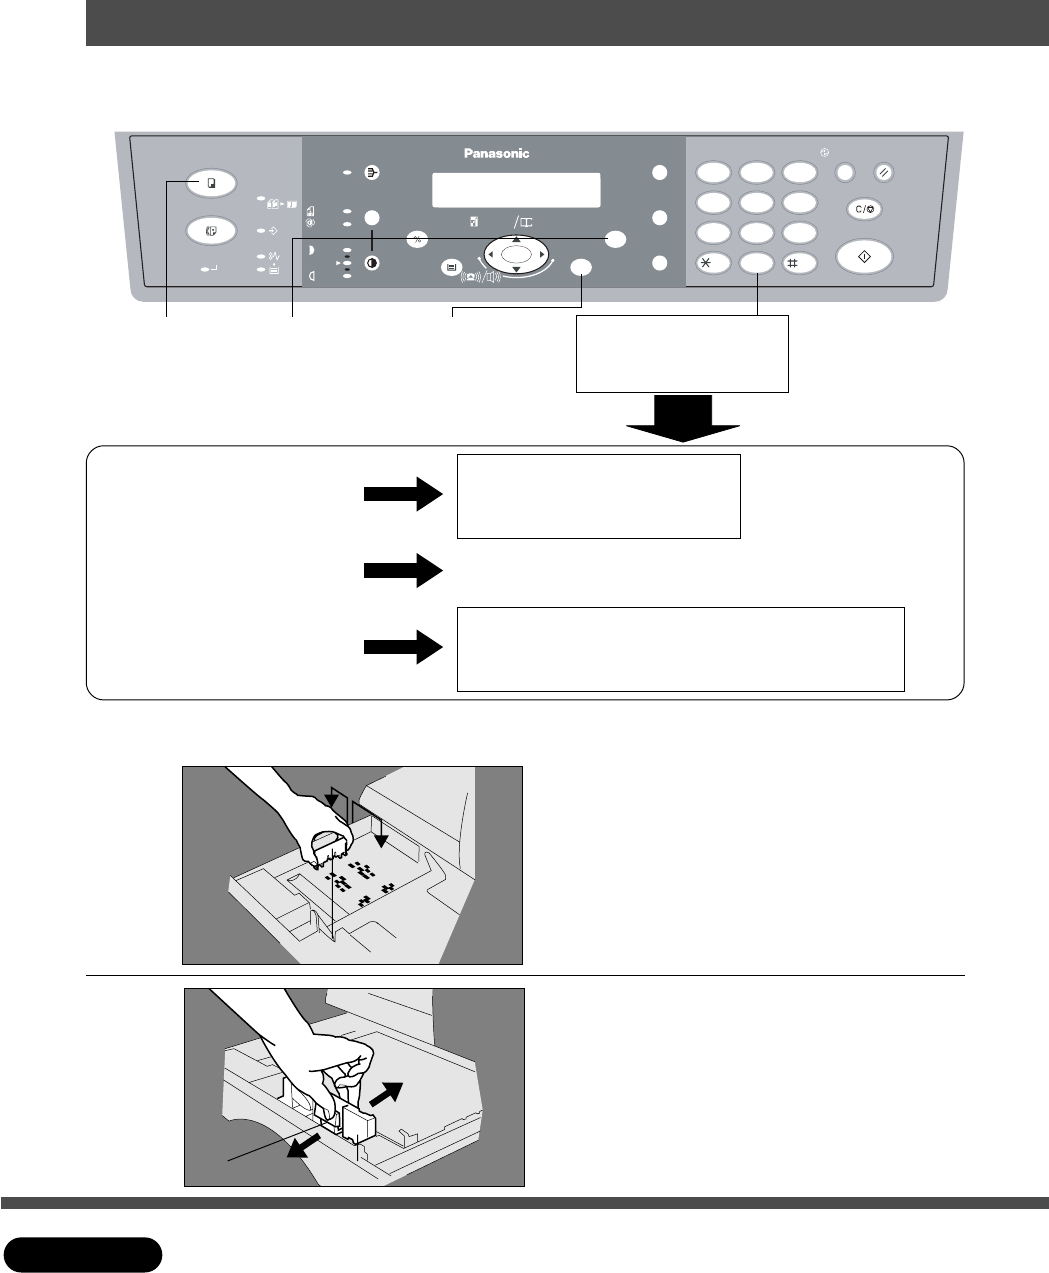
Following is the procedure to change paper size of paper tray from the control
panel. This procedure is also same for optional 2nd Paper Feed Module.
Handling
Changing paper size
9
# Lift paper tray and pull out of
the copier until it stops.
$ Move paper guide a to the
paper length required.
10
# Move paper guide b to the
paper width required.
Squeeze the stopper to move the paper
guide b to the desired paper size.
$ Push paper tray back into copier.
Paper Guide
bb
bb
b
Paper Guide
aa
aa
a
Stopper
2SIDED
START
12
45
78
0
3
6
9
ABC DEF
GHI JKL MNO
PQRS
TUV
WXYZ
PAPER TRAY
SELECT
FUNCTION
CLEAR/STOP
SET
2 in 1
ZOOM
(50~200%) SEARCH
DIRECTORY
abc..
DATA
COPY
FAX
PHOTO
AUTO
SORT PAUSE
REDIAL/
FLASH/
MONITOR
SAVER
ENERGY
RESET
DARKER
LIGHTER
ON LINE
SUB-ADDR
+-
TONE
-/()
1
Press Copy
Key
2
Press
Function Key
Press Set Key
4A6A83A5A7
Message Display
9A10
3
Press “3” Key
3: PAPER SIZE ?
PRESS SET TO SELECT
appears in the message
display.
5
Press “1” or “2” Key
Press “1” to select standard 250-sheet paper tray
Press “2” to select optional 2nd Paper Feed Module*
1
7
Select paper size by
Keypad
1: A4 4: FLS (8″ × 13″) 7: LEGAL
2: B5 5: FLS (8.5″ × 13″) 8: INVOICE
3: A5 6: LETTER 0: NOT INSTALLED*
2
■■
■■
■ After changing paper size from the control panel, change the paper size
of paper tray by following procedure.
C
Please change the paper size of 2nd Paper Feed Module by same procedure.
∗
1 When the optional 2nd Paper Feed Module is not installed, set to “TRAY 2, to zero (0)
not installed”.
∗
2 “TRAY 2 0: NOT INSTALLED” is available to select only when optional 2nd Paper Feed
Module is selected at the procedure 5.
ATTENTION


