


1-C Settings
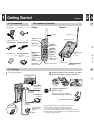
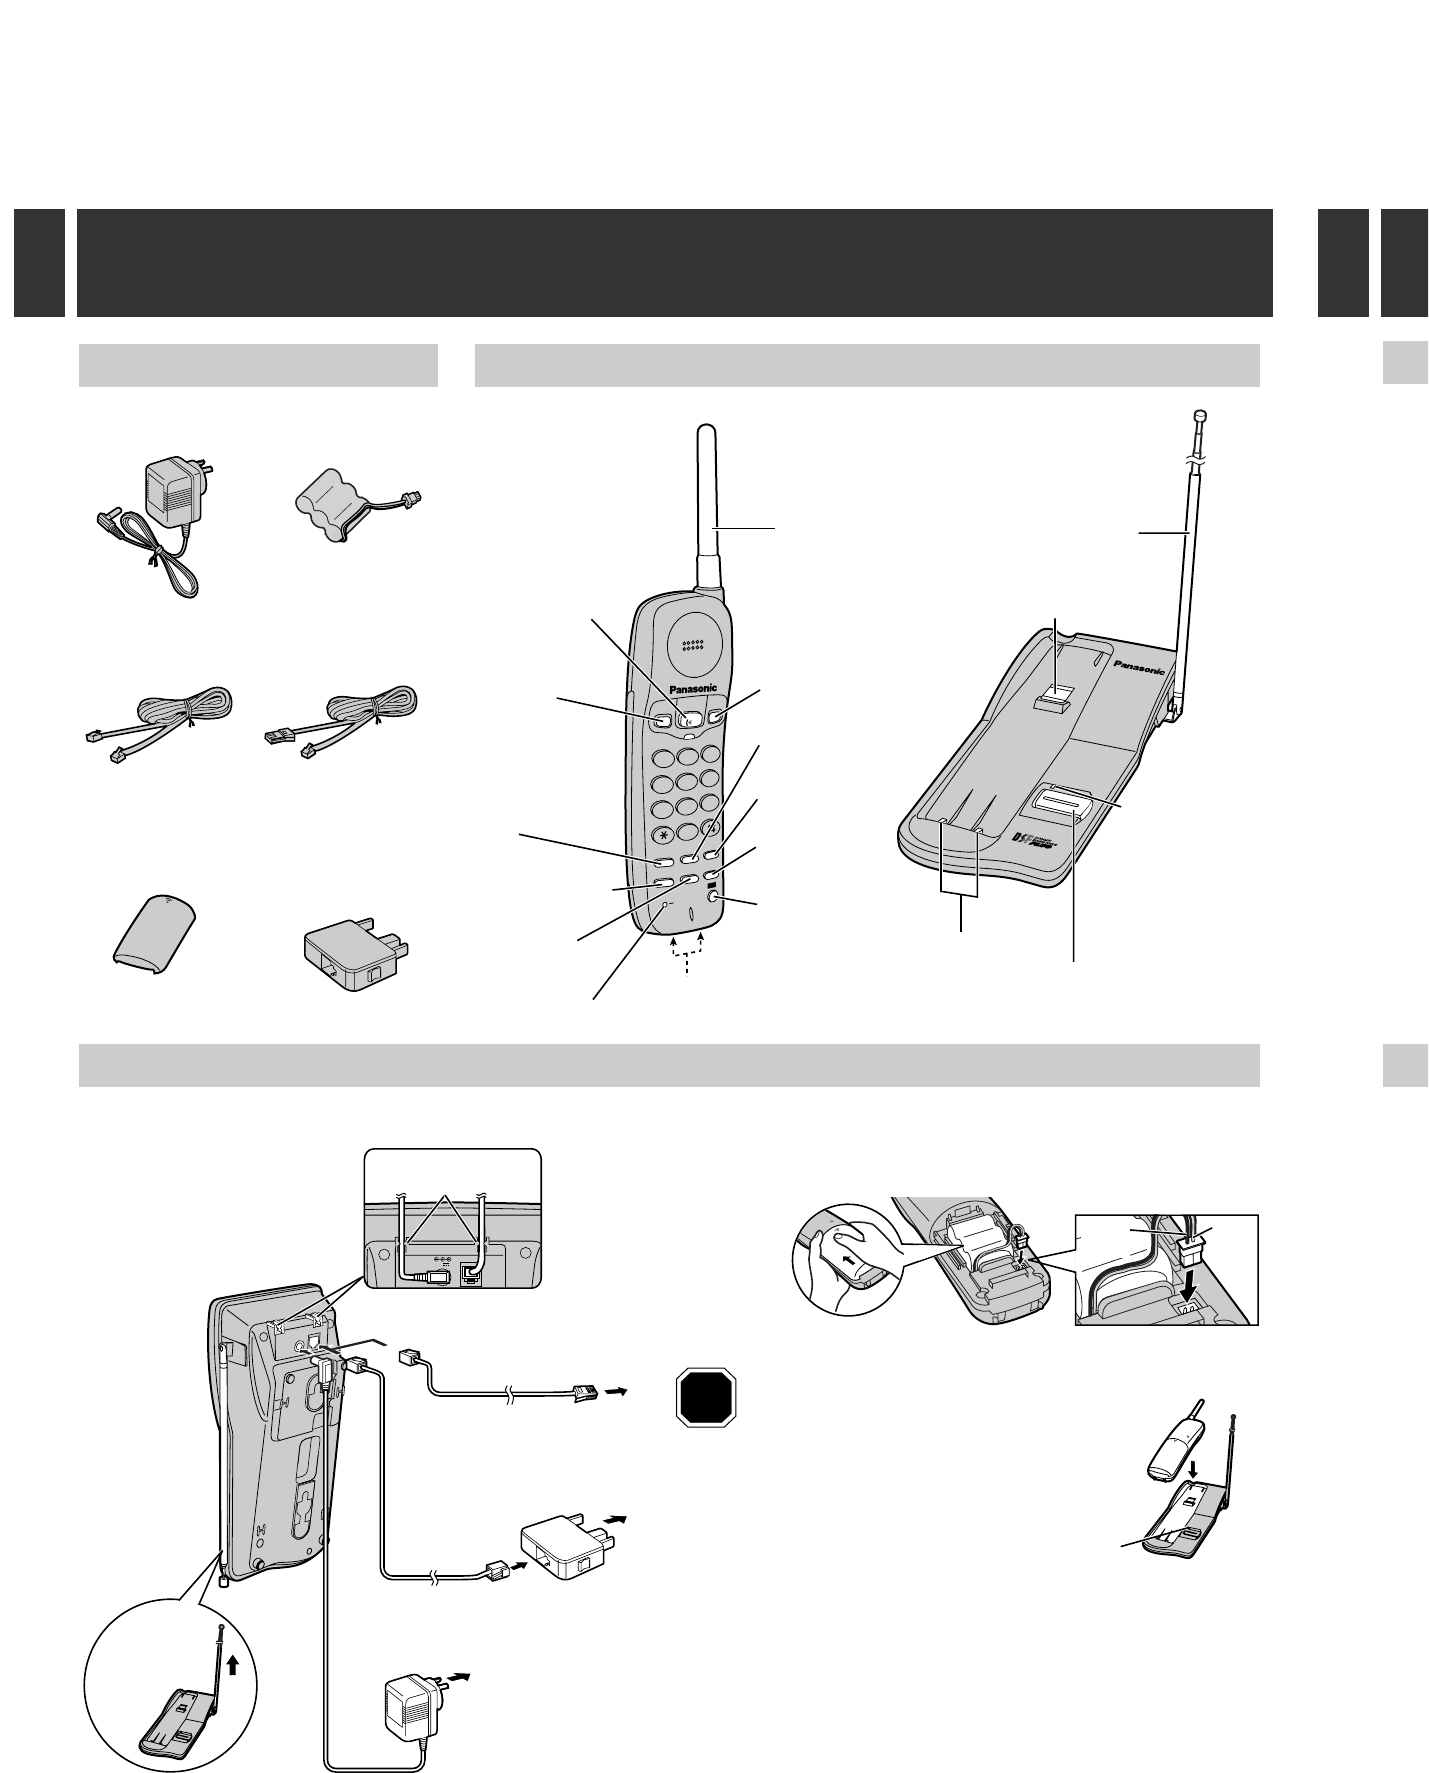
1-A Accessories 1-B Location of Controls
Handset Base unit
∑
AC Adaptor
.......................one
∑
Telephone Line Cord..........................one
IN USE/CHARGE
HANDEST LOCATOR
Handset Hook (6-D)
Charge
Contacts (6-A)
IN USE/CHARGE
Indicator
(1-C, 5-A)
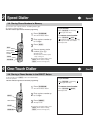
Antenna (1-C)
(HANDSET\LOCATOR)
Button (5-A)
RECHARGE
Indicator (6-A)
(TALK) Button and
Indicator (2-A)
(RECALL)
Button (5-D)
(RINGER) Button
(2-B)
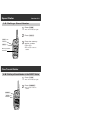
(PROGRAM)
Button (3-A, 5-D)
(LOUD)
Button (2-A)
(REDIAL)
Button (2-A)
(AUTO) Button
(3-A, 5-D)
(PAUSE)
Button (5-C)
(DIRECT)
Button (4-A)
Antenna
(CH) (Channel)
Button (2-A)
Charge Contacts (6-A)
ABC
2
1
DEF
3
JKL
5
GHI
4
MNO
6
TUV
RECALL
8
PQRS
7
WXYZ
9
0
RINGER
REDIAL
DIRECT
CH
LOUD
PROGRAM
RECHARGE
PAUSE
AUTO
TALK
ON
OFF
≥USE ONLY WITH Panasonic AC ADAPTOR PQLV16AL.
≥The AC adaptor must remain connected at all times.
(It is normal for the adaptor to feel warm during use.)
≥
To connect a standard telephone on the same line, see section 6-F.
≥KX-TC1200AL and KX-TC1200NZ are not designed to be used with
rotary (pulse dialling) services.
STOP
AC Adaptor
Fasten the cords.
Hooks
LINE
12V
Extend the
antenna fully.
Telephone
Line Cord
To Socket
Telephone Plug
For New Zealand
To Single-Line
Telephone Jack
For Australia
To Power Outlet
(AC 230 V–240 V,
50/60 Hz)
Telephone
Line Cord
OR
1
Connect as shown.
(TA
Ind
(CH
(LO
(RE
(RI
2-
2-
1
Getting Started Section 1
2
M
For Australia For New Zealand
For Australia only
∑
Telephone
Plug...............one
∑
Battery............one
∑
Handset Cover
.......................one
2
Install the battery in the handset, and close
the handset cover, locking it into place.
3
Charge the battery for
about 15 hours.
≥See section 6-A for more details.
≥The IN USE/CHARGE indicator lights.
IN USE/CHARGE Indicator
Red
Lead
Black
Lead