52
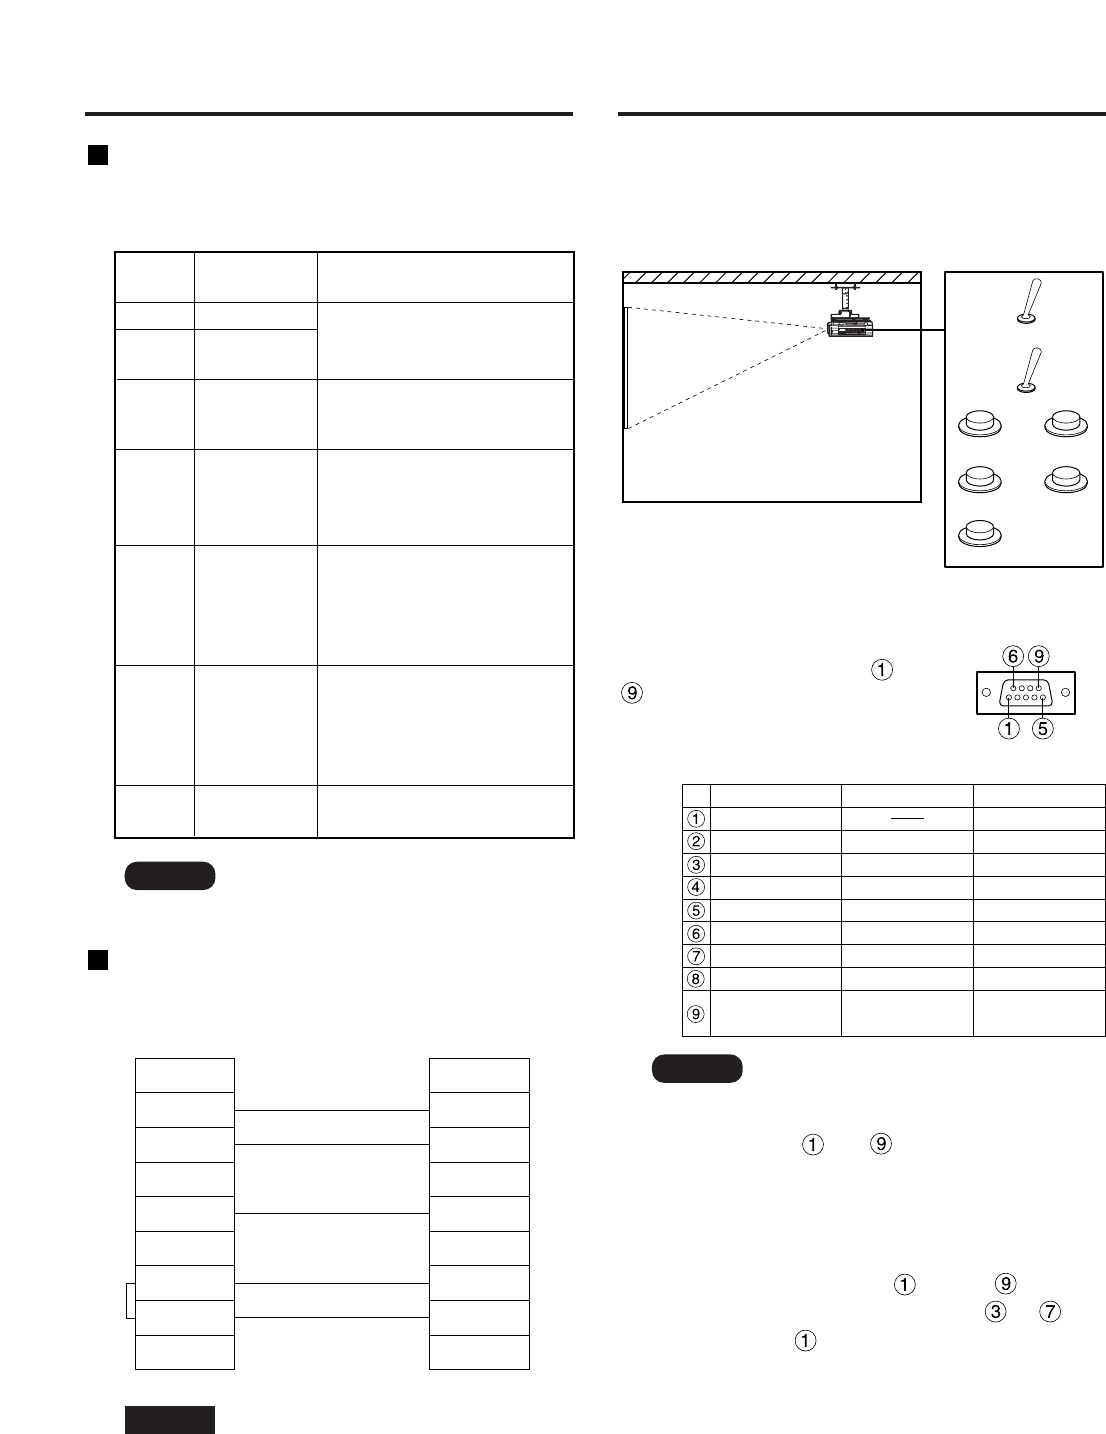
Using the REMOTE2 IN terminal provided on the side of
the main unit, it is possible to operate the projector from a
control panel etc. furnished in a distant location where
infrared remote control signal cannot be received.
Pin assignments and control
Be sure to short-circuit Pins and
when controlling.
Using the REMOTE 2 terminal
D-Sub 9-pin (female)
external appearance
•
The following buttons on the remote
control and the operation area of the
projector can no longer be operated when
pins and are shorted:
POWER button and SHUTTER button.
Neither will it be possible to use the RS-
232C commands or network functions
corresponding to these functions.
•
If you short pin and pin , and also
short one of the pins from to and
pin , then the following buttons on the
projector operating area and the remote
control can no longer be operated:
POWER, RGB1, RGB2, DVI-D, VIDEO,
S-VIDEO and SHUTTER buttons.
Neither will it be possible to use the RS-
232C commands or network functions
corresponding to these functions.
Note
Example of a control panel layout
Projector set up in a meeting room
Control panel located
in a different room
STANDBY
ON
RGB1 VIDEO
RGB2 S-VIDEO
LAMP
Remote
terminal
External
control
Remote terminal
/External control
DVI
Names of terminals
GND
POWER
RGB1
RGB2
VIDEO
S-VIDEO
DVI
SHUTTER
RST / SET
Open (H)
OFF
Other
Other
Other
Other
Other
OFF
Controlled by
remote control
Short (L)
GND
ON
RGB1
RGB2
VIDEO
S-VIDEO
DVI
ON
Controlled by
external contact
Cable specifications
Control commands
When controlling the projector from a computer, the
following commands are available:
• To connect the computer to the
SERIAL terminal, prepare an
adequate communication cable that
fits to your personal computer.
Attention
Remarks
Command
Function of
command
To confirm that the power is
ON, use a “Power query”
command.
Parameter
000 = STANDBY
001 = Power “ON”
Parameter
VID = VIDEO SVD = S-VIDEO
RG1 = RGB1 RG2 = RGB2
DVI=DVI-D
Parameter
0 = DUAL
1 = SINGLE
2 = LAMP 1
3 = LAMP 2
Parameter
0 = DUAL
1 = SINGLE
2 = Only LAMP 1 is on
3 = Only LAMP 2 is on
Parameter
0 = HIGH, 1= LOW
Power “ON”
Power
“STANDBY”
Power query
Switch input
modes
Query for
active
lamp mode
Active lamp
mode
Lamp power
setting
PON
POF
QPW
I I S
QSL
LPM
OLP
* “SINGLE” will use
the lamp (LAMP 1
or LAMP 2) with
shorter operating
hours.
Projector
1
2
3
4
5
6
7
8
9
NC
NC
NC
NC
Computer
(DTE specifications)
<Connecting to a PC>
1
2
3
4
5
6
7
8
9
NC
NC
NC
NC
• If you need a detailed command list,
please contact your dealer.
Note
Using the serial terminals


