


User Manual BDL3215E / BDL4225E
13
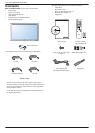
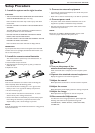
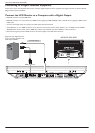
Way II: Mount the monitor on the wall
Before mounting the monitor to the wall, make sure that the system has been power-off and you have obtain a standard wall-mounting kit
(commercially available). Using mounting interface that comply with TÜV-GS and/or UL1678 standard in North America is recommended.
100
100
100
100 100 100
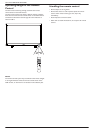
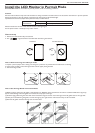
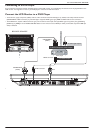
Protective Sheet
Tabletop standTable
Lay a protective sheet on a table, which was wrapped around the monitor when it was packaged, beneath the screen surface so as not to 1.
scratch the screen face.
This device cannot be used or installed without the Tabletop Stand or other mounting accessory. Make sure all these stuffs are ready for 2.
wall-mount installation.
Follow the instructions that come with the base mounting kit. Failure to follow correct mounting procedures could result in damage to 3.
the equipment or injury to the user or installer. Product warranty does not cover damage caused by improper installation.
For the wall-mounting kit, use M6 mounting screws (having a length 10 mm longer than the thickness of the mounting bracket) and tighten 4.
WKHPVHFXUHO\5HFRPPHQGHGWRUTXH1vFP
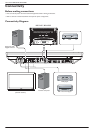
Caution:
For preventing the monitor from falling.
Install the monitor with metal brackets for wall or ceiling installation (commercially available) on your own responsibility. For detailed
procedures of installation, refer to the instructions of the metal brackets.
7ROHVVHQWKHSUREDELOLW\RILQMXU\DQGGDPDJHUHVXOWLQJIURPIDOORIWKHPRQLWRULQFDVHRIHDUWKTXDNHRURWKHUGLVDVWHUEHVXUHWRFRQVXOW
the bracket manufacturer for installation location.
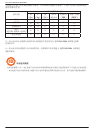
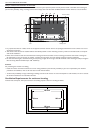
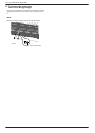
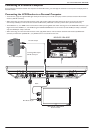
Ventilation Requirements for enclosure locating
To allow heat to disperse, leave space between surrounding objects as shown in the diagram below.
100 mm 100 mm
100 mm
100 mm